Spellbinders Small Die of the Month | Home for the Holidays
We had an actual cold front move through Texas earlier this week, so I had a great excuse to hole up in the craft room and make some pretties! It was glorious, I tell ya. I love sweater weather, especially since it’s so scarce this far south in the country. It puts me in the mood for all things “Fall-oween-mas”.
In light of everything cozy and warm, I have some more Spellbinders Monthly Club Kits to share with you this week. In this post, I’m working with the Small Die of the Month Club Kit, Home for the Holidays. There’s some extra happy sprinkled on everything today, though – I’m excited to tell you that I joined the Spellbinders Club Influencer Group!
*celebratory music & confetti*
How cool is that?! Stay tuned for more Club Kit inspiration in the future! But, I digress. Here’s the project I made with the Small Die of the Month Kit.
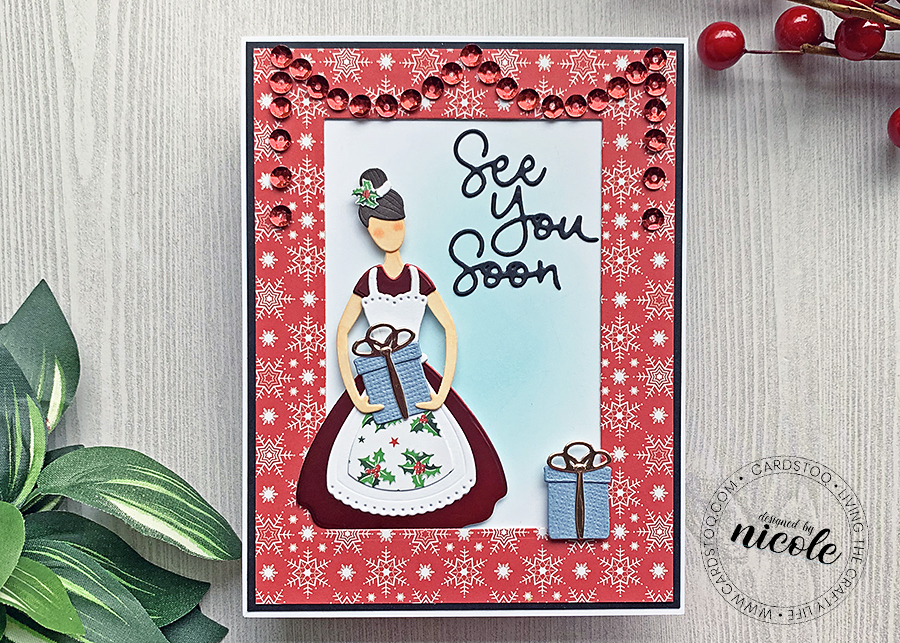
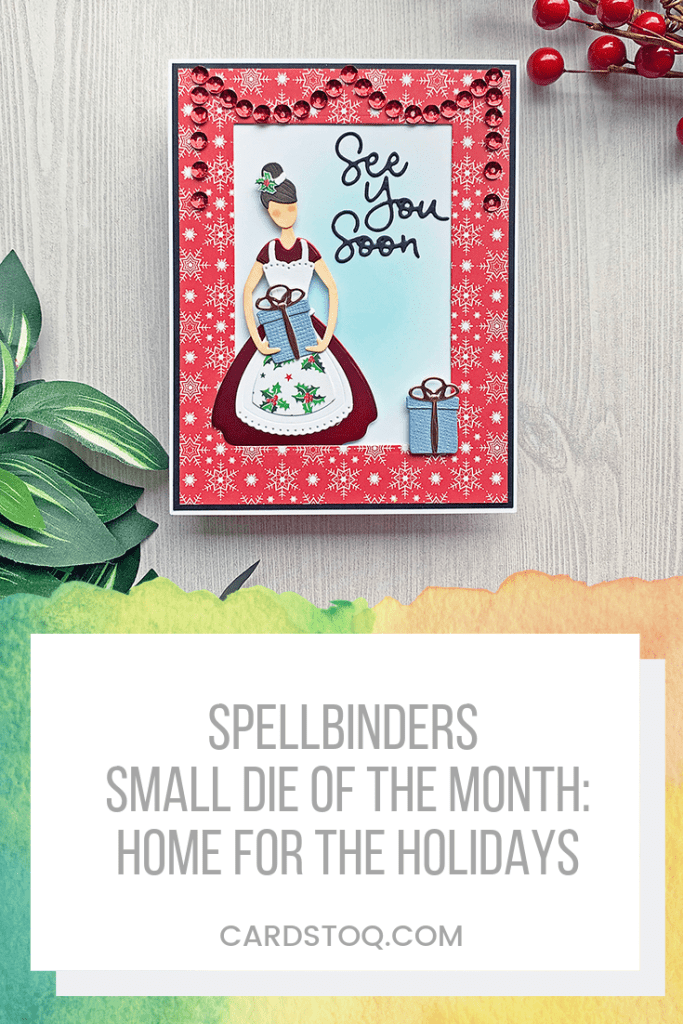
Isn’t she GORGEOUS? I cannot tell you how much fun it was to choose the papers and put together this little doll of a lady. What I can tell you, however, is how this all came about.
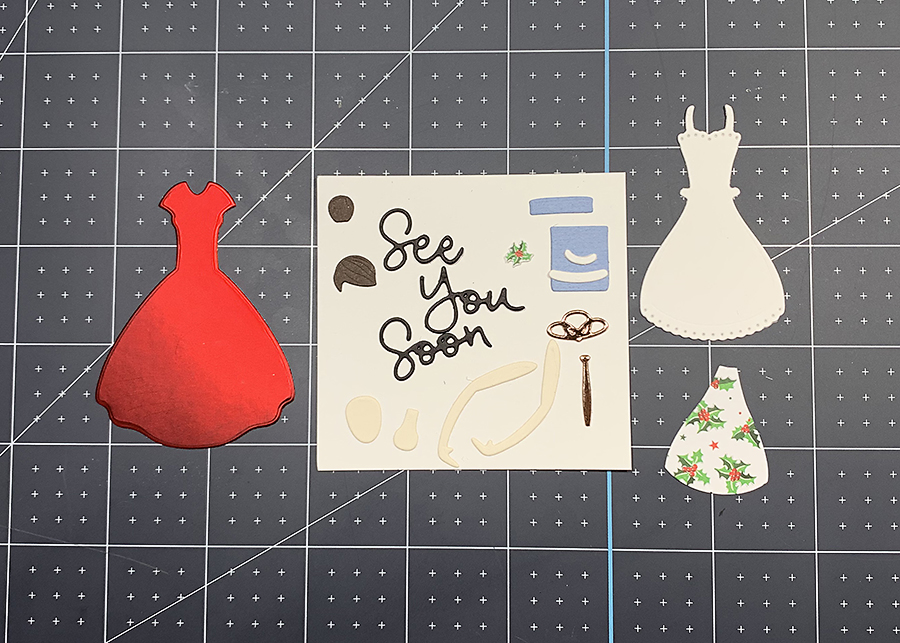
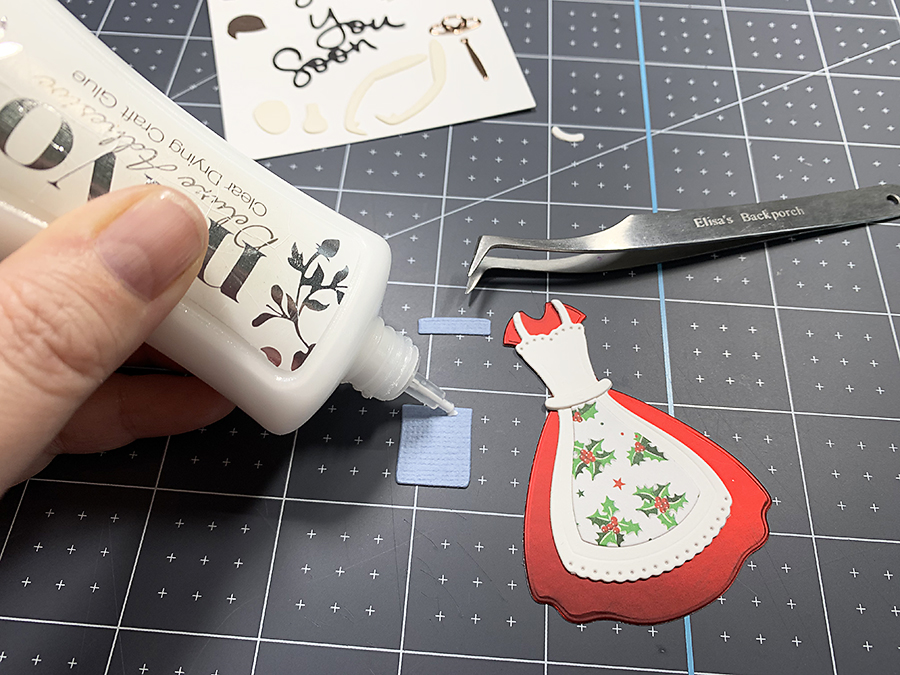
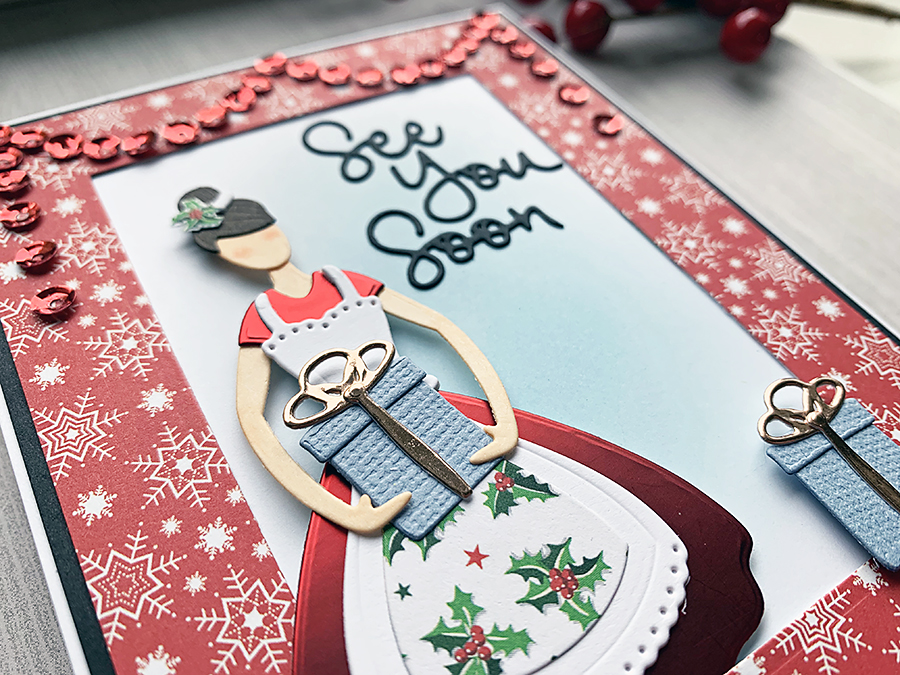
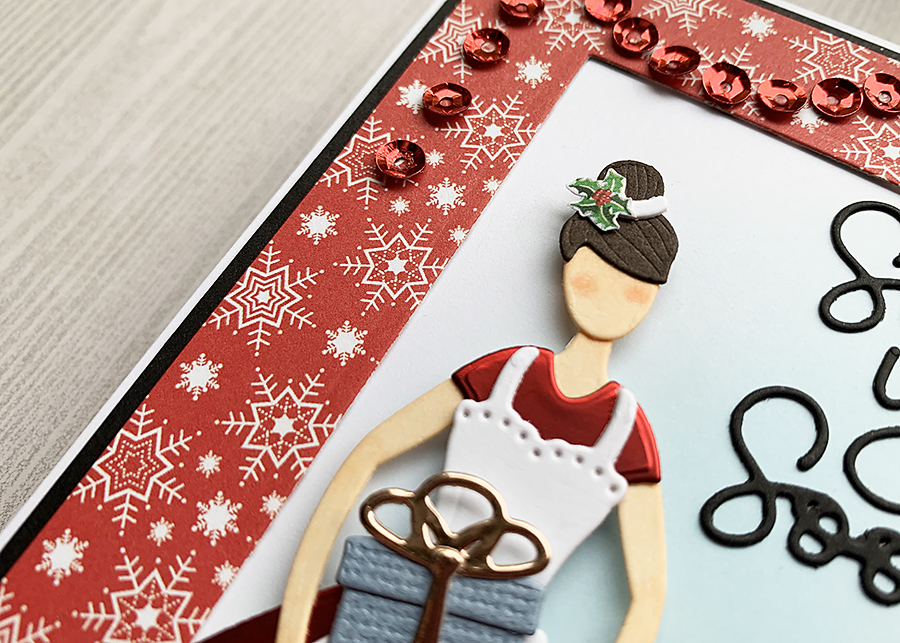
I started off by rummaging through my little scraps bin to find just the right papers to use. Then, I die cut all the pieces: patterned paper for the apron (and I fussy-cut one holly for her hair), Scarlet Organza Satin cardstock for her dress (how fitting!), Bazzill Rose Gold Metallic for the gift bows, and several plain cardstocks for the rest of the pieces. I’ll list as many as I can find below in the supplies.
Home For The Holidays also has a small tree and pie dies so you can swap what your lady is holding.
I put most everything together with my favorite liquid glue, Nuvo Deluxe Adhesive.
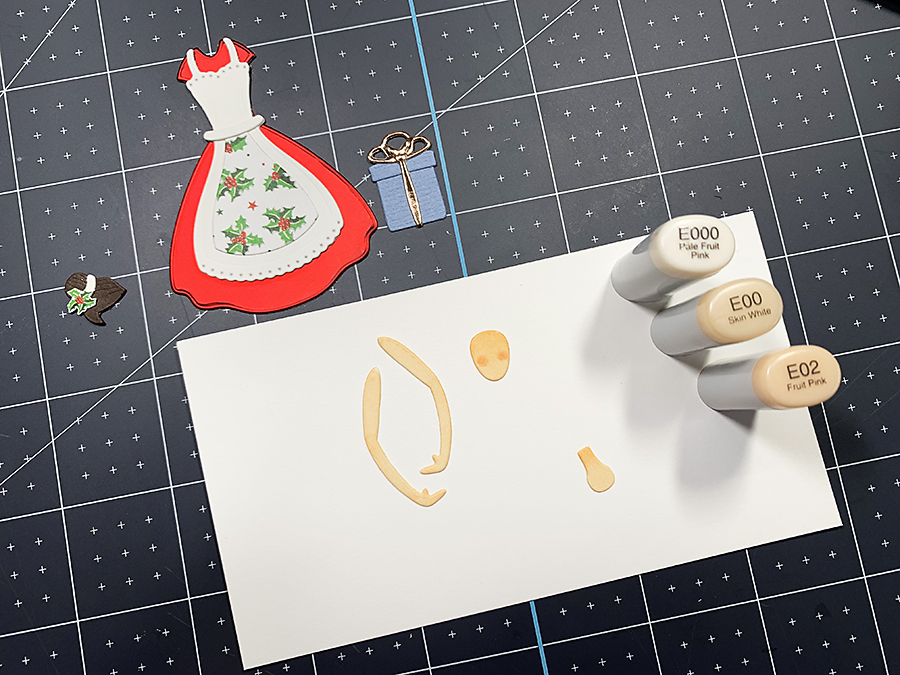
I couldn’t find a good paper color for her face and arms, so I colored up the pieces with a few Copic Sketch markers in E000, E00, and used E02 for her blush.
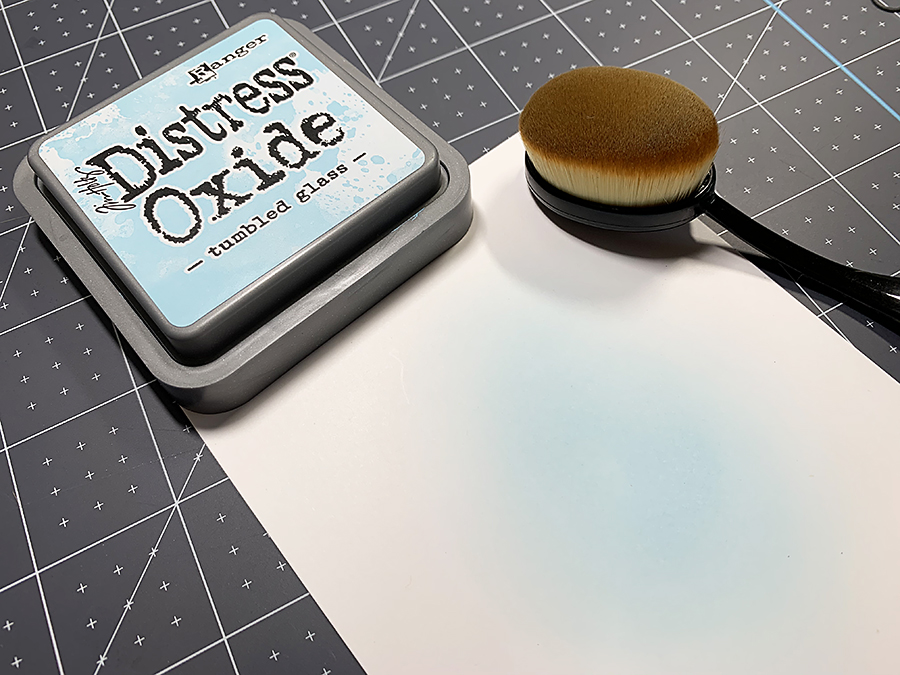
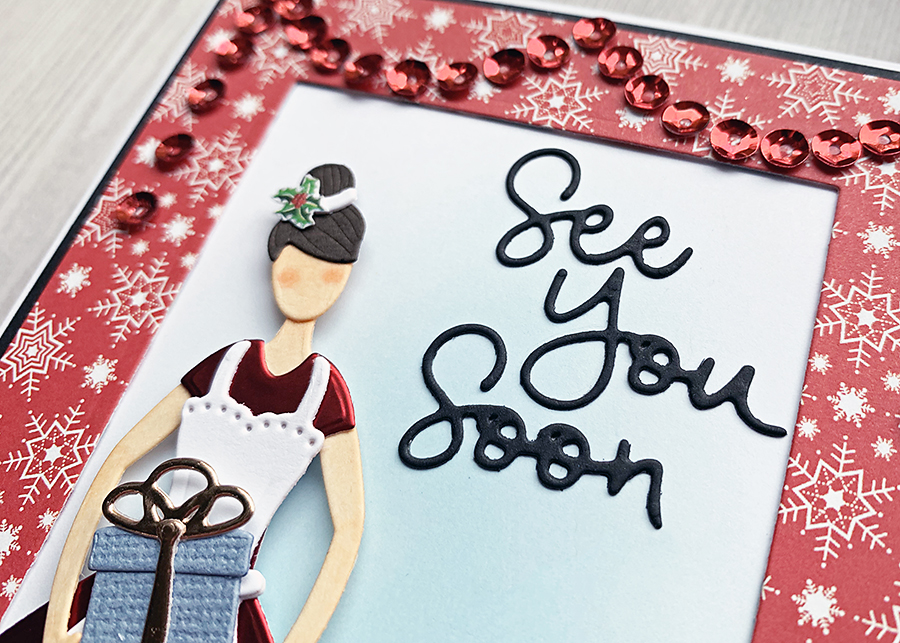
Once everything was assembled, I put together a frame with patterned paper trimmed to 4″ x 5 1/2″, and black cardstock trimmed to 4 1/8″ x 5 3.8″, then die cut the center with a rectangle from a Shapabilities set called A2 Matting Basics B. To add a bit of something to the white background that would show through, I blended out some Distress Oxide Ink in Tumbled Glass.
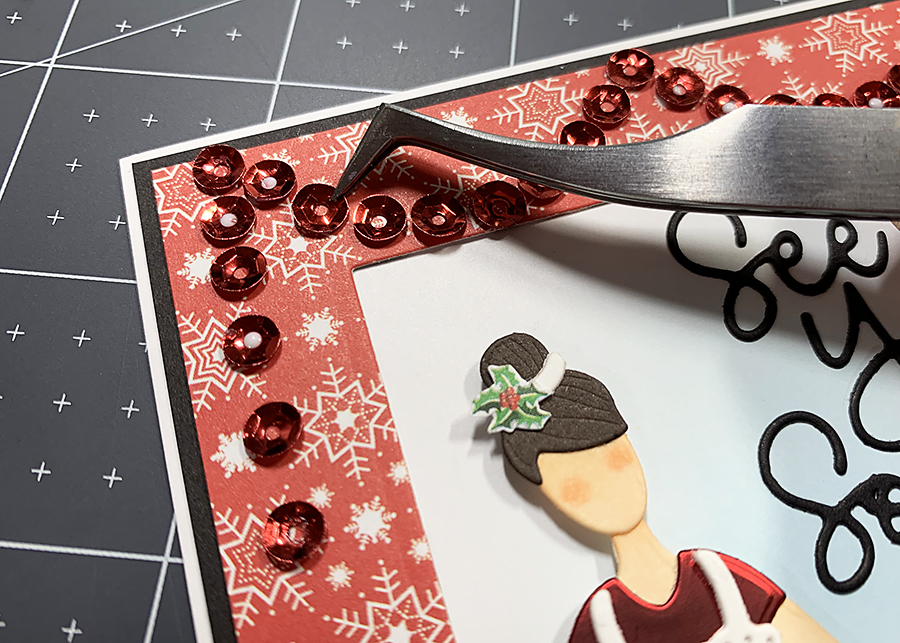
I attached the frame with a Tombow Xtreme glue runner (just on the outer edge so I could tuck in my little lady), then arranged the lady and an extra gift with foam squares, and the sentiment with glue.
I used Nuvo Deluxe Adhesive to adhere the sequin swag since it dries clear.
And here it is!
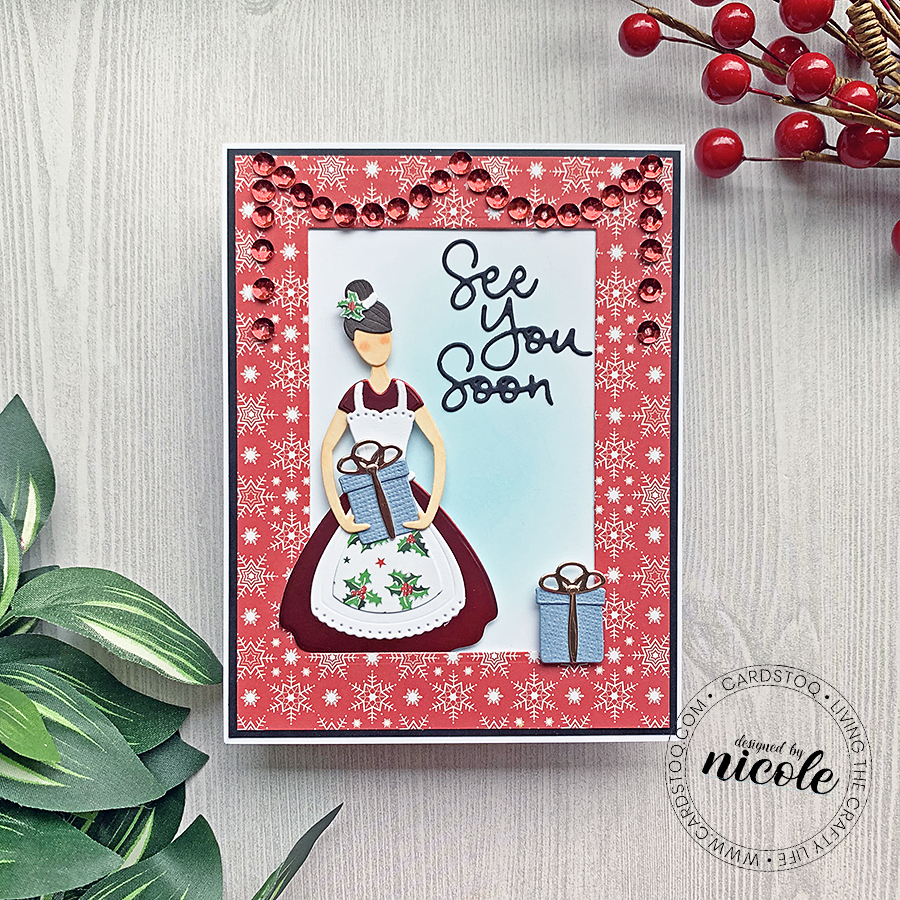
It’s the perfect card to send to someone who’s expecting a visit from you over the holidays, isn’t it? I’m saving this for a special trip that will happen soon, I hope!
Thanks for popping in today to see the card I made with the Spellbinders Small Die of the Month Club Kit, Home for the Holidays. Do you have this kit too? Drop a link to your blog in the comments – I would love to see your creations!
PS – Here’s another project from a previous SDOM that I think you’d like!