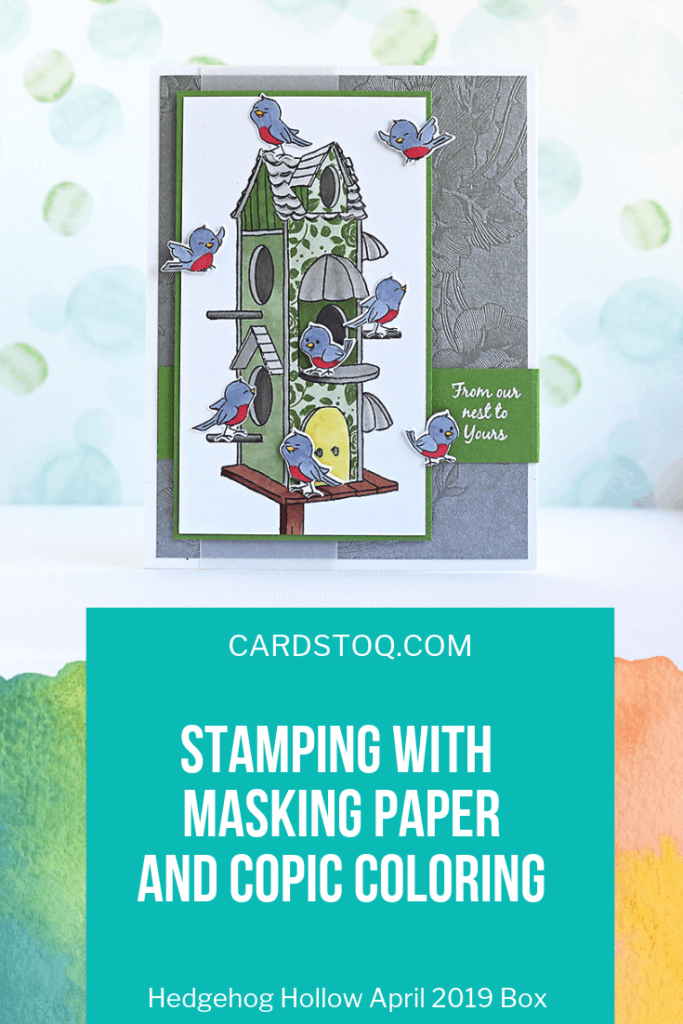
Stamping with Masking Paper + Copic Coloring
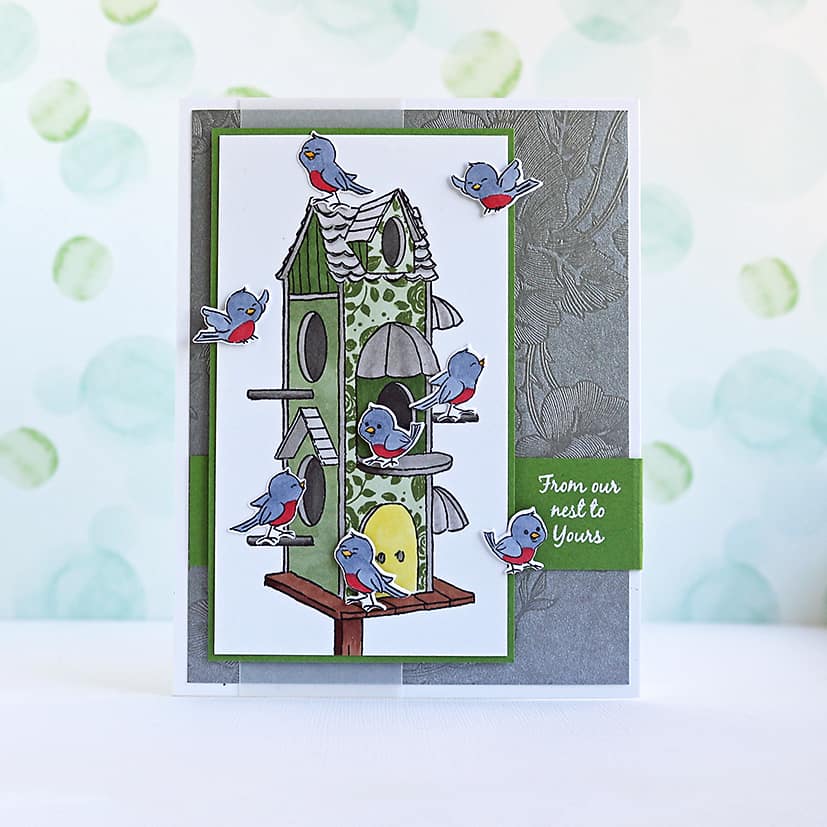
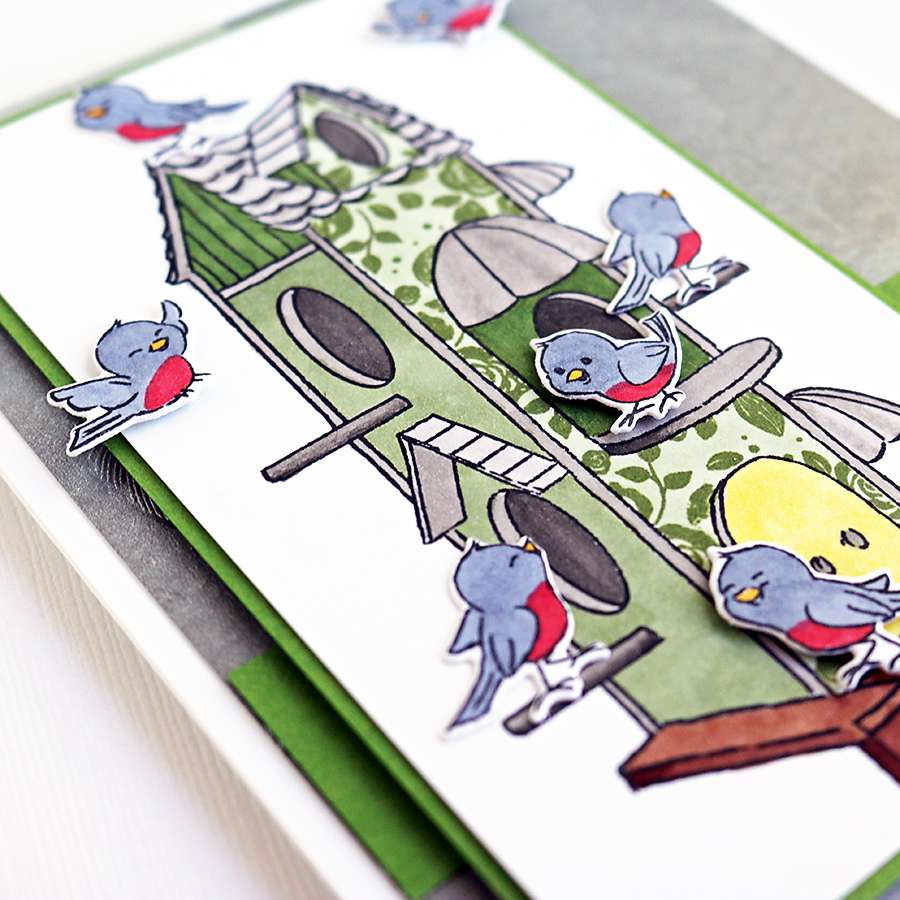
Hello! For today’s project, I decided to do a little bit of stamping with masking paper and some coloring with Copic Markers. I am in love with the little birds that are part of the Art Impressions stamp set in the Hedgehog Hollow April 2019 Kit, and it was hard to decide how to color them for this card. Ultimately, I ended up choosing to make them robins! Aren’t they sweet?
Starting Out
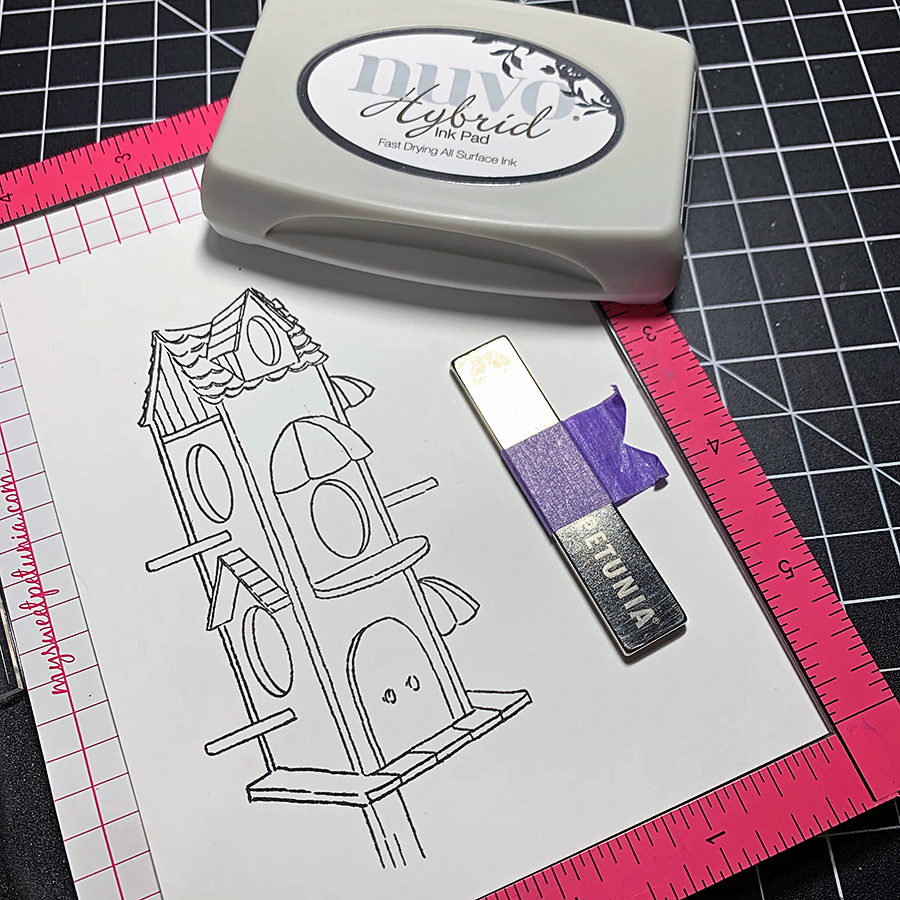
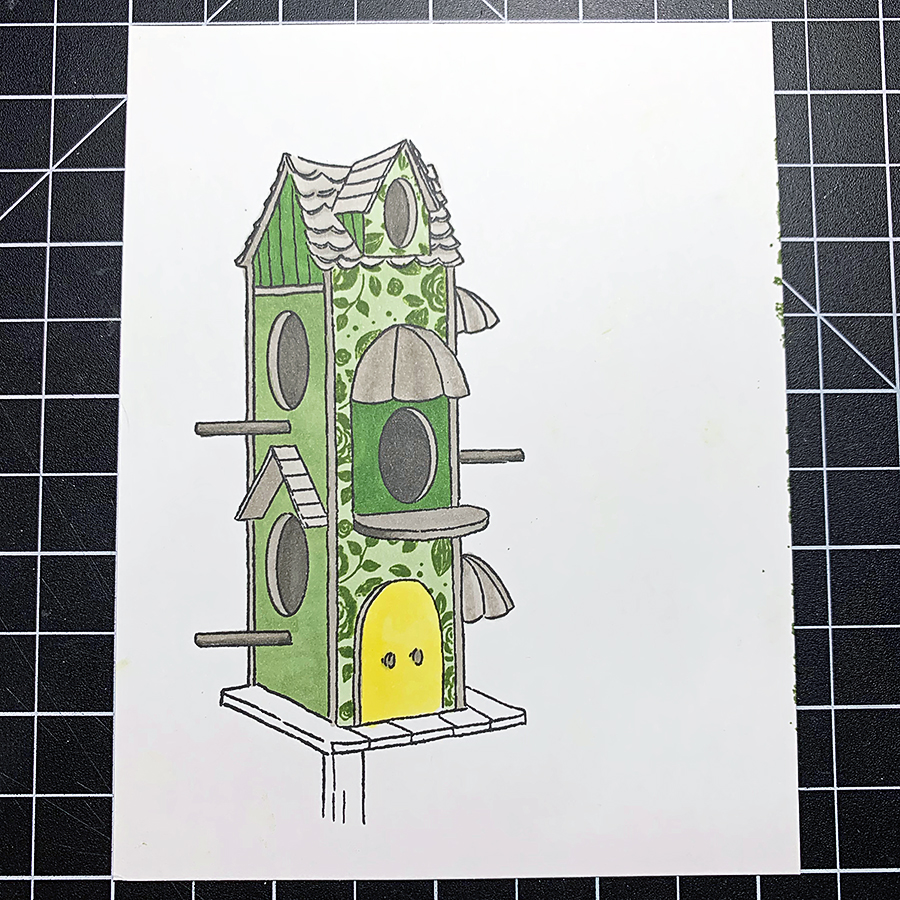
To start this card, I stamped the birdhouse with Nuvo Hybrid Ink in Black (it’s a great ink to use with alcohol markers) and proceeded to color it in shades of green and gray.
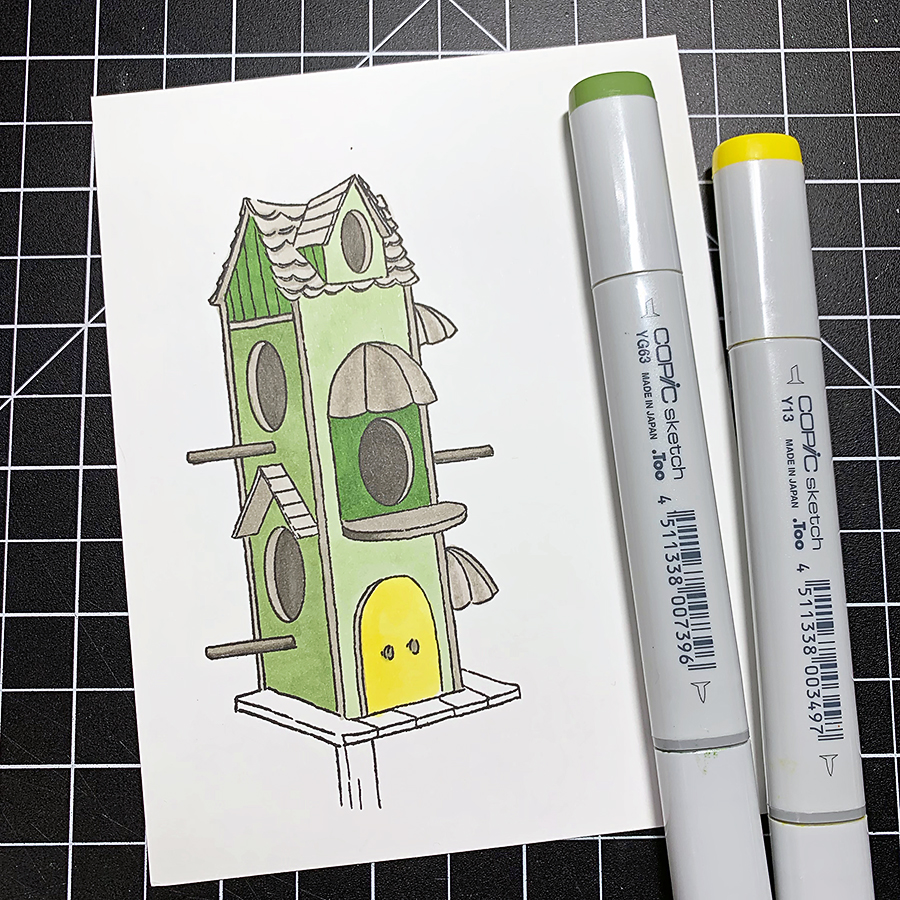
The Copic markers for the birdhouse are:
- Roof, Perches, and Cubbies: W2, W4, W7
- Front: YG61
- Side: YG63, YG67
- Door: Y13
- Stand: E23, E25, E29
Masking the Front
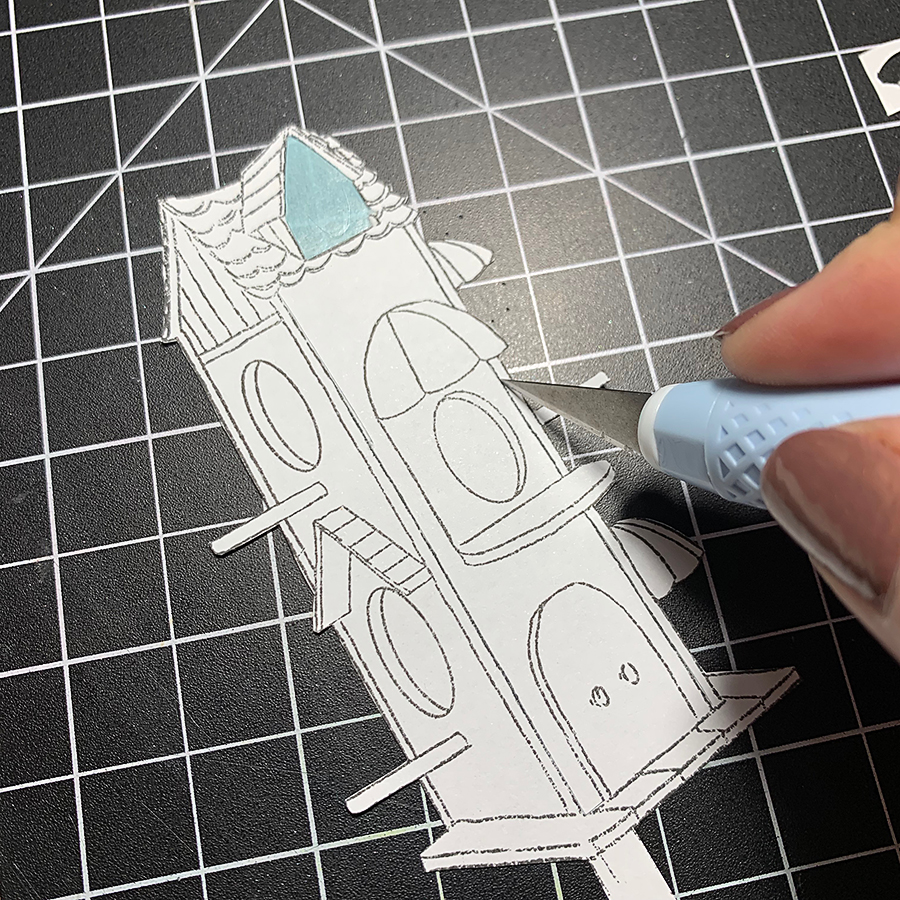
After I was finished, it seemed a little, well, dull. To fix that, I created a stamp mask with some stamp masking paper and cut out sections so the light green front of the birdhouse would show through.
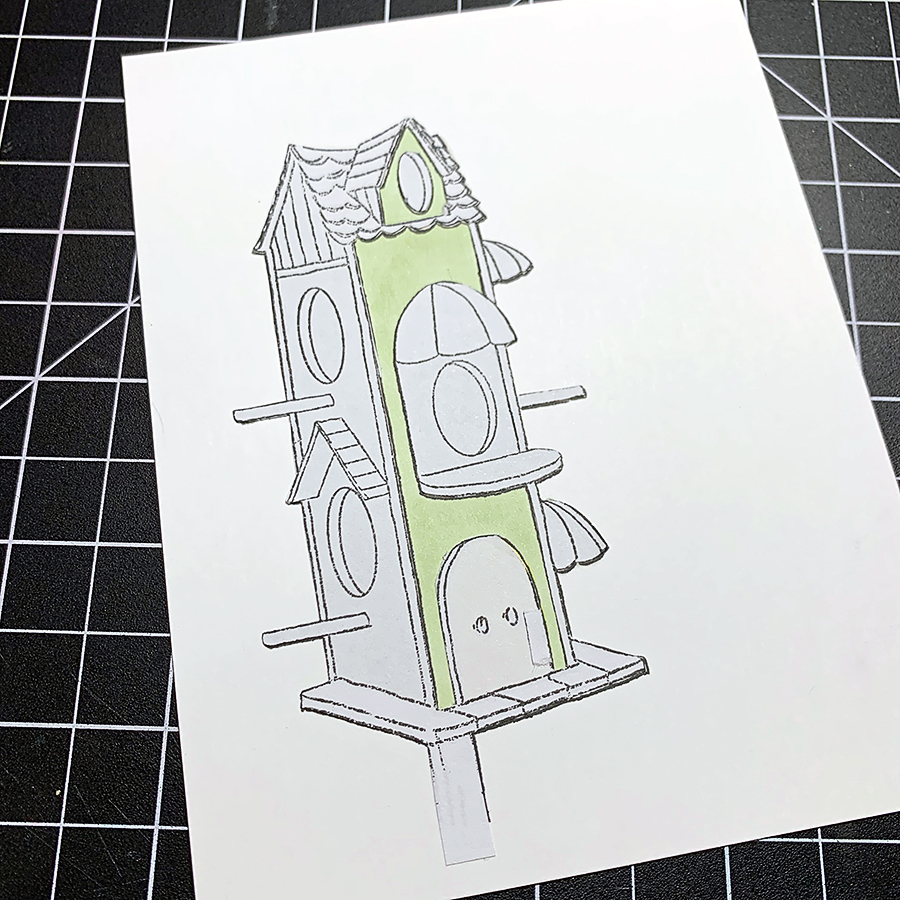
Next, I used Post-It® Tape to cover the rest of the panel (at this point, I wasn’t sure how I was going to cut out the birdhouse) and pressed it face down on a rosy background stamp from my stash. The ink I used for this is Versafine Clair in Shady Lane.
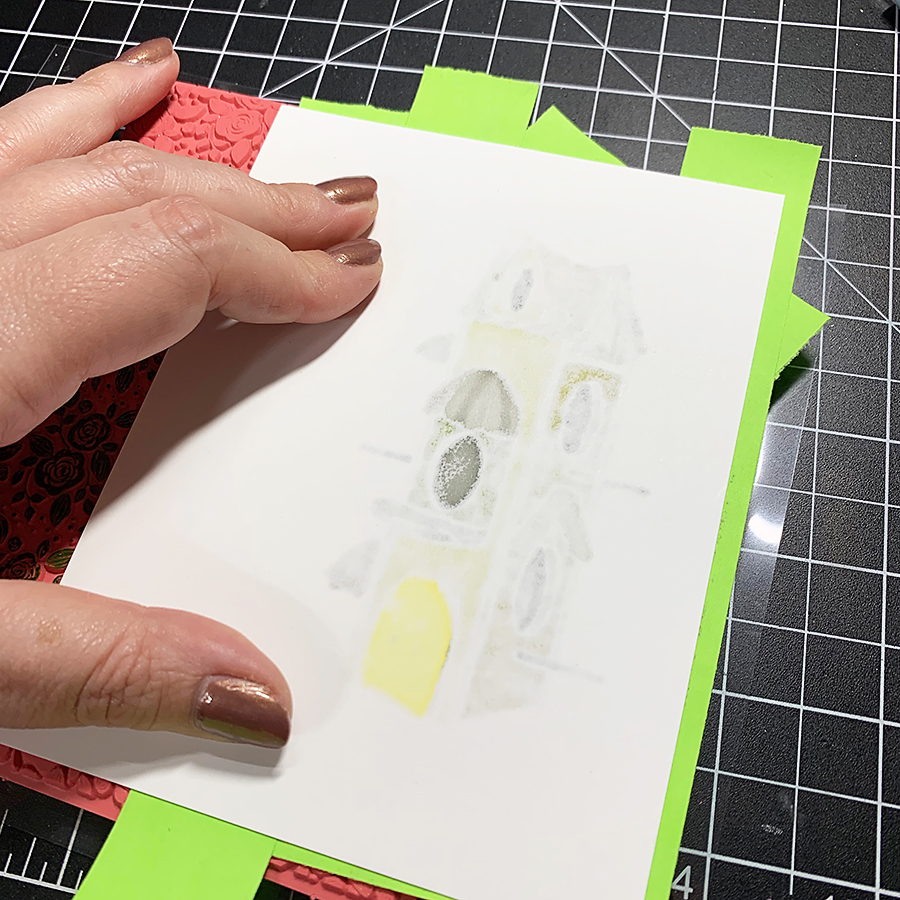
Gosh, I love peeling off masking, don’t you? It’s like opening a present.
To finish up this piece of the card, I trimmed the birdhouse piece to 2.75” x 4.75” and used a green cardstock rectangle (1/8” wider all around) to mat it.
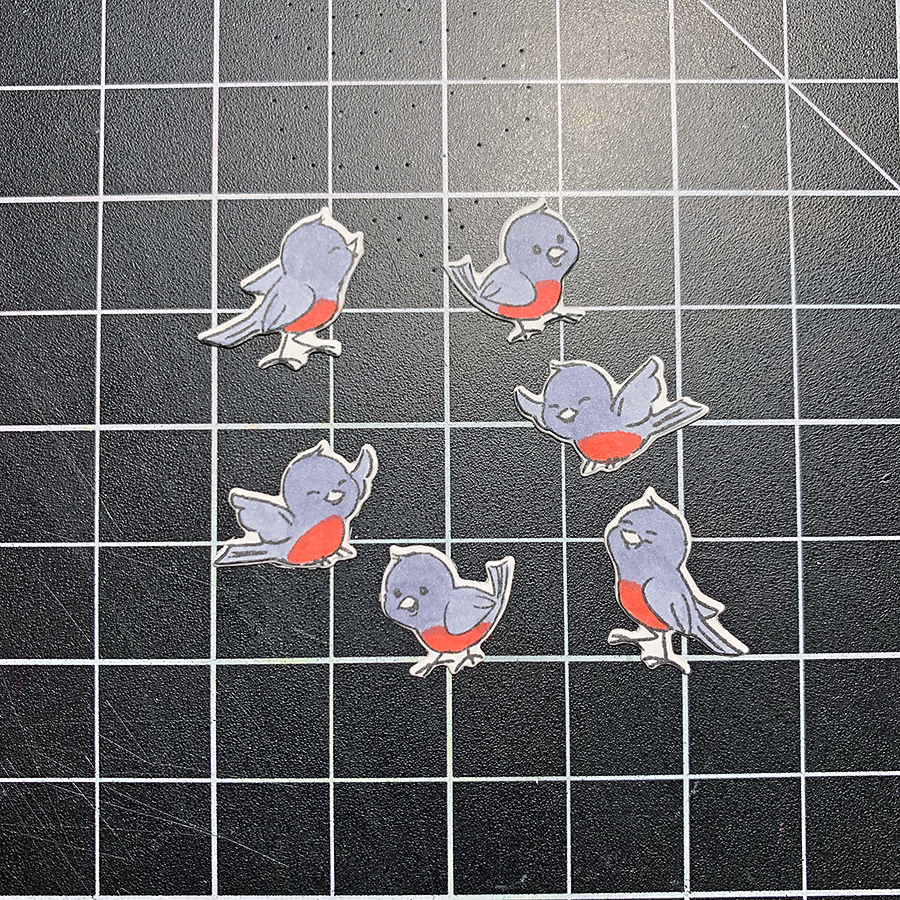
Next, I stamped and colored the birds with BV23, R24, and Y17.
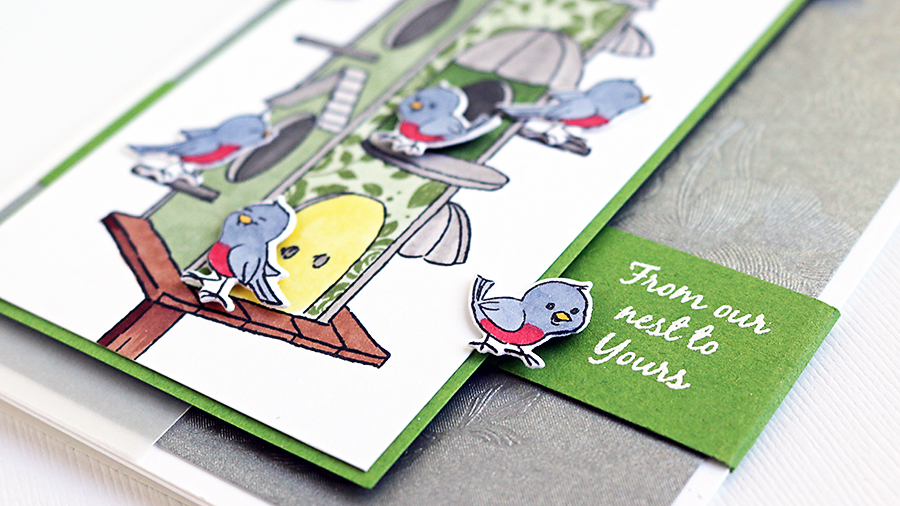
I also trimmed a 1.5” x 5.25” piece of vellum to go behind the birdhouse panel and a 1.5” x 5.25” strip of green cardstock too. That’s for making a place to stamp the sentiment.
Putting it All Together
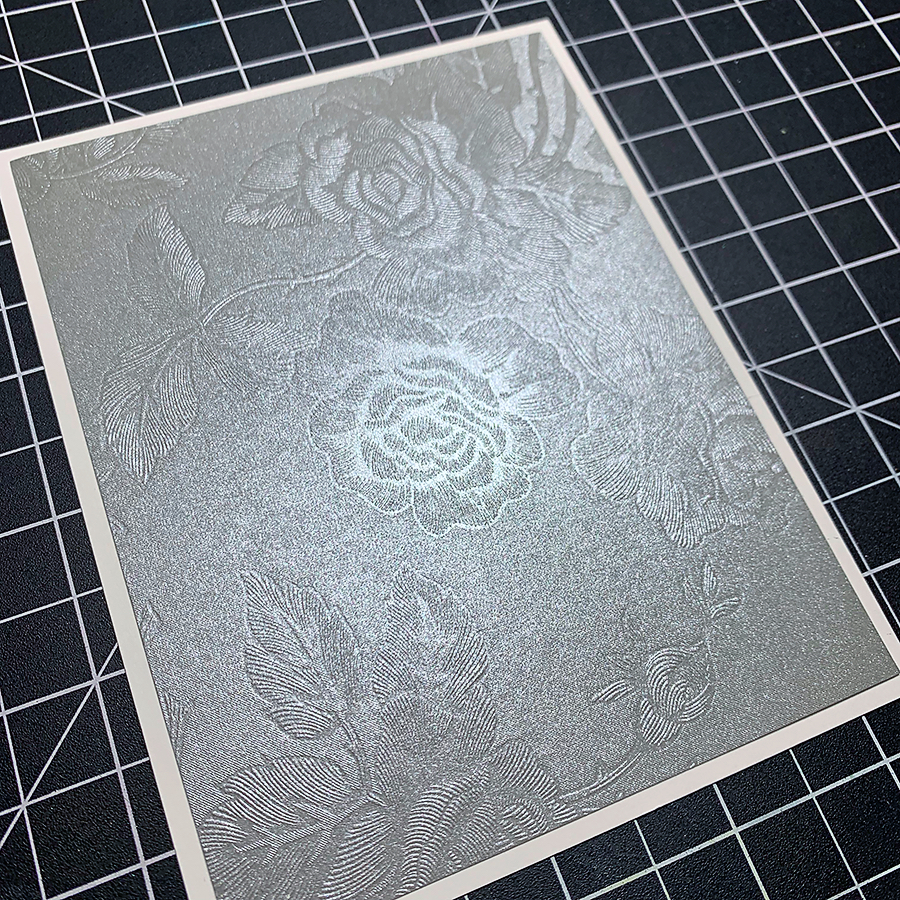
I needed a gray or silver background, and plain cardstock wasn’t cutting it. So, I grabbed a piece of Tonic Studios Luxury Embossed Card in Steel Toile. It was left over from another card I had made earlier 🙂 I trimmed it to 5.25” x 4” and layered it over my A2 card base. Isn’t the pattern pretty?
Next, I layered the vellum strip and secured it with a lick of glue tape right in the center. Then, I added the green piece across the lower third, folding and tucking the end behind the gray layer.
To place the sentiment, I put everything in a MISTI and stamped it in Unicorn White ink. Also, I heat embossed over it with white embossing powder to make sure it wasn’t going to smudge.
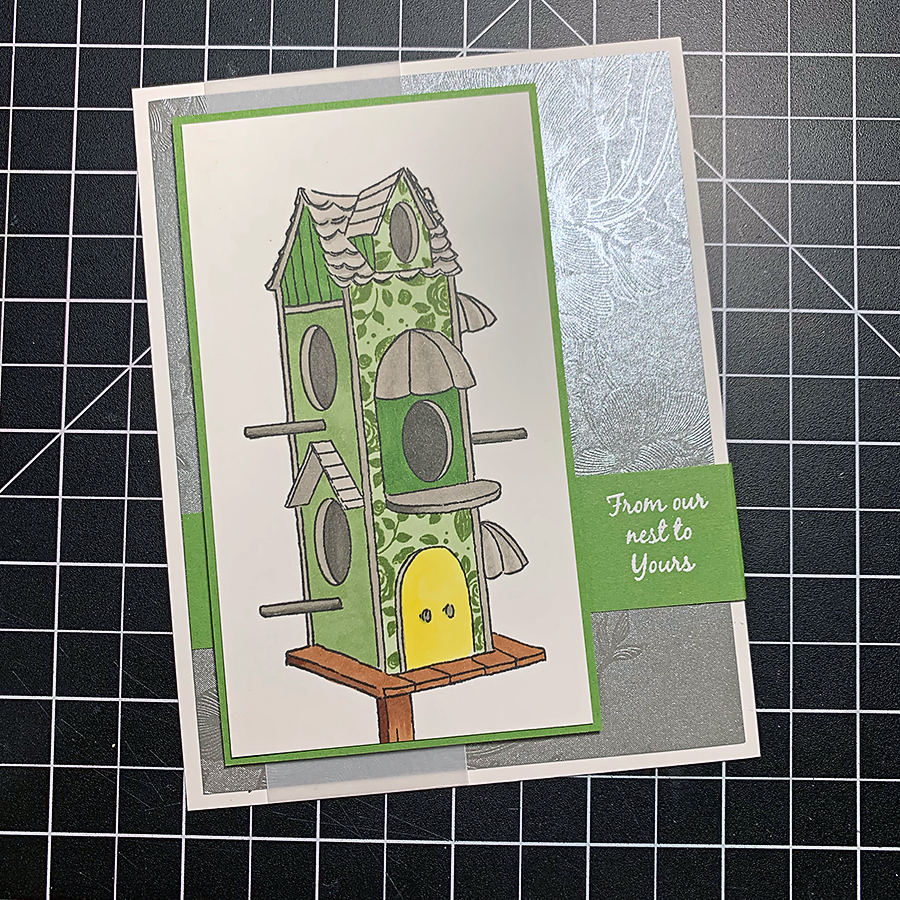
Then, I popped up the birdhouse panel over the vellum strip with foam adhesive. A few bits of foam and Aleene’s Tacky Glue attached the birds perfectly in place.
Thanks for reading today! I hope you try stamping with masking paper to add designs to specific parts of your stamped images. Don’t forget to pin this post to your Pinterest inspiration board for later & happy crafting!
PS – Here’s another post that I think you’d enjoy: making a frame with stamp masking paper!