Embellishing a Handmade Card with Quilling Elements
Today’s card is a little bit different than my usual fare. I went back to my first love and tried embellishing a handmade card with quilling elements. It’s been a long time since I’ve quilled anything, and it felt wonderful!

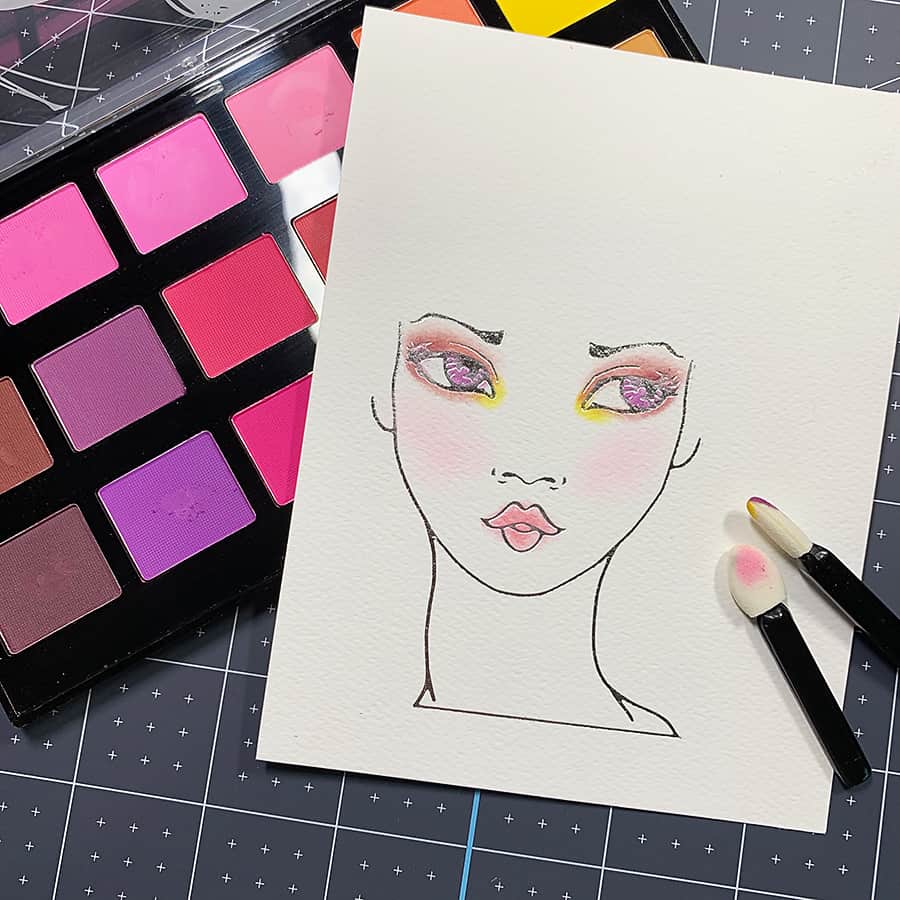
The lovely people over at Spellbinders sent me a few products to play with for this post, and it was my first time trying out the Palette Pastel Sets from Jane Davenport. The one I’m using for the card today is called Lit Up, and I gotta tell ya, it blends like a DREAM.
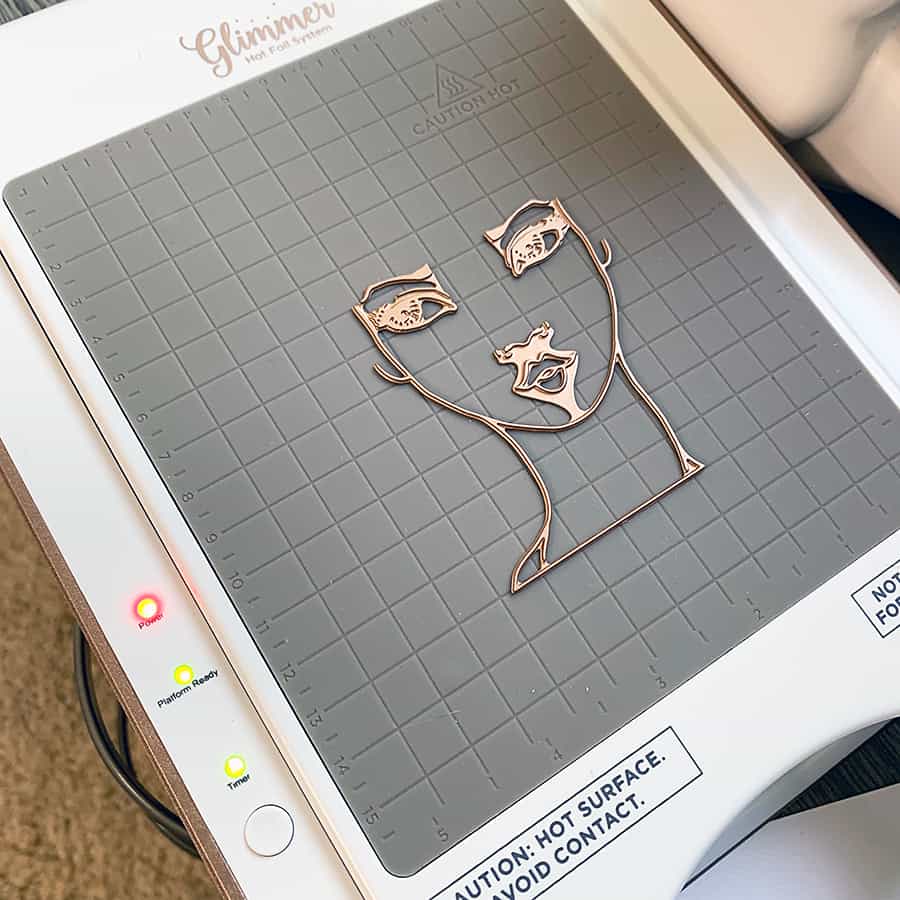
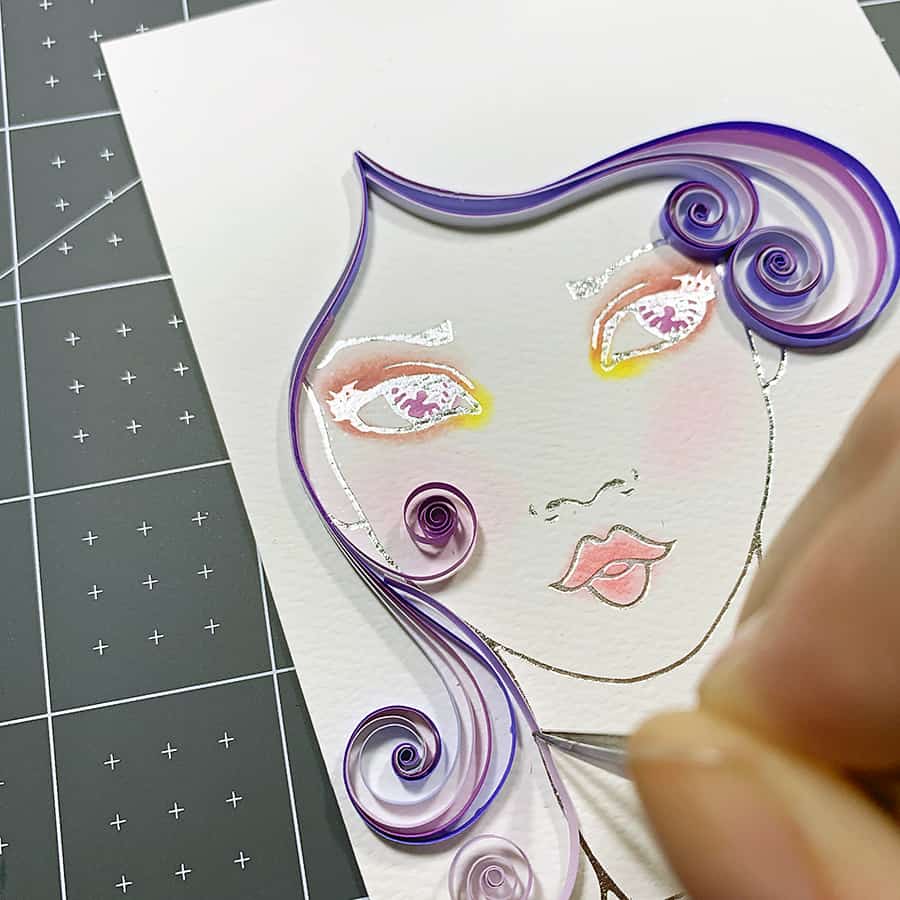
I used my Glimmer Hot Foil system according to the instructions to transfer the face to the front of my card and styled her makeup with the pastels.
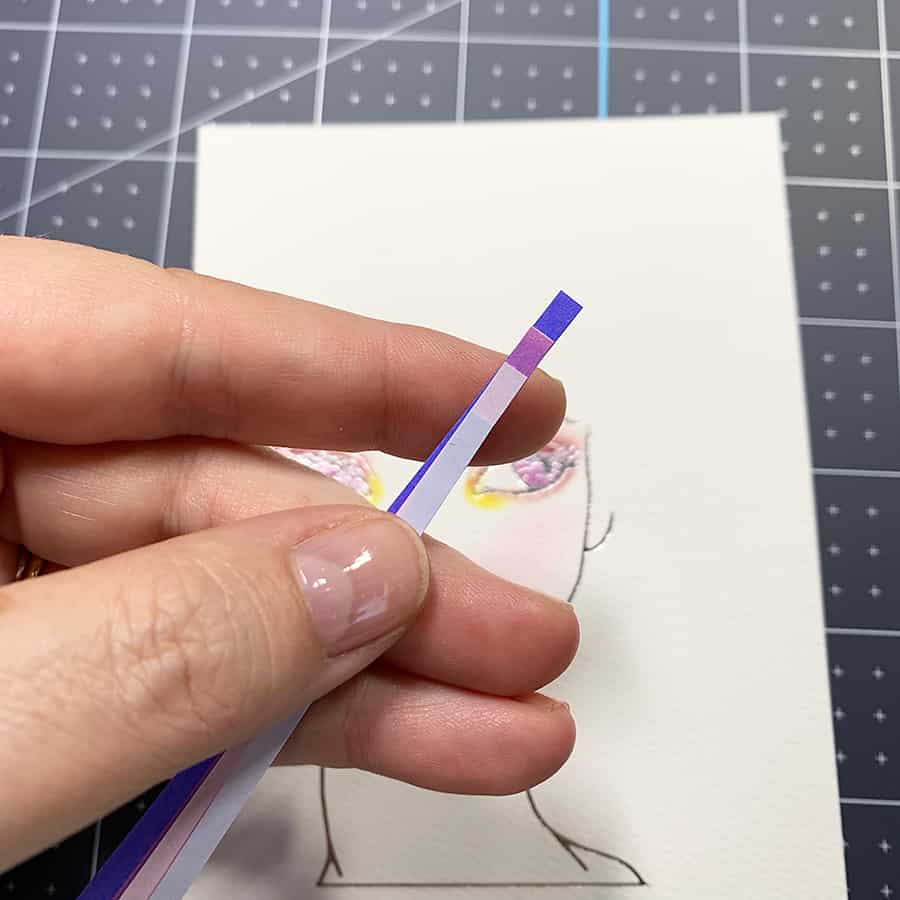
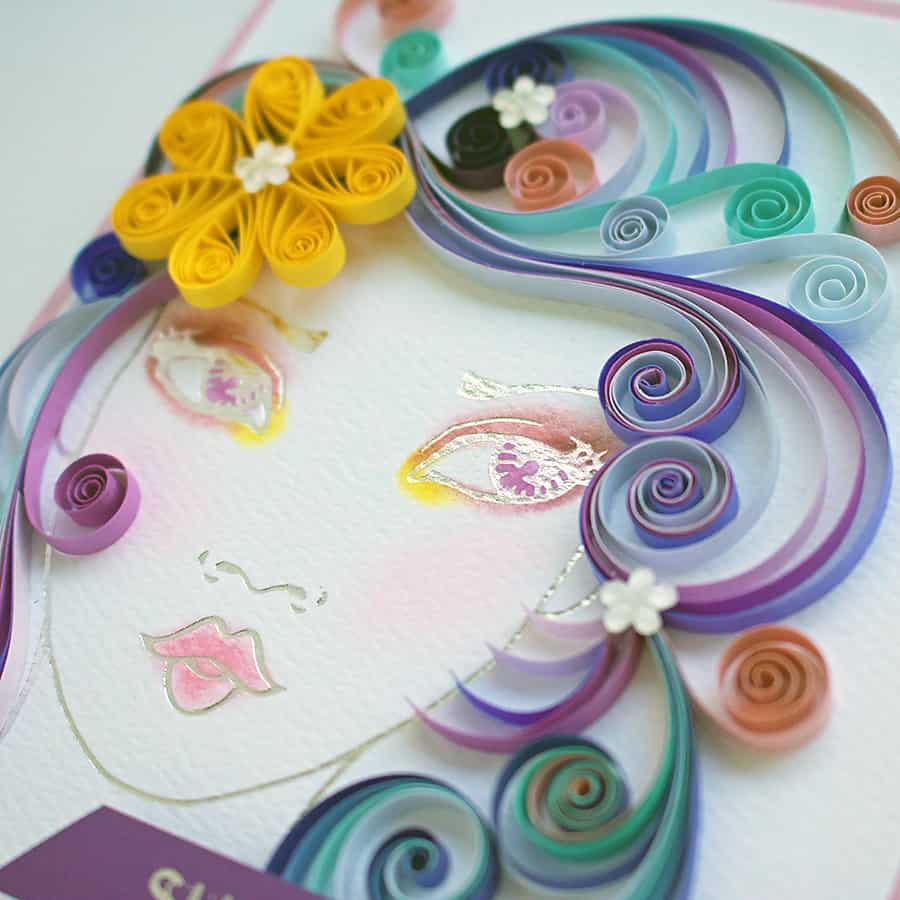
Next, I got to work with the quilling paper to design her hair.
Some tips for creating this type of quilling:
- A needle quilling tool works best as has the nicest results, but if you’re just starting, a slotted tool is your best bet. To make the coils, glue all your papers together on one end, curl, then use the “tails” to push and pull your coil into shape.
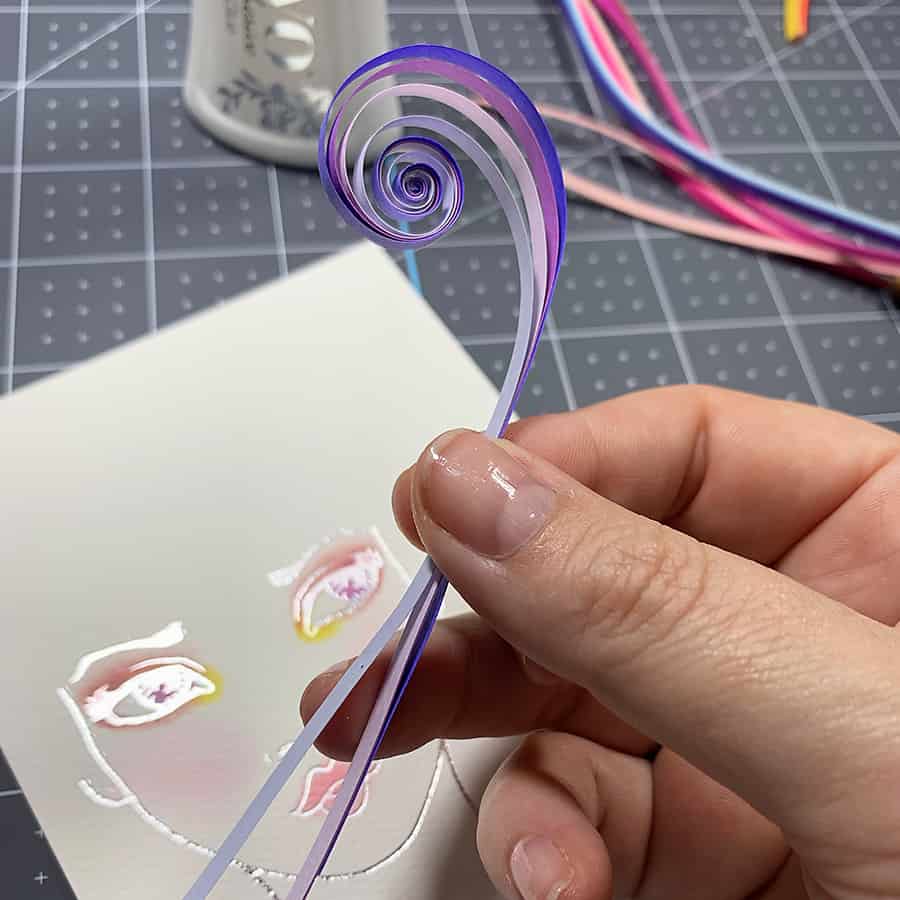
- When making a swirl with different color papers, stagger them as you’re gluing so it makes a smoother curl.
- Use as little glue as possible to make your paper stick. If necessary, pick up some disposable brushes to apply glue (I used Nuvo Deluxe Adhesive)
- Get you some fine-tipped tweezers to adjust the coils as you’re setting them in place.
- When it comes to placement, go with your gut. There’s no right or wrong, and it’s a part of individual expression.
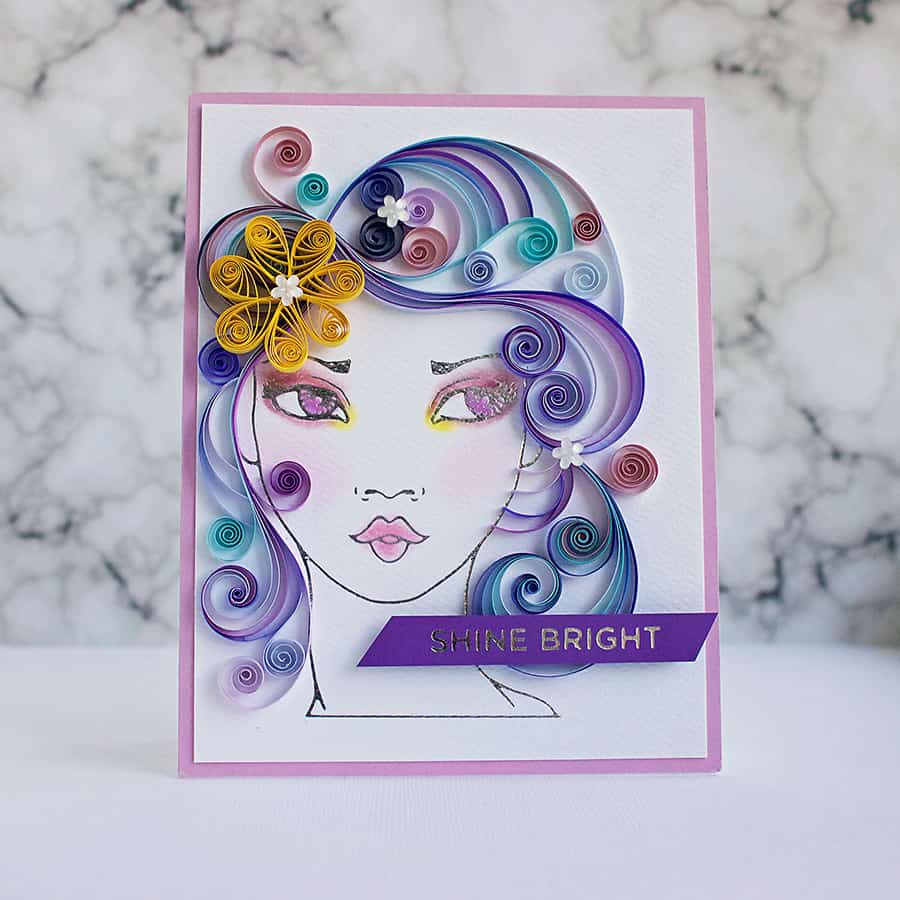
For the sentiment, I used the Glimmer Hot Foil system again to transfer the sentiment to some purple cardstock, then trimmed it out with a small guillotine trimmer. To adhere it to the card front, I double stacked some foam squares and adhered the strip over the quilling element in the bottom right corner.
Isn’t she pretty?!
Thanks for popping in today to take a look at how I embellished this card with quilling elements! New to quilling? Check out this post next to see how to quill with your fingers!

Isn’t it?! I wonder how many hairdos I can make 😀
Wow, Niki! I don’t know much about quilling, but this is gorgeous! What a perfect image to quill!