Autumn Wreath Slider Card
Do I have the cutest wreath slider card to share with you today! It’s one of the past dies from the Large Die of the Month Club at Spellbinders, called Festive Wreaths. There’s a few different options to decorate the wreath form; I chose to put together this lovely autumn wreath with the leaf dies and a bunch of different papers.

I was going to just make a straight up wreath on my card front, but this set also has a slider option which is pretty freakin’ cool. I haven’t really gotten into all the movers & shakers card types, but I really enjoyed using this die, so I’m probably going to be experimenting with a lot more fancy-mechanism-style cards soon!
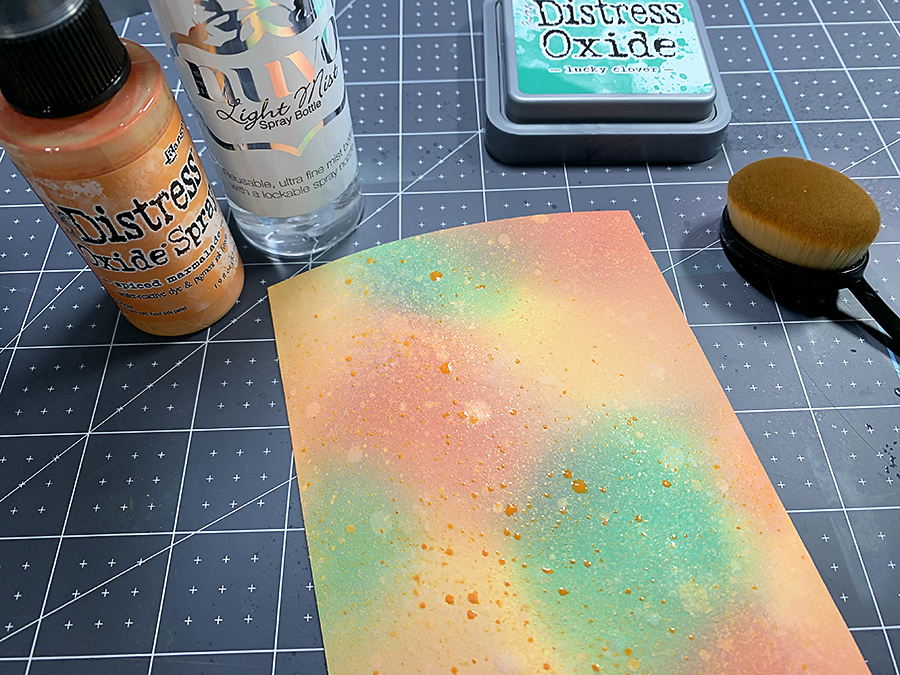
The first thing I did was create a panel with Distress Oxide Inks in Lucky Clover, Festive Berries, Squeezed Lemonade, and Distress Oxide Spray in Spiced Marmalade.
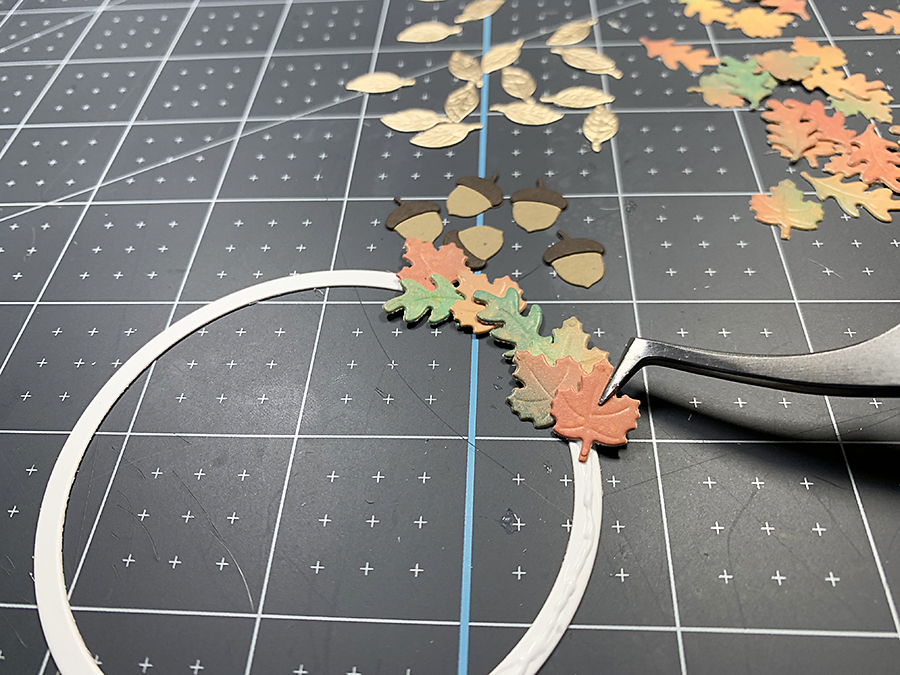
Once it was dry, I used that panel to cut out the leaves. I also cut some from a gold paper to add a little shine. Next, I die cut the wreath form and put that together (it comes in two pieces), then adhered them to the circle with Nuvo Deluxe Adhesive, overlapping as I went.
While that was drying, I die cut the card front from some patterned paper, and again from white cardstock. I used the outer part of the white piece to reinforce the patterned paper, since it was a little thin. I cut out the center portion on the white so it wouldn’t interfere with the pop-up piece.
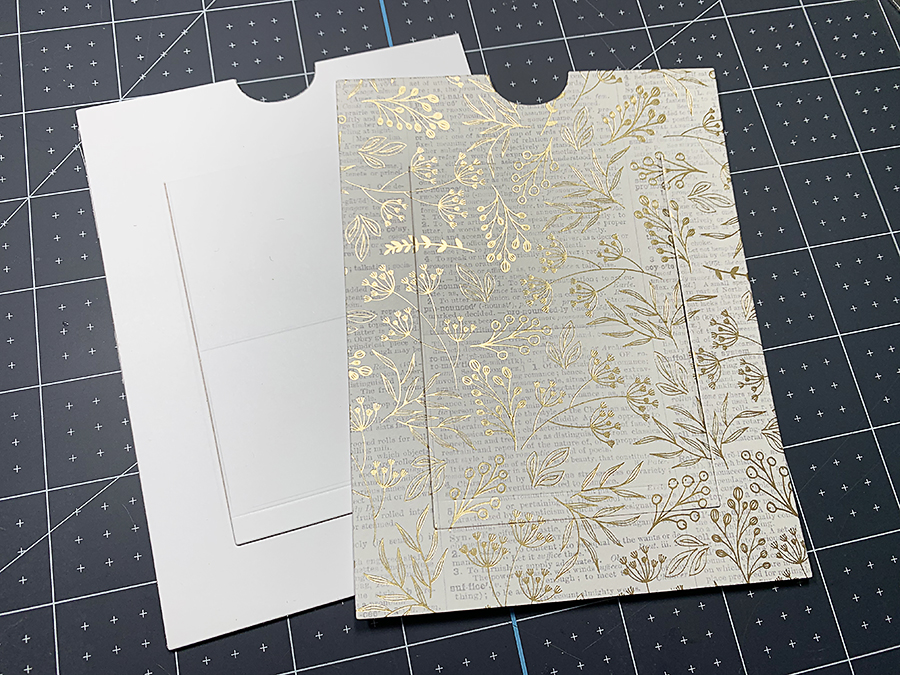
After adhering around the edges only (not the center, the card won’t slide properly), I die cut the slider tag portion, and attached the bottom of it to the bottom edge of the window, then added a wood patterned paper to the back to create the pocket.
It’s kinda hard to explain, but there’s directions on the package if you need them. It should look like this when you’re done.
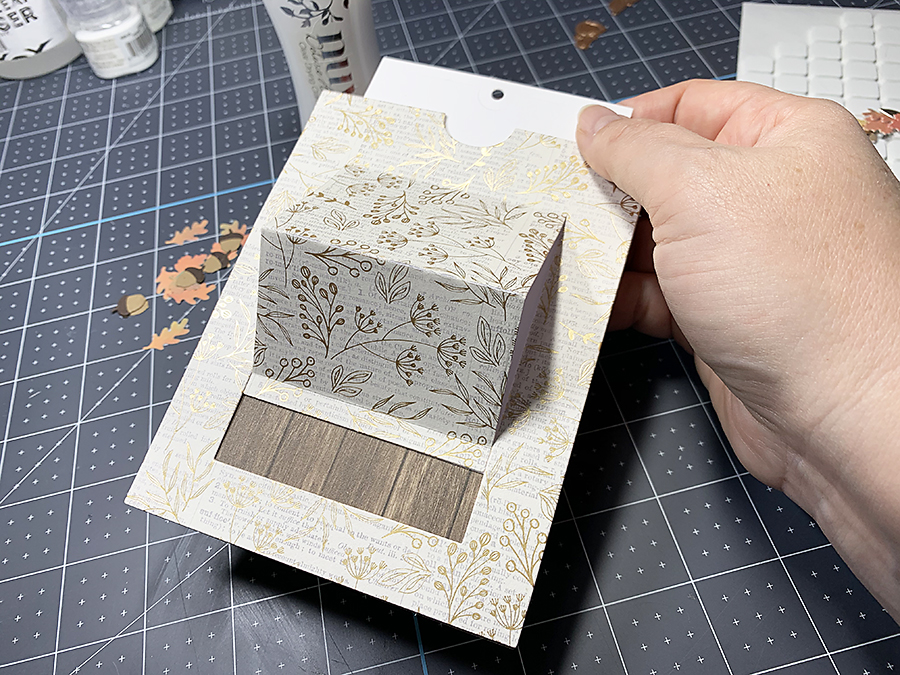
Since the wreath was dry by then, I adhered the bottom half only to the bottom area of the pop-up area. Don’t glue the top – the wreath won’t pop up and be all fancy 🙂
For the sentiment, I used “congratulations” from the Elegant Sentiments set and foiled it onto a piece if Kraft cardstock. Then, I attached to across the center of the wreath to disguise the bend.

To finish up, I added a natural twine bow to the top of the wreath and through the hole in the slider tag. And there ya have it!

Wouldn’t this be a great card for a fall convocation or wedding? I love the colors so much.
Thanks for reading today! Oh! This die set in on sale at Spellbinders, now through 10/20/19. Pop over and pick one up, or take a look at all the other dies from past Club Kits that are on sale too – I’m sure you’ll find something you’ll love.