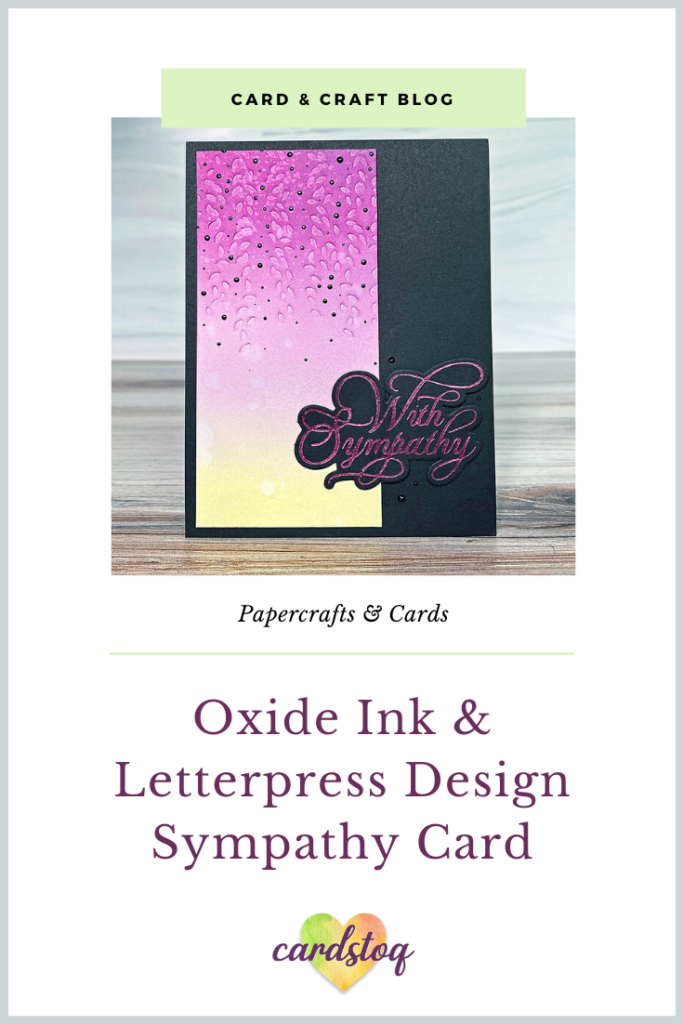
Oxide Ink & Letterpress Design Sympathy Card
I don’t think anyone ‘likes’ to make sympathy cards, but they’re a necessary part of life. I find them extremely hard to make; give me rainbows and butterflies any day! But, Spellbinders sent me a few products to work with for this post. And I just loved the gentle vibe of one Glimmer plate set. So today, I have a letterpress design sympathy card to share with you 🙂

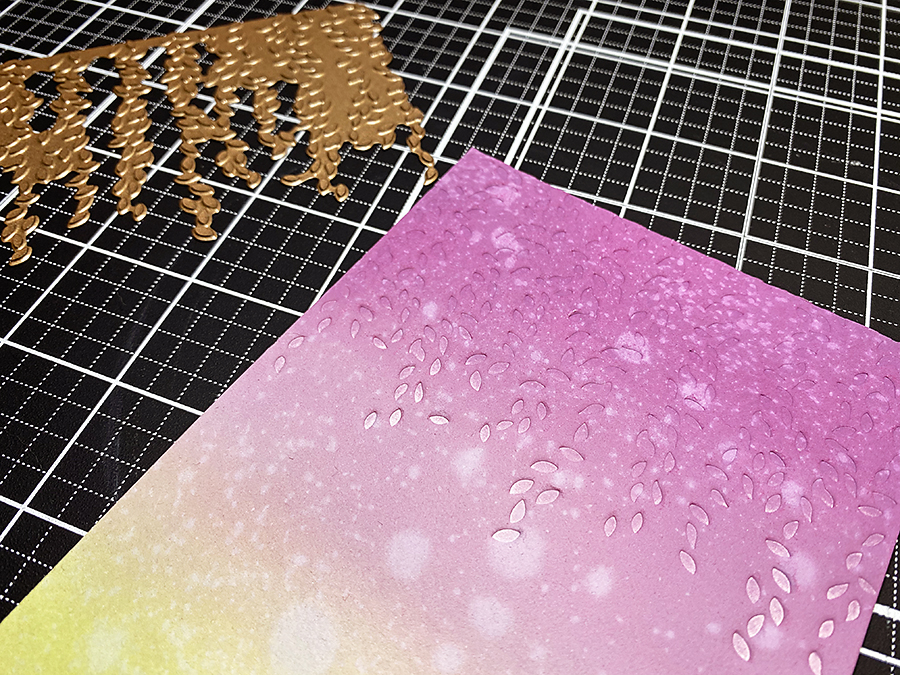
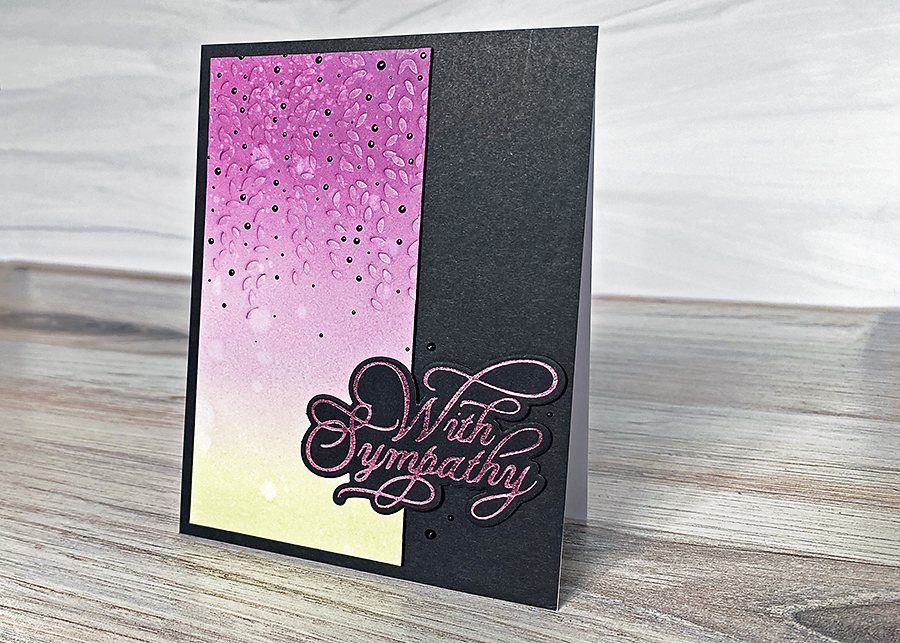
You’d think when I mentioned Glimmer plates that I was talking about the sentiment, right? Nope! It’s the pretty vines on the inked panel – didn’t know you could do a letterpress effect with Glimmer Plates, did ya?! All you need is the right cardstock.
Prepping the Pieces
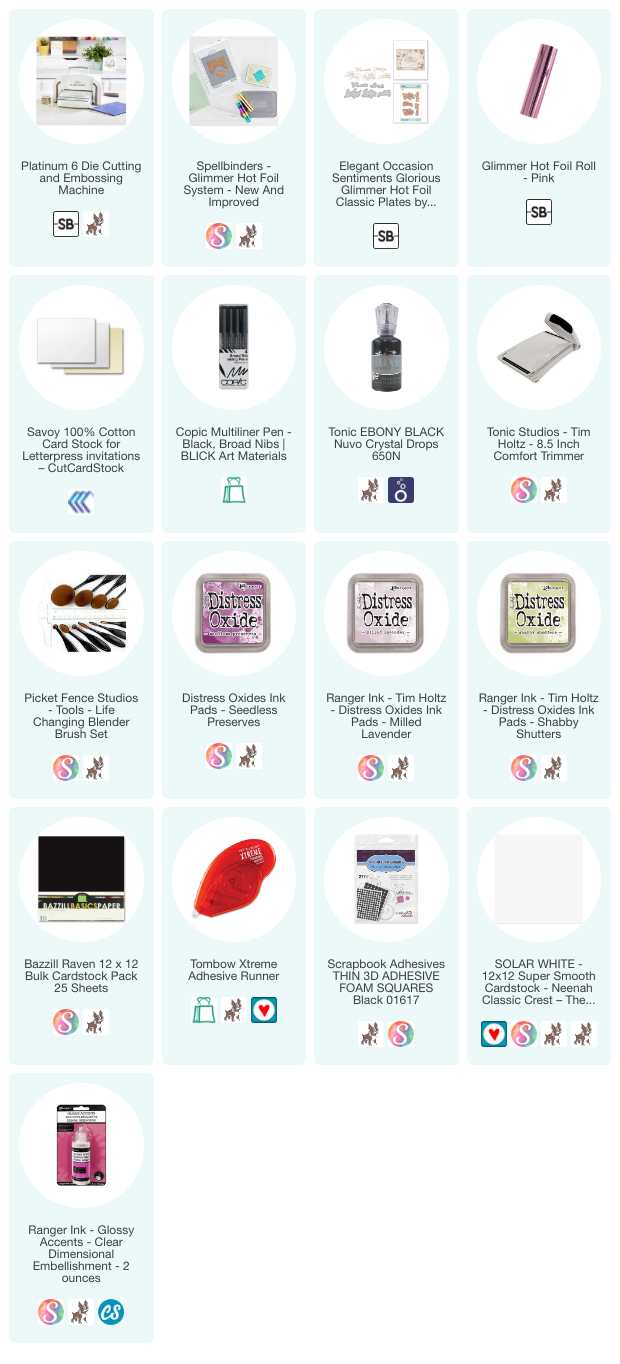
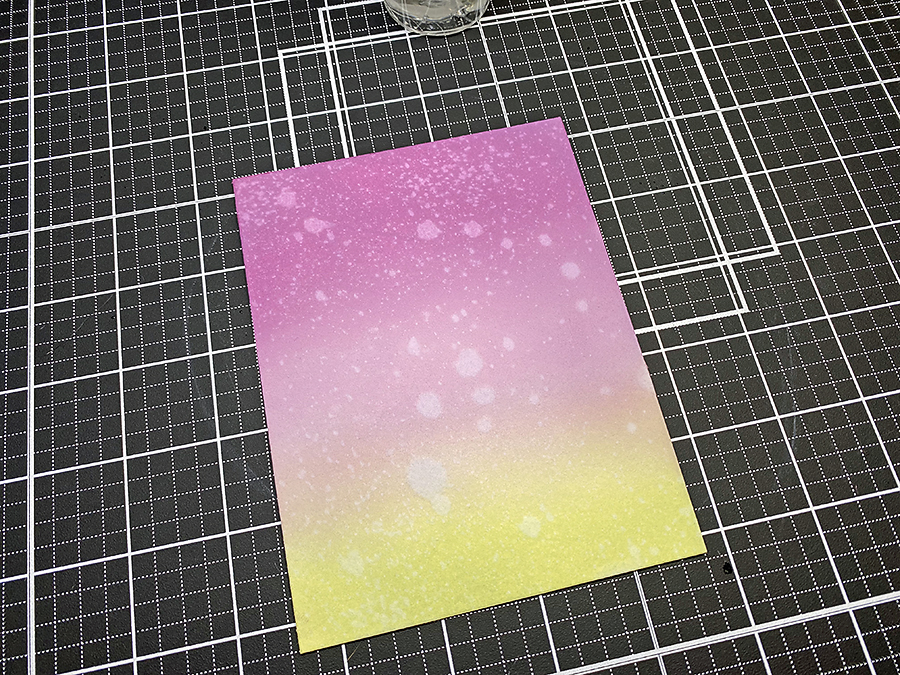
OK, to start, get you a 5.5″ x 4.25″ piece of Savoy 118lb Cotton Cardstock. This stuff is a little crazy to trim on a small trimmer like Tim Holtz’s 8.5″ guillotine, but it can be done if you go slowly and apply a solid, even amount of pressure. A bigger trimmer would probably be more manageable.
Next, a little bit of ink blending!
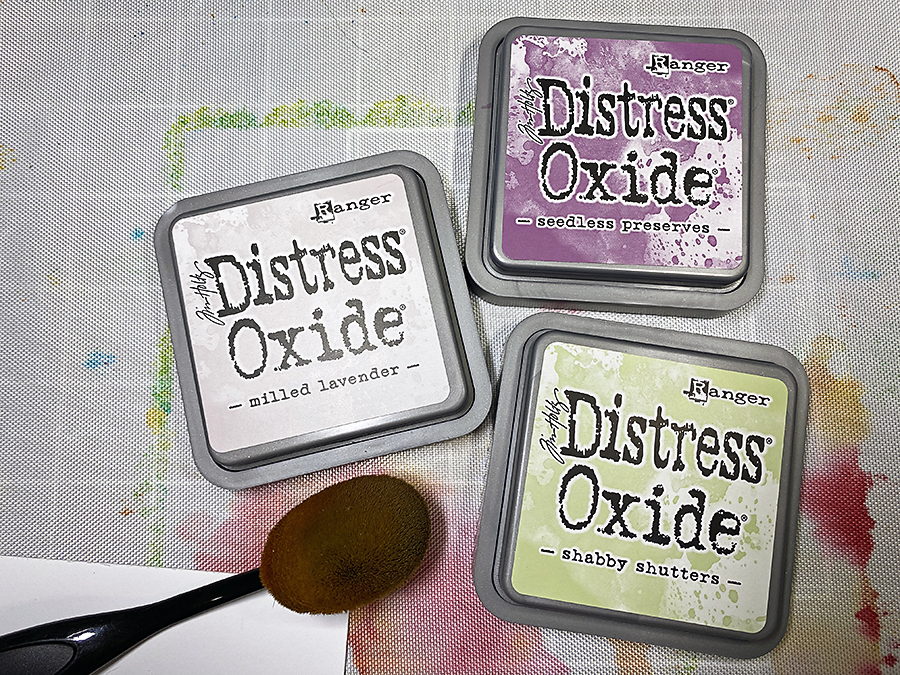
I will use Seedless Preserves, Milled Lavender, and Shabby Shutters to create a beautiful sunset style blend. Use whatever blending tool you like – I still really enjoy the Picket Fence Brushes.
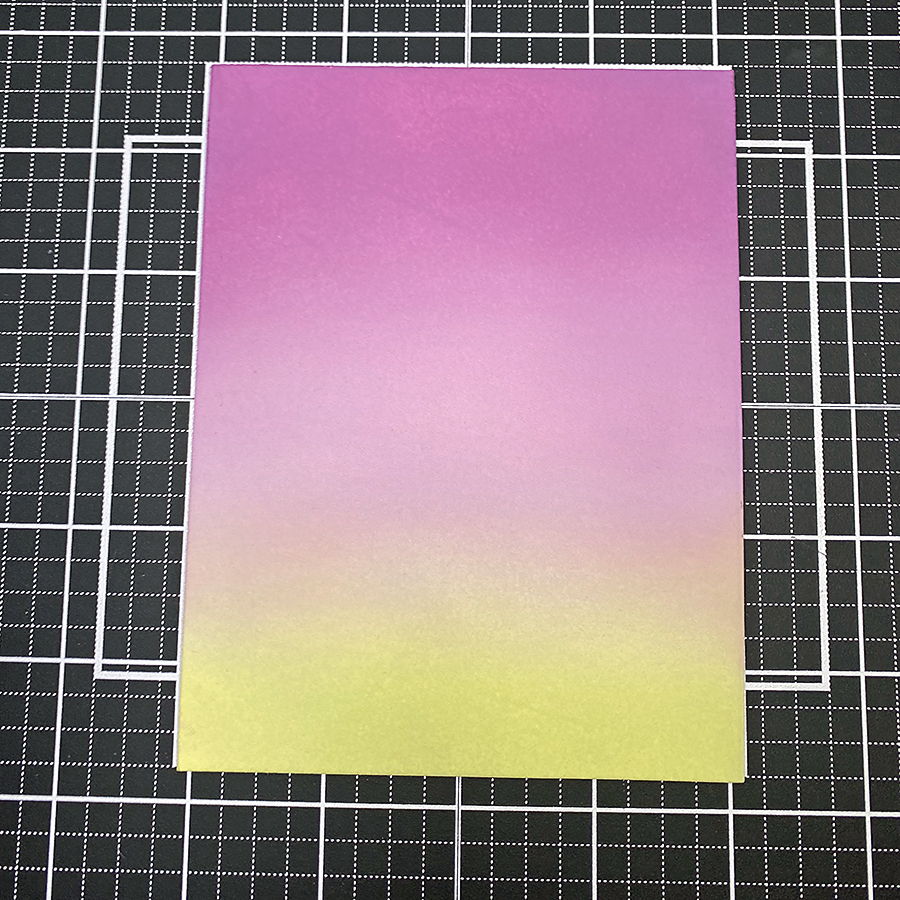
Of course, since these are Distress Oxide Inks, I flicked a bit of water over the panel and let it react with the ink. Be careful with how much water you use on this cardstock – it’s super absorbent.
Next comes the neat part! Instead of heating the vines plate from the Framed Details Glimmer Plate Set, I simply ran it through my Platinum 6 just as I would a wafer-thin die.

Protip: You know, if you had a bit of letterpress ink and used a brayer to apply it to the Glimmer plate, you could make some gorgeous cards this way.
Et voila! Isn’t that a fabulous texture? A fancy letterpress design with a Glimmer plate and a die-cut machine.
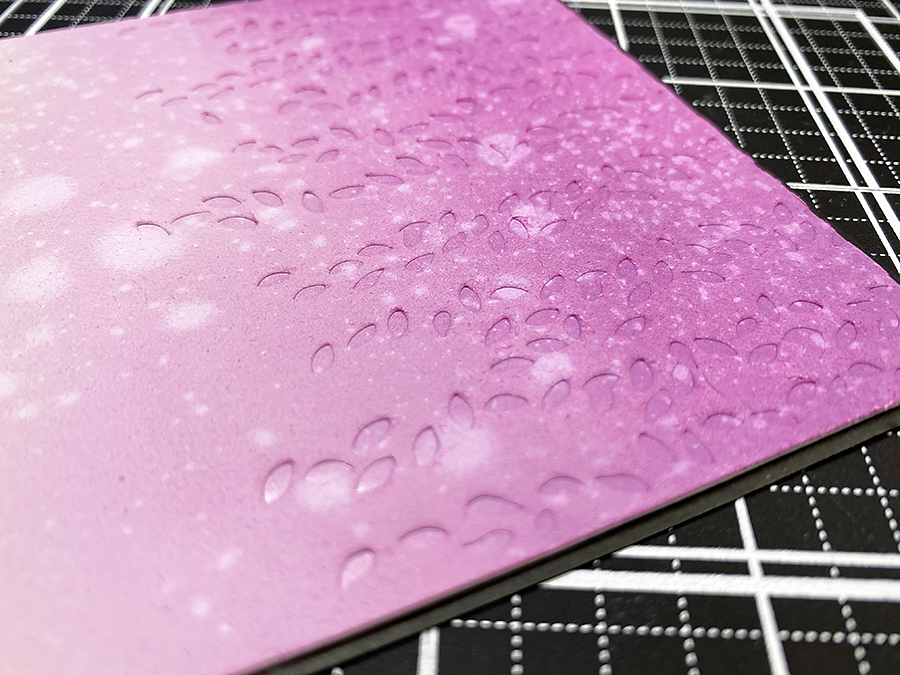
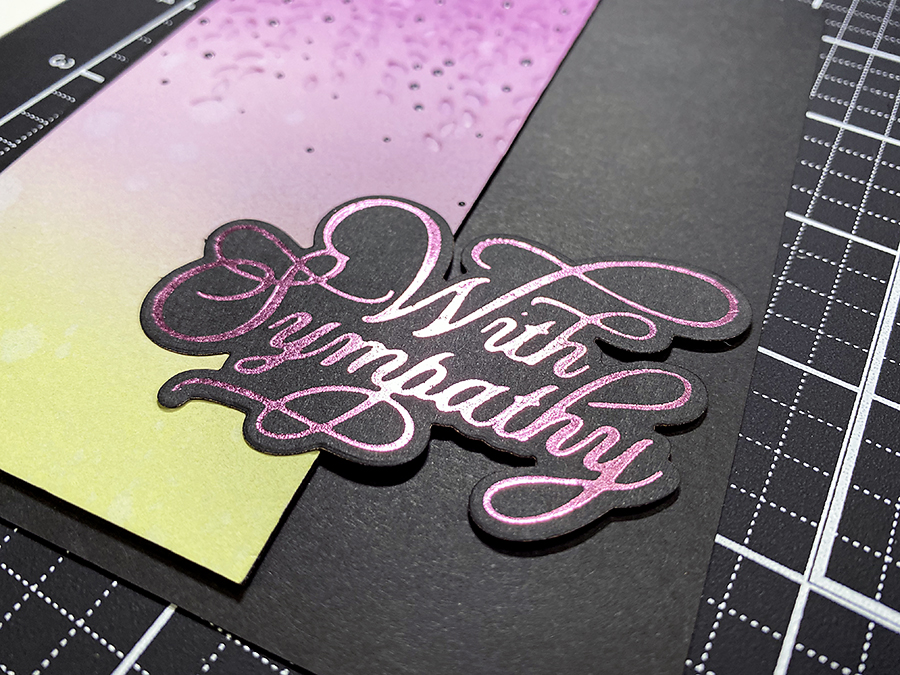
So, the next thing I did was cut down the inked panel one more time to 2.5″ x 5.25″ and add in some Black Nuvo Drops between the leaves to help this piece coordinate with the black cardstock I was going to mount it on.
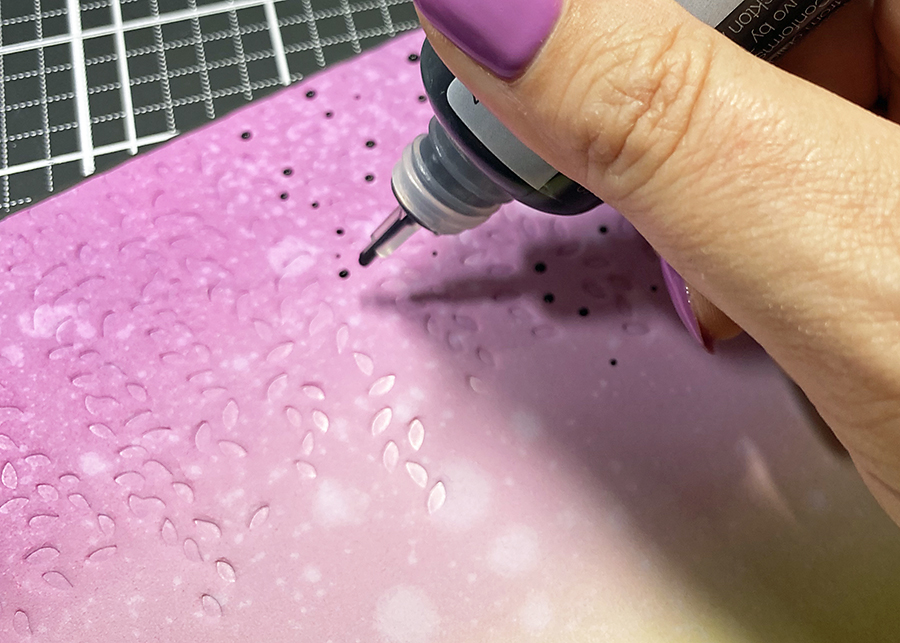
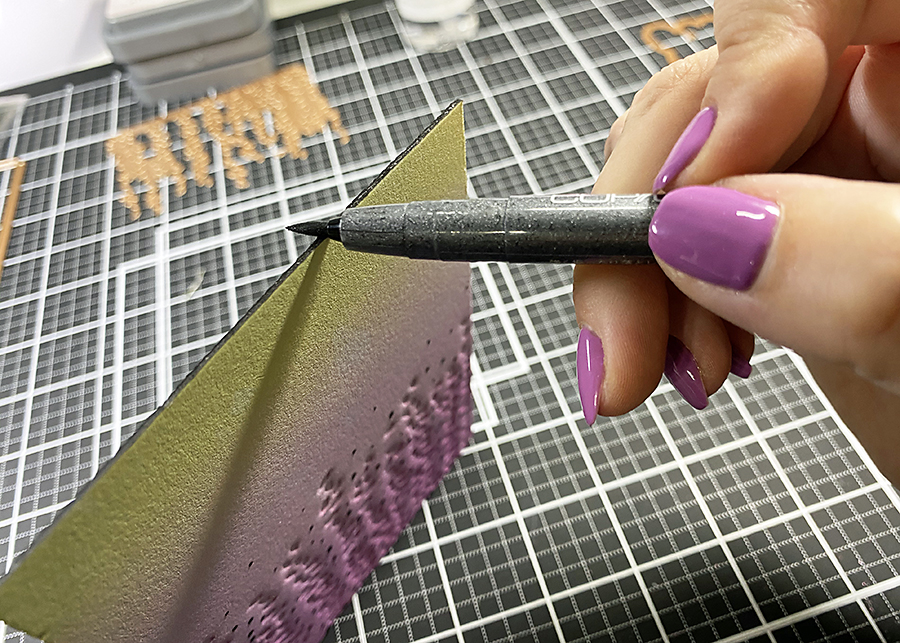
Then, I edged it with a black marker to give the piece a more finished look. You can use any black marker you have for this, be sure to edge from behind in case your marker slips (so you don’t end up with a big ol’ line down your artwork).
The marker I’m using is a brush tip Copic Multiliner.
Then, I adhered this panel to the left hand side of a 5.5″ x 4.25″ piece of black cardstock and started on the sentiment.
Putting it Together
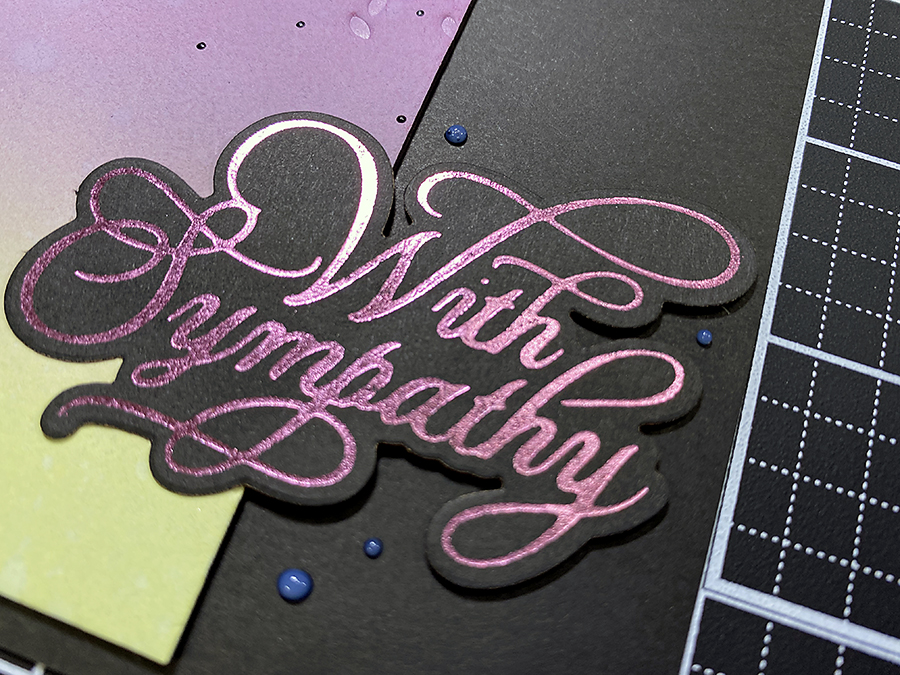
The one I’m using today is from the Elegant Occasions Sentiments set by Spellbinders. Using my Glimmer Hot Foil System and some Pink Glimmer Foil, I created the “with sympathy” sentiment and adhered that to my card front with Thin Foam Squares.
Then, I added a few droplets of Glossy Accents to match the Nuvo Drops on the inked panel.
Once that was all dry, I mounted my card front on a Neenah Solar White card base.
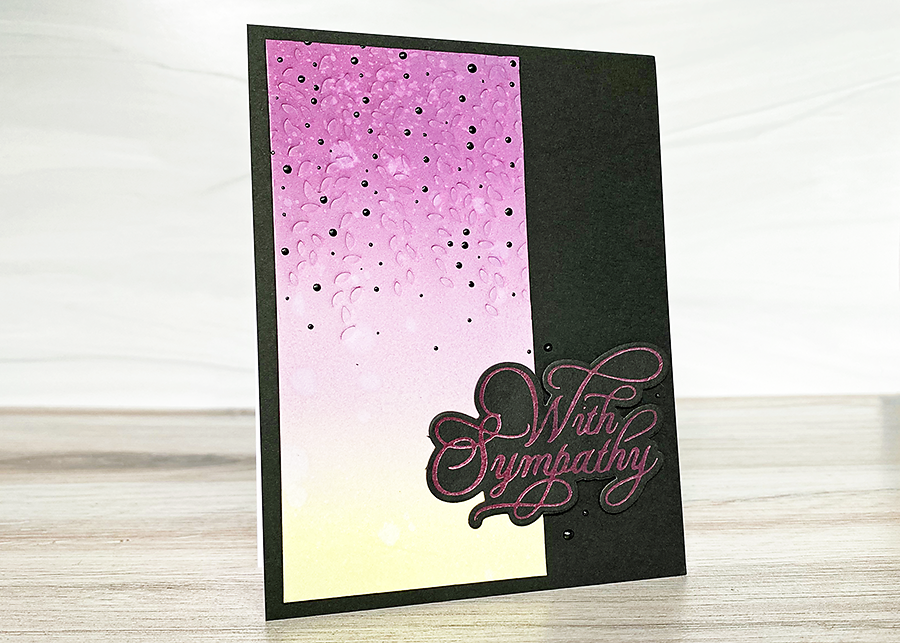
There you have it! Don’t you love the look of that letterpress design?
Thanks so much for reading today! Pop a comment below and don’t forget to pin this idea to your inspiration board on Pinterest!