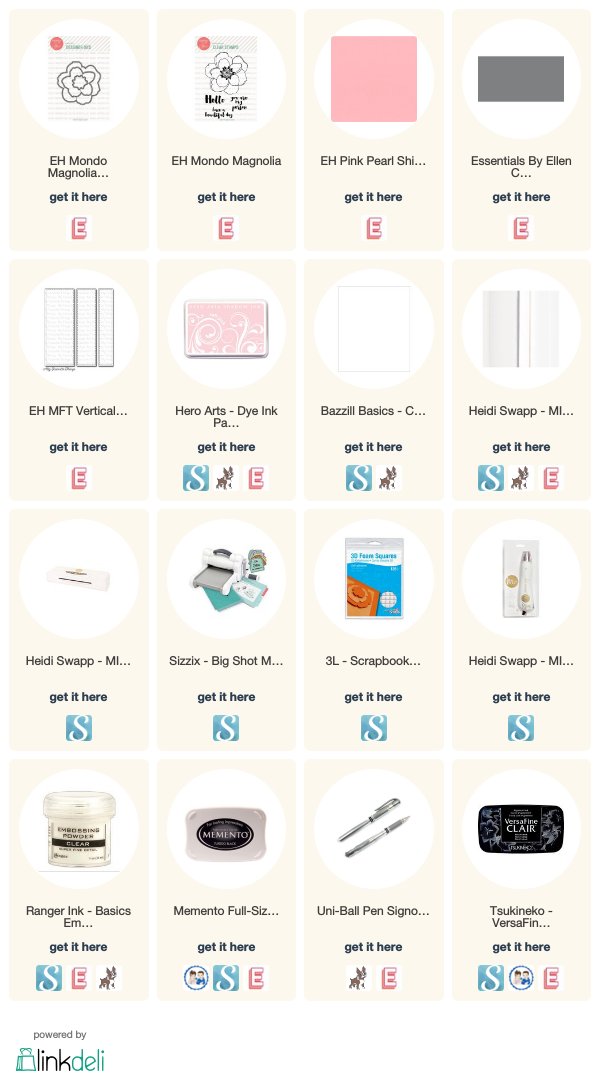
Lovely Magnolia Card With A White Foiled Background
Continuing from yesterday when I made this background, I decided I wanted a lovely magnolia as the main embellishment for my card. The Mondo Magnolia stamp set (by Julie Ebersole) from Ellen Hutson was just right since the white flowers on gray made for a busy background. I also entered this card in the Pin-Sights Challenge for guest artists!
I wasn’t going to do much more with the foiled panel, so I went ahead and matted it with pink cardstock and adhered it to the card base.
Making the Magnolia
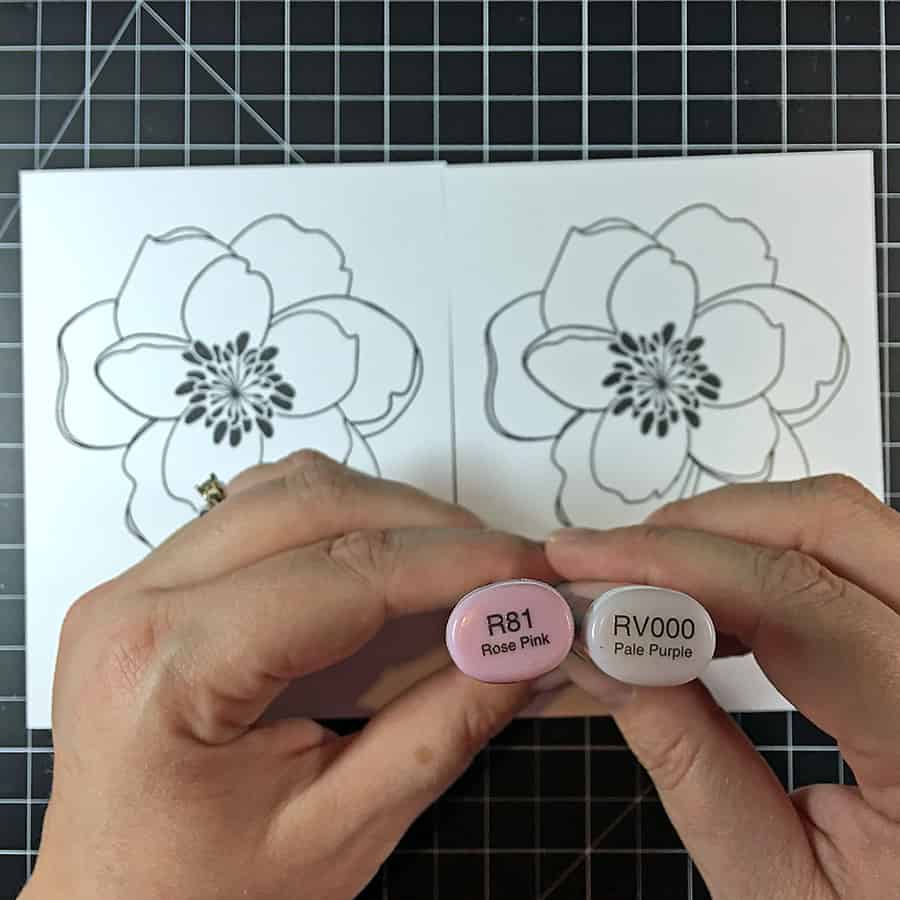
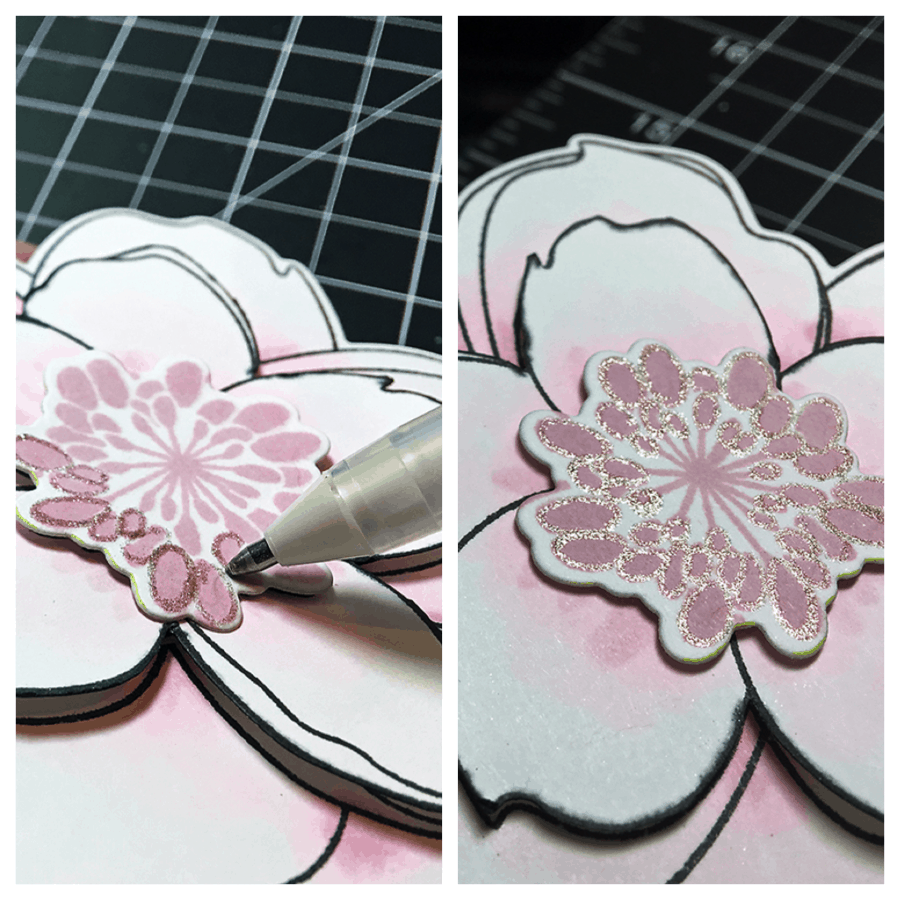
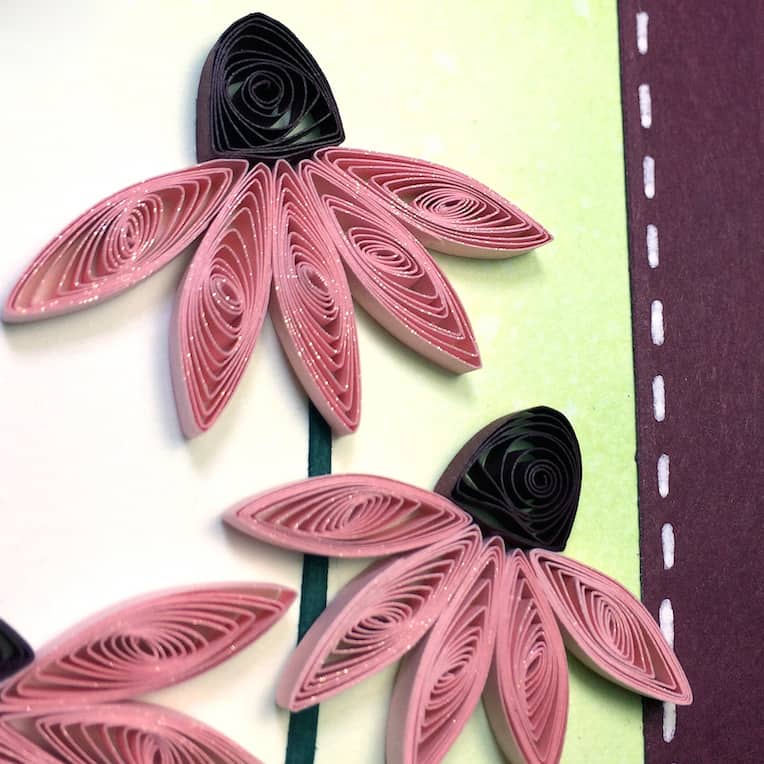
The first thing I did was stamp the magnolia image three times – twice in black Memento Ink and once with pink Hero Arts ink. I very lightly colored around the central areas of the magnolia with a couple of Copic Sketch markers. I wanted it to be just a dab of pink to match my cardstock.
You’d be proud of me. I finally took a baby step into the realm of videos for the blog. It’s the first time I successfully uploaded a clip to YouTube – the others that I tried had awful playback. It was probably the format in which I was saving the videos.
I sped up the video of me adding color to my magnolia to save you a few minutes. It’s a lot easier to show you than trying to explain via photos 🙂
Once the coloring was all done, I die cut the magnolia center from the pink stamped image and the other two layers from the ones I just colored.
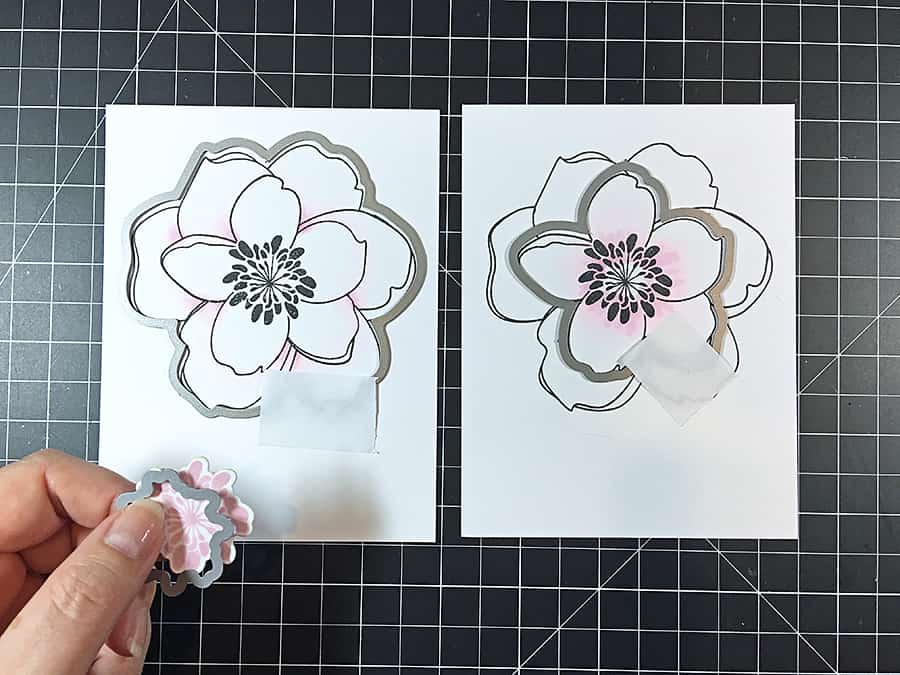
After that, I fussy-cut the middle flower a little more so I could see the outlines from the layer below.
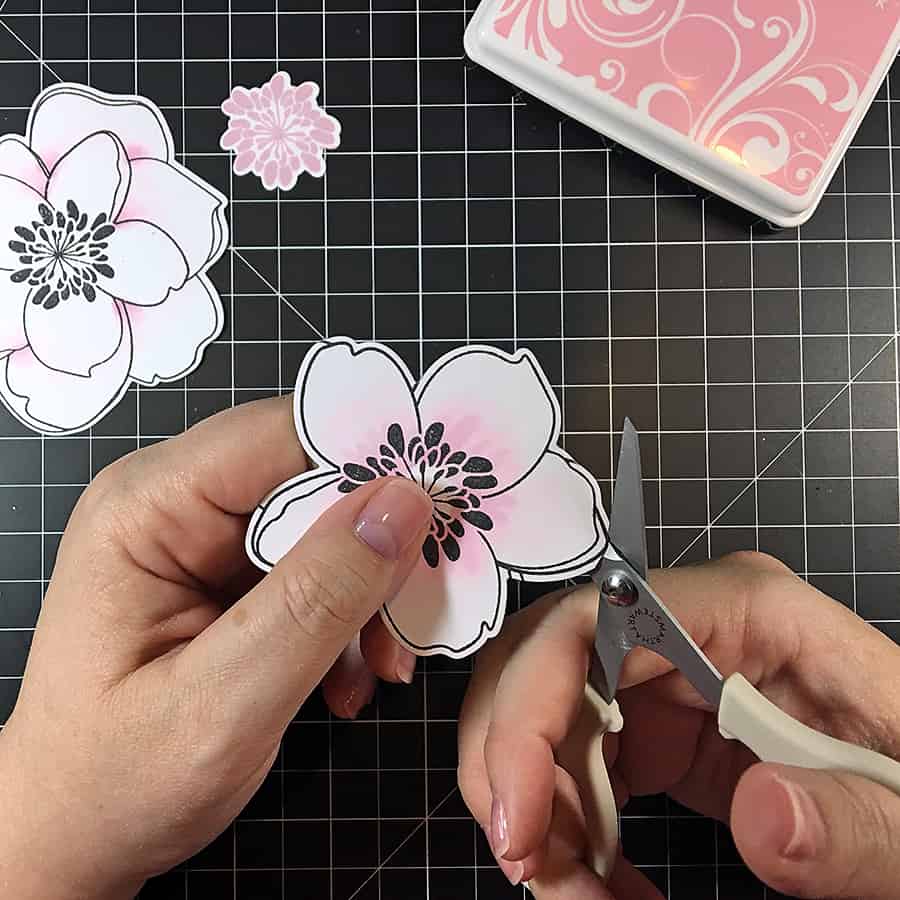
Next, I took the same middle layer and carefully colored the edges with a black marker. It helps to give the die cuts a more finished look.
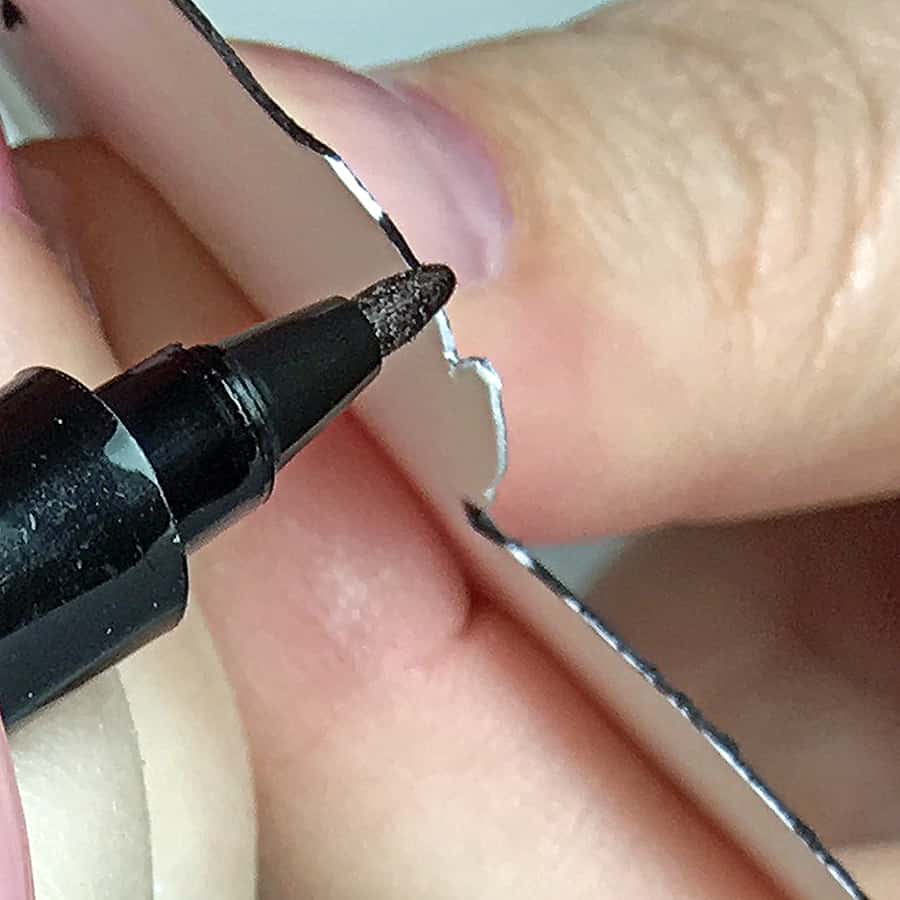
A few well-placed foam squares behind each layer added some dimension, and I finished the flower by outlining the stamens with a Silver Gel Pen.
Putting It All Together
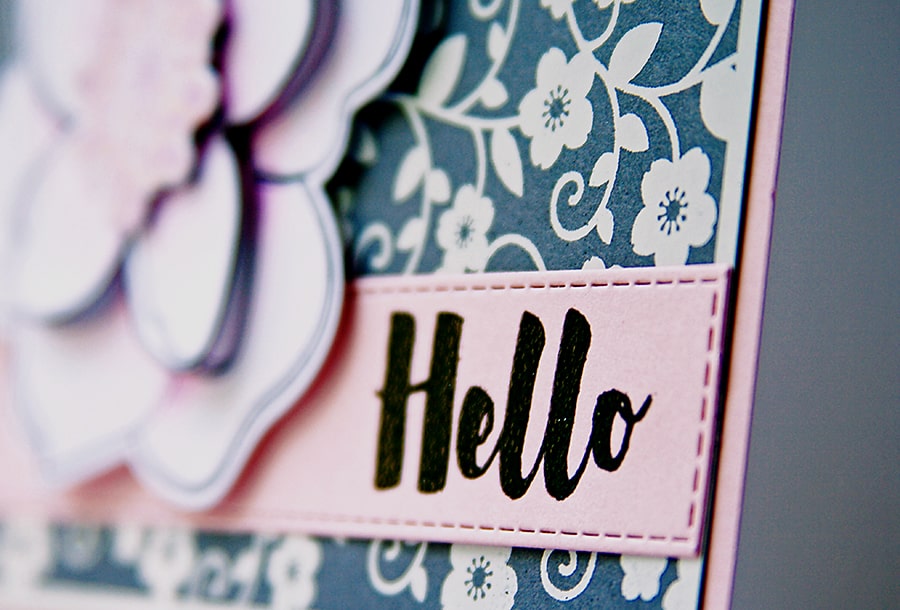
To help the sentiment stand out, I die cut a stitched rectangle strip and centered my word stamp to the right. After stamping in Nocturne (Versafine CLAIR) and heat embossing with Clear Embossing Powder, I adhered the piece directly to the background.
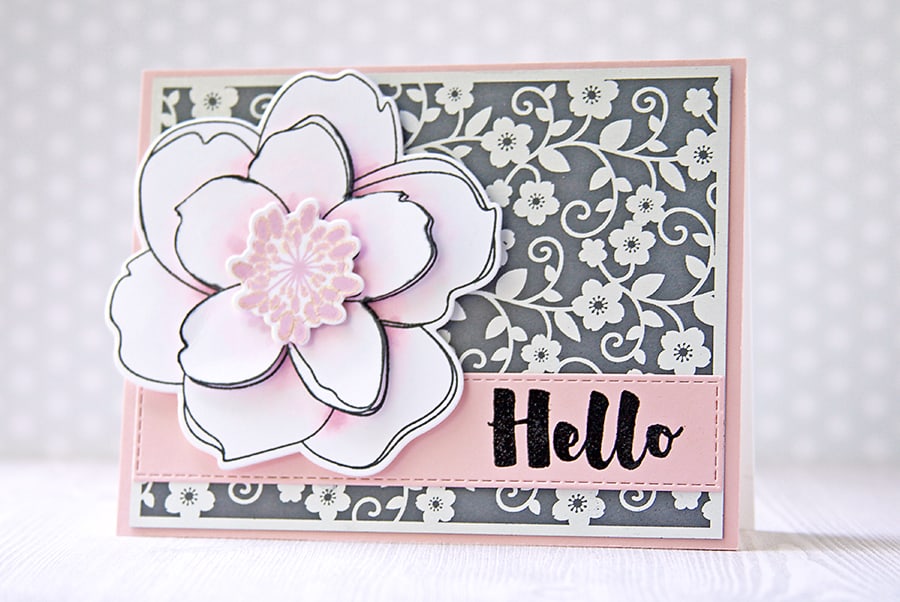
Finally, I used some more Foam Squares to attach my lovely magnolia to the card front.
Thanks for coming by today!
Flowers are my favorite thing to work with when I’m crafting. What’s your favorite crafty subject? Rainbows? Animals? Leave a comment below!
This card is stunning Niki!
GORGEOUS! I love it and I adore the soft coloring and bits of sparkle you added to the florals!