Make the Cards Challenge #7: Coffee or Tea
Hello and welcome back! I’m guest designing today, and I have a card for you that I put together for the Make the Cards Challenge #7. The theme for this challenge is “Coffee or Tea.” I loves me a good cup of British tea… complete with milk and sugar. I work from home most of the time, and it goes exceptionally well with copywriting in the morning 🙂
The funny this was, as much as I love anything coffee or tea-themed, I had a super hard time finding stuff in my stash that was coffee or tea-related. Never fear, though! I found some great Whimsy Stamps products.
Building the Background
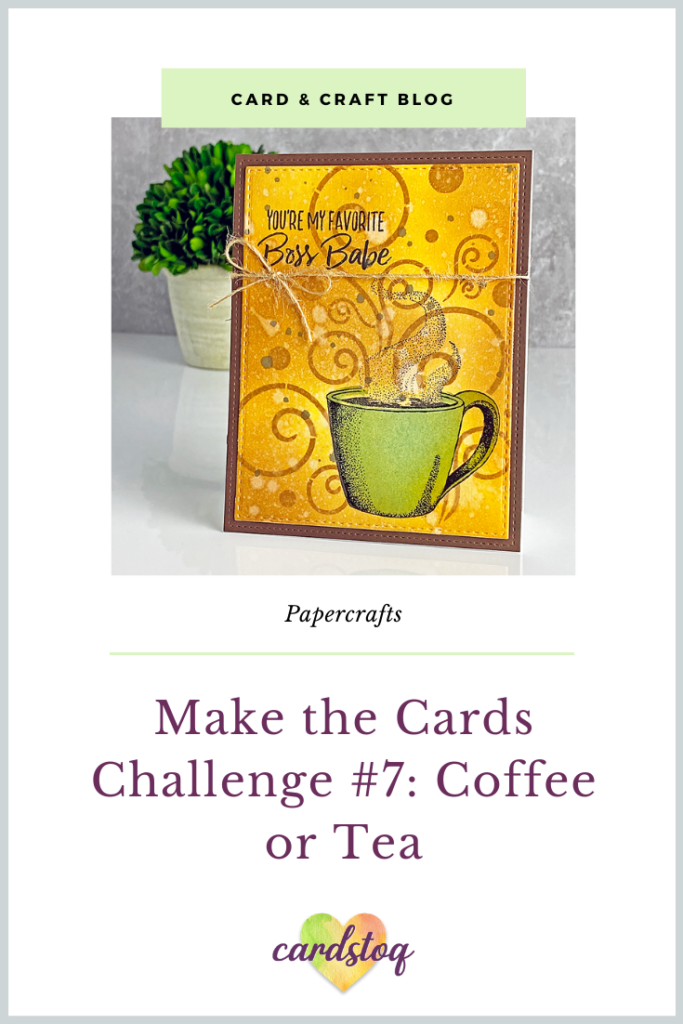
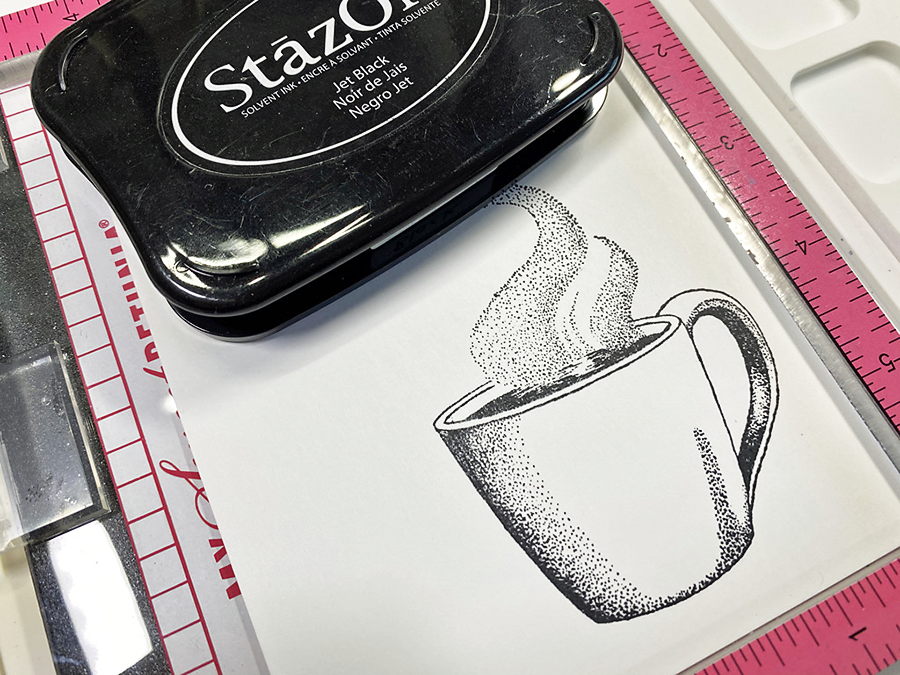
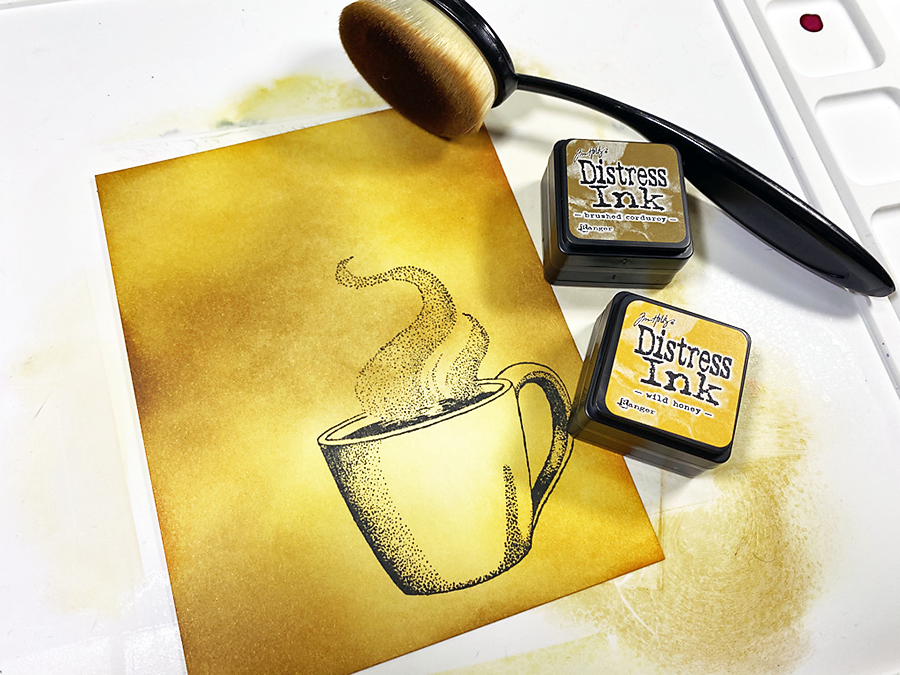
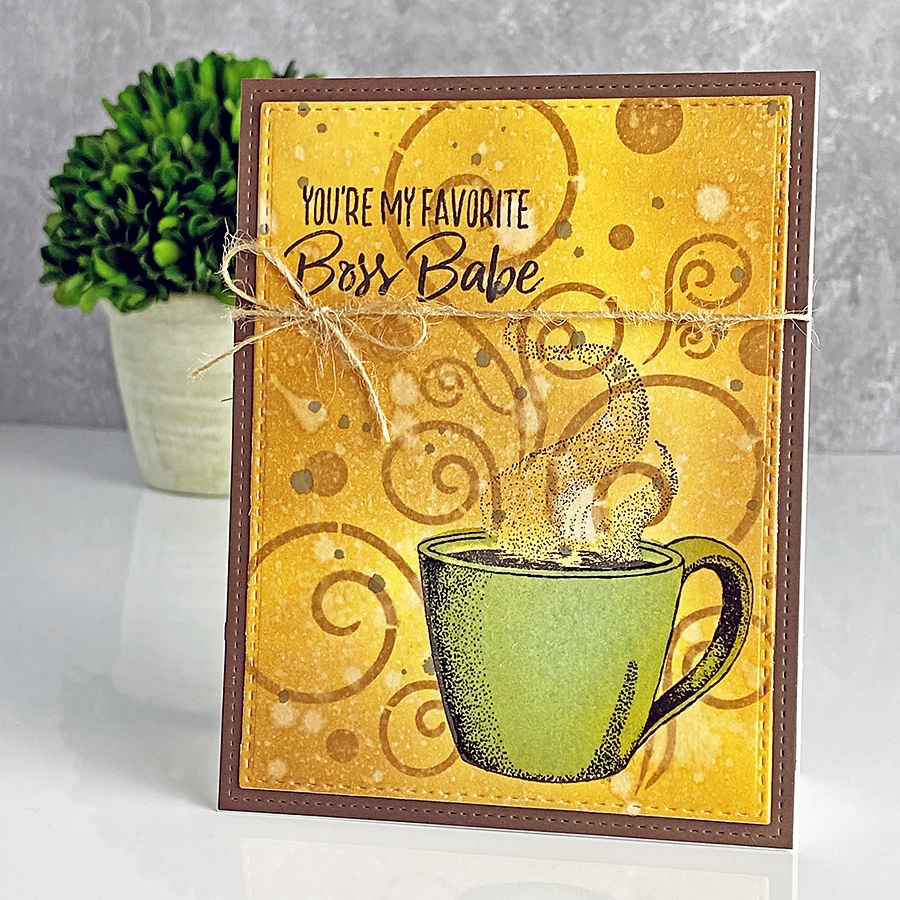
To get started, I stamped the Whimsy Stamps Hot Sip coffee cup on some Neenah Classic Crest in Staz-On ink (I wasn’t sure at this point if I would use a bunch of water or not).
Next, I pulled out a few Distress Inks and a blending brush.
Do you ever have problems blending inks? Like uneven splotches or the dreaded “Overinked Edge Of The Foam Line”? Then try out these blending brushes from Picket Fence Studios. They create a super smooth blend, especially with Distress Inks like the Scattered Straw I used to start the background.
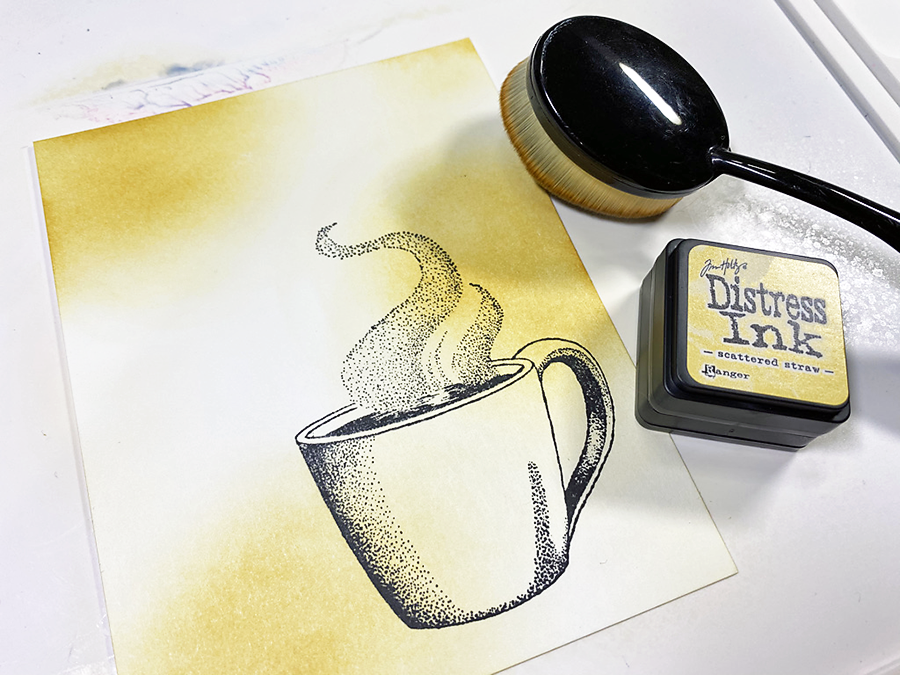
When blending ink, always start with the lightest color. You can add more if you want, but if you start with the darker colors, you can’t take them off, and your design can get overwhelmed fast. I chose Wild Honey and Brushed Corduroy, giving the background a relaxed coffee-colored vibe.
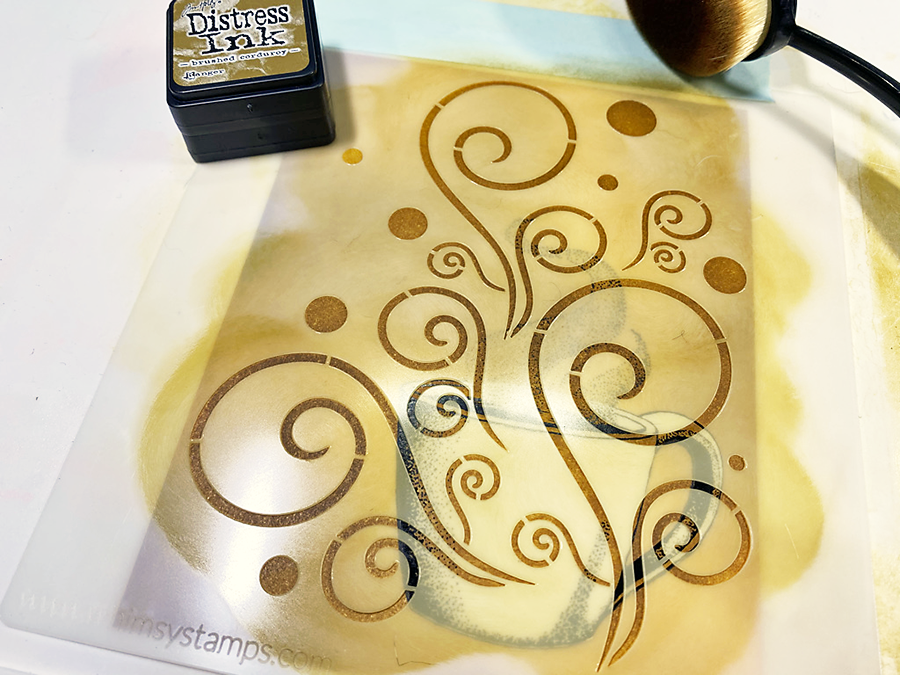
Next, I masked my coffee cup with a piece of Gina K Masking Magic paper where I’d stamped an extra coffee cup to cut out for masking. I stuck that in place, then overlayed the card front with the Whimsy Stamps Curly Flourish stencil and blended a heavy layer of Brushed Corduroy over it.
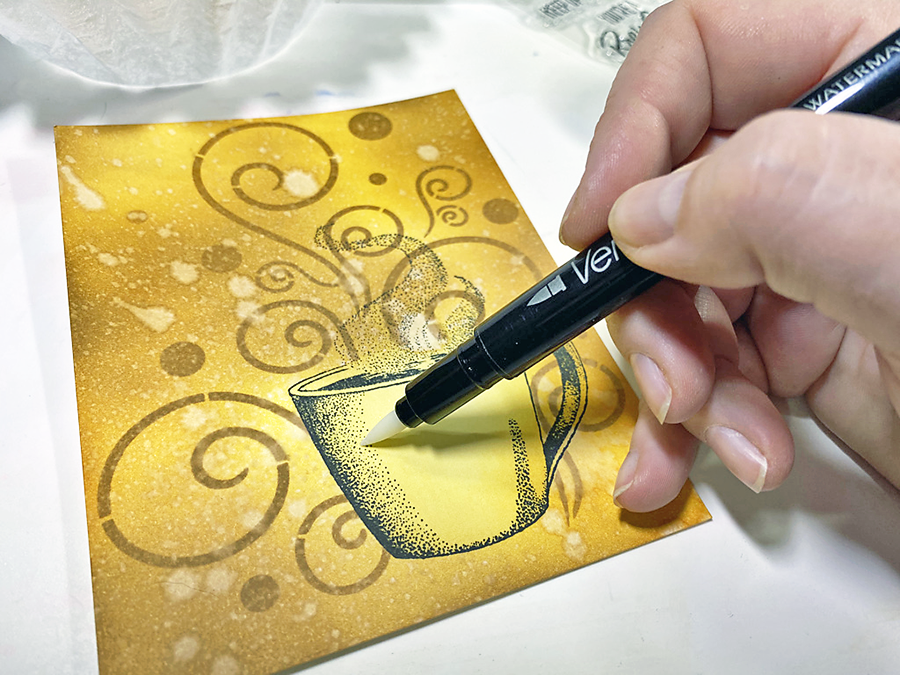
After I lifted the stencil, I used a Nuvo Mist Bottle to spritz a few drops of water over the design and hit it with my Ranger Heat Tool to dry. The next step was to remove the cup mask and color the cup with a Versamarker. I did the whole front, handle, and around the edge up to the steam.
Distress Glaze
Have you worked with Distress Glaze yet? This stuff is SO COOL. It’s the same as other embossing powders, except it’s translucent. For the cup, I chose Speckled Egg because I love the look of blue and gold together.
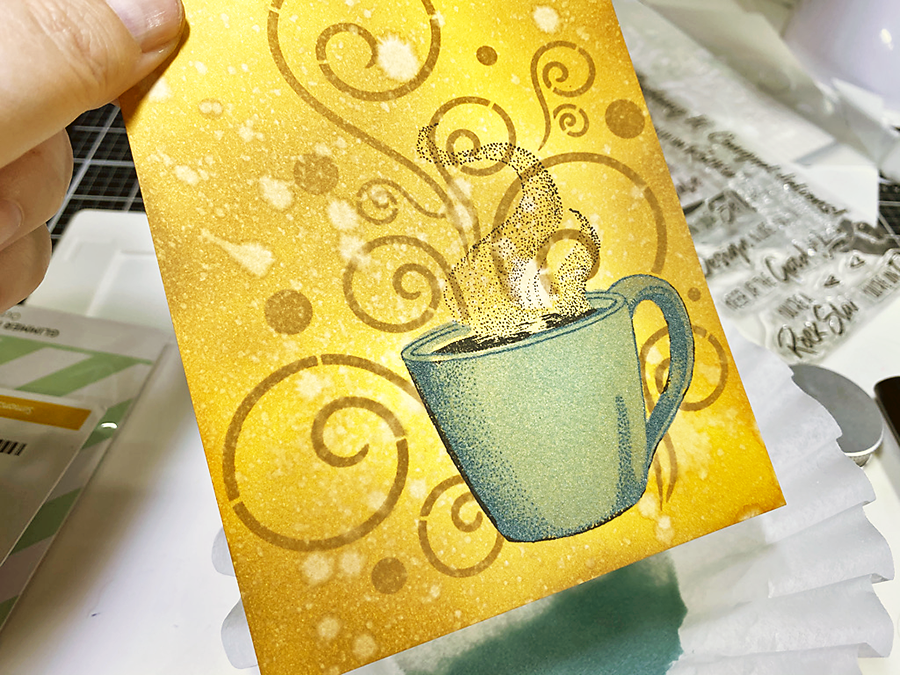
I knew that once it melted, the cup would show through the ink underneath and create a really neat greenish hue. I love it! It’s a fabulous solution for adding a hint of color without being too in-your-face, don’t you think? I can’t wait to try this out on “glass” vase images.
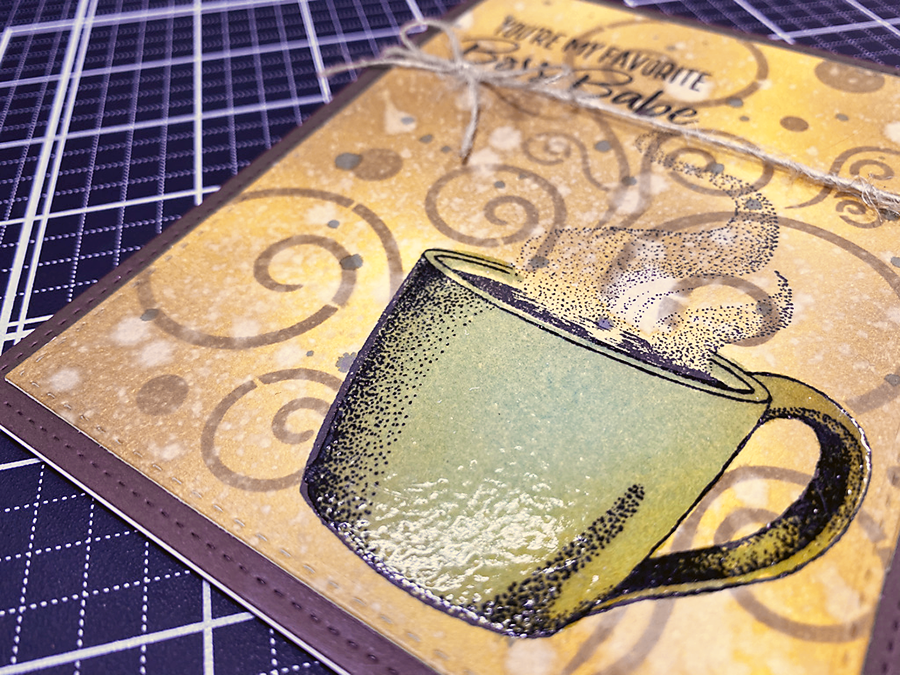
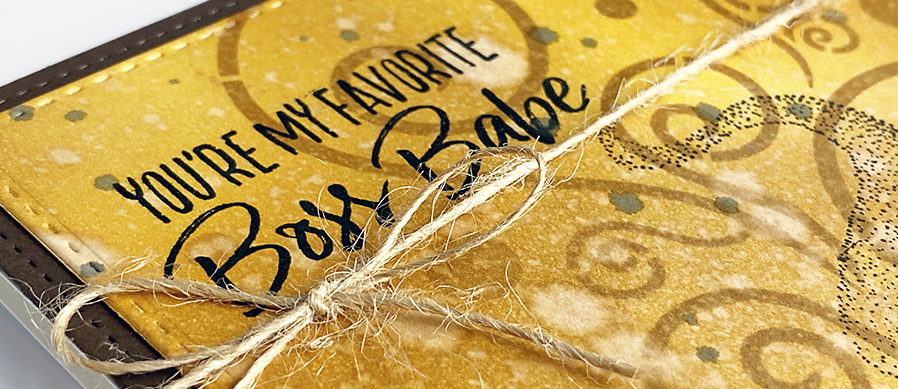
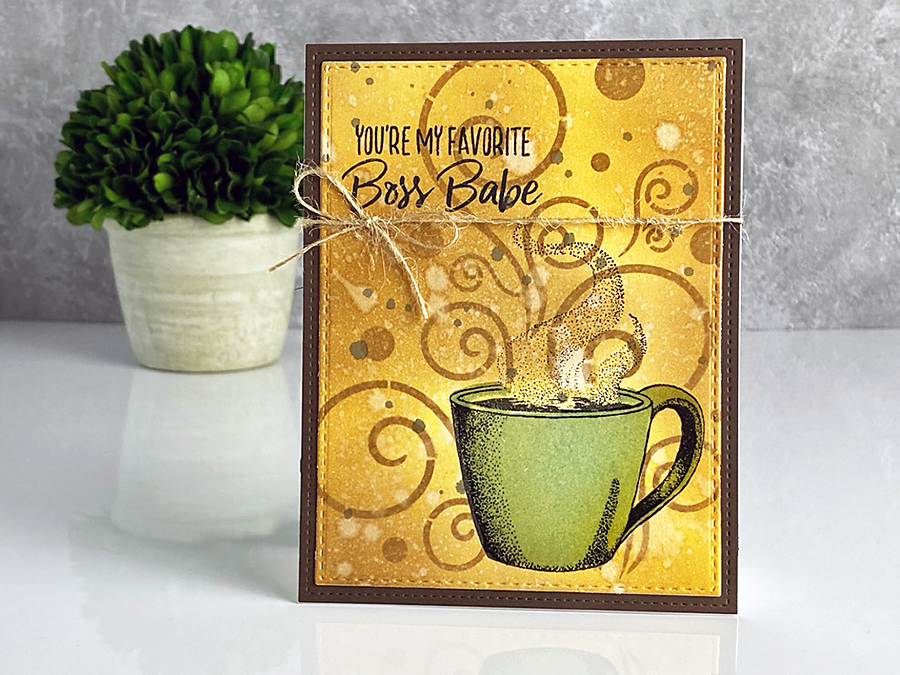
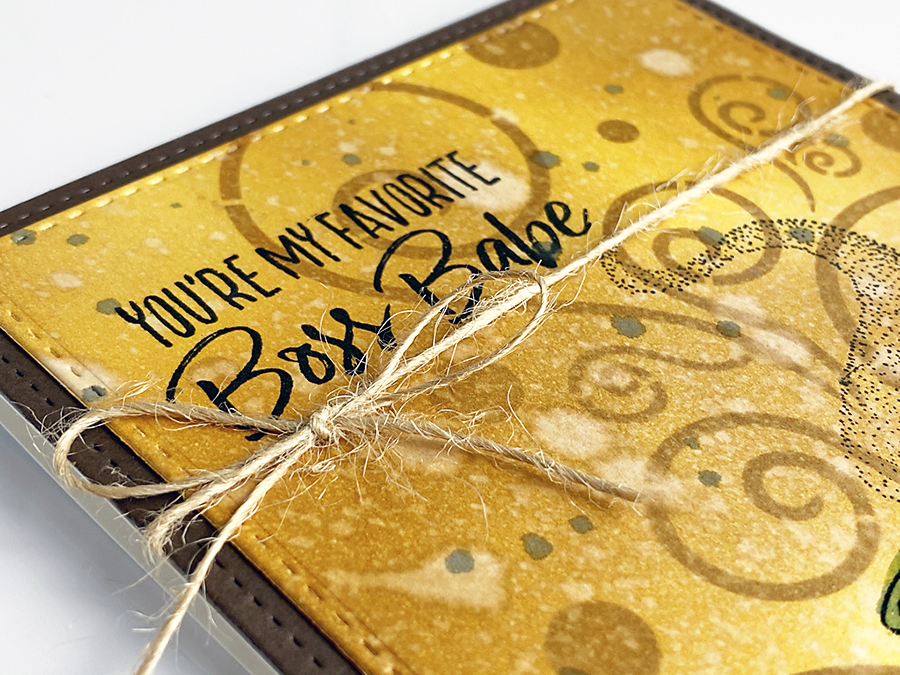
After that, I stamped the sentiment (from the Boss Babe stamp set by My Favorite Things) using a MISTI and Memento Black ink. Also, I smooshed some onto my work surface and added a bit of water. Picking it up with a paintbrush, I tapped some drops over the card and then cleaned off the cup.

To finish up, I trimmed 1/4″ from each side of the card front, then tied a length of jute twine below the sentiment.
Next, I matted the panel with some brown cardstock and adhered it to a card base. Tada!
Thanks so much for stopping by to see my card for the Make the Cards Challenge #7! Do you prefer coffee or tea? Drop a comment below and let me know your favorite, then head on back to the challenge to submit your project!