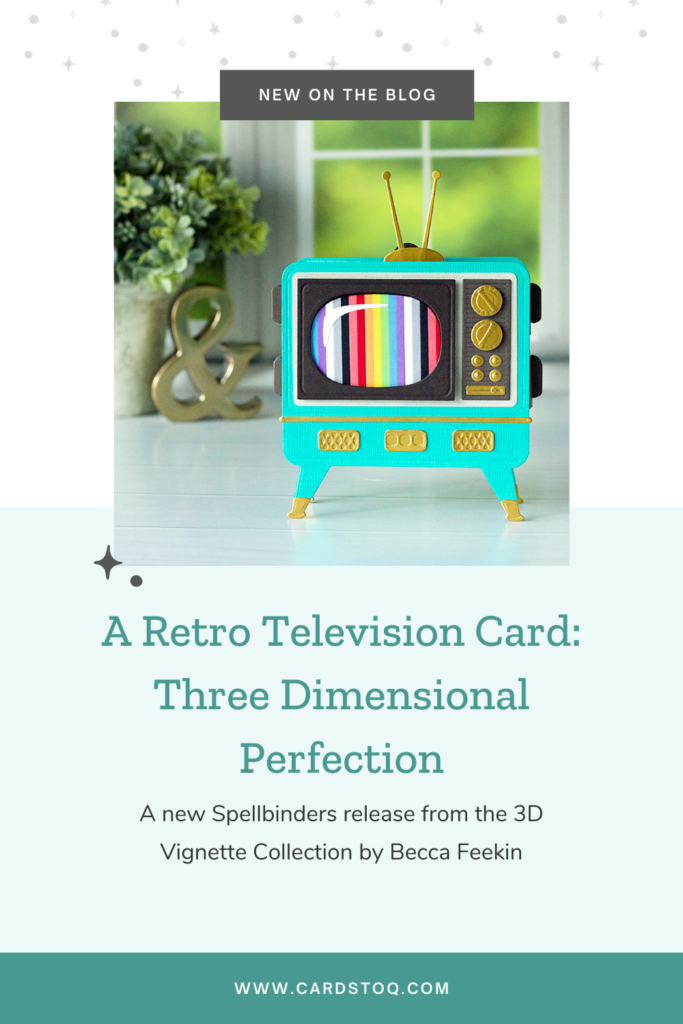
A Retro Television Card: Three Dimensional Perfection
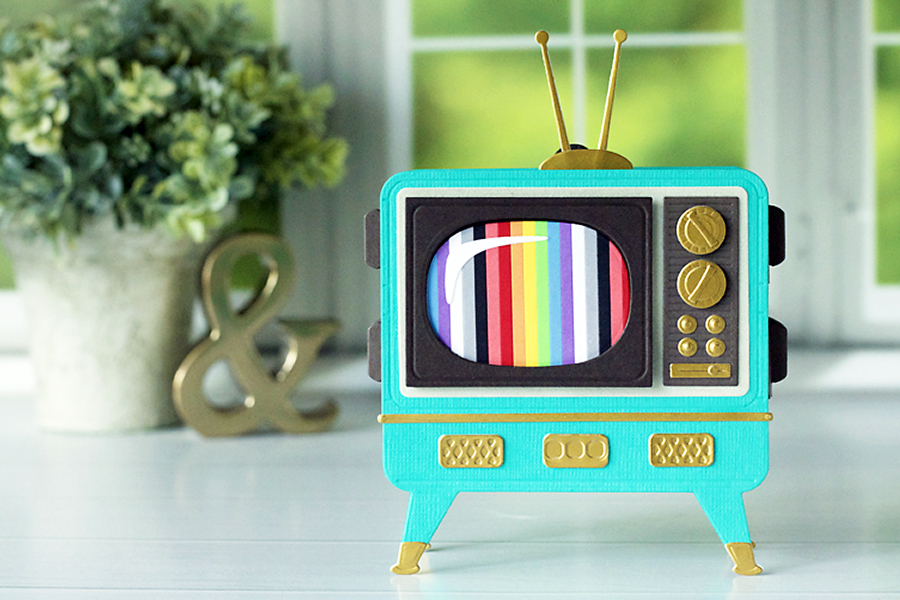
Hello, long time no see! I had the privilege today to test drive one of the latest die sets from Spellbinders. When put together, it makes a little 3D retro television card or standalone project. It’s called the Retro Television die set from the 3D Vignette Collection by Becca Feekin. And the best part is, like my favorite dress, it has pockets!
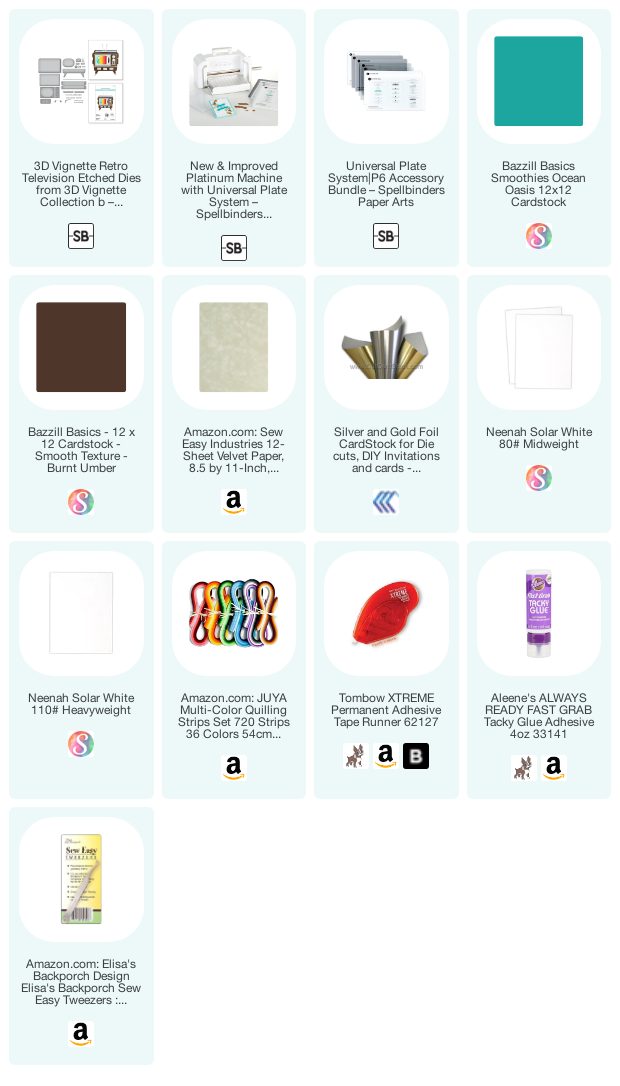
I used my old Platinum 6 die cutting machine for all the pieces, along with the new Universal Plate System. It was my first time using that plate system, too. The recommended sandwich was a little snug in the machine, but dang it cut like a dream. No gross, shaggy edges, so I’m happy with it.
Originally, I was going to do a walk through on how to assemble the pieces of this 3D retro television card. But as it turns out, that would be a HUGE blog post and probably kind of boring to read. Also, the instructions are available on the Spellbinders website. I’m sure they do a better job of explaining it than I would!
However, I did make a couple of modifications as I went, and I’ll tell you where in just a bit.
Anyhow, let’s look at this sweet little retro television. I’m not gonna lie; it took a bit of time to cut out all the pieces, but it was totally worth it, and it went together super easy. I would love to send it to someone; it looks so impressive in person!
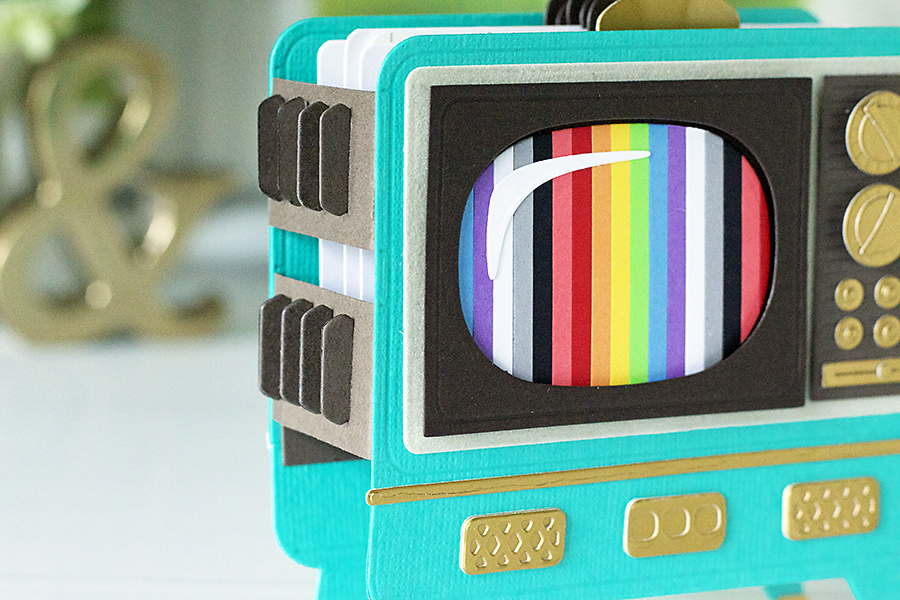
The first thing I want to show you is the layered dials and buttons. Aren’t they neat? I chose a retro gold cardstock from CutCardStock.com. It reminded me of the weathered brass on my grandma’s furniture way back in the 70’s. That cardstock worked well for the trim and feet, too.

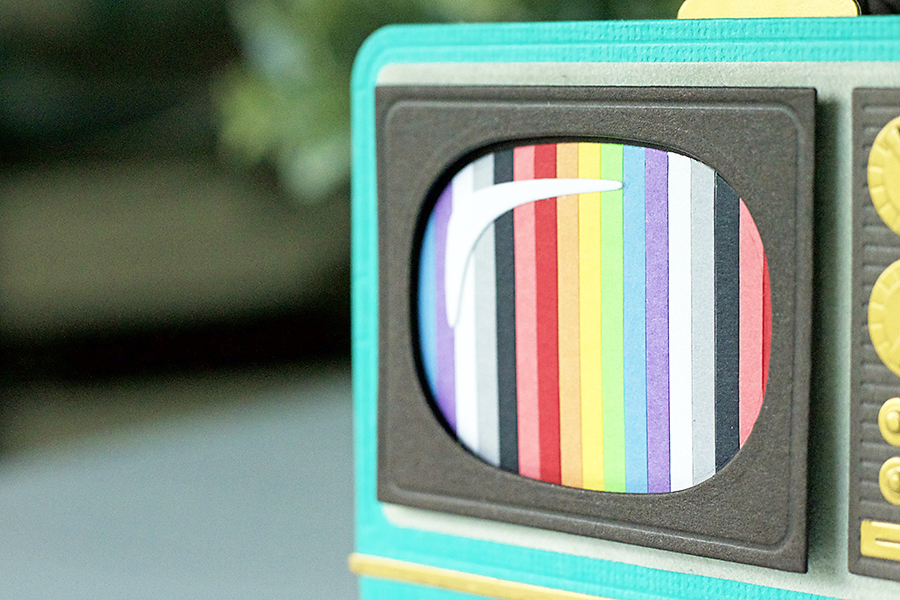
I also found a velvet paper in Celery Green from S.E.I., so I used that as the background for the screen and buttons. Nothing screams retro more than green velvet, don’t you think? Plus, it went really well with the Bazzill Ocean Oasis and Burnt Umber color scheme.
Speaking of the screen, this is where I did something a little different from the assembly instructions. Instead of using the die set to cut the strips for the test pattern on the screen, I adhered several strips of 1/8″ quilling paper onto a piece of 80# white cardstock. That saved a lot of time.
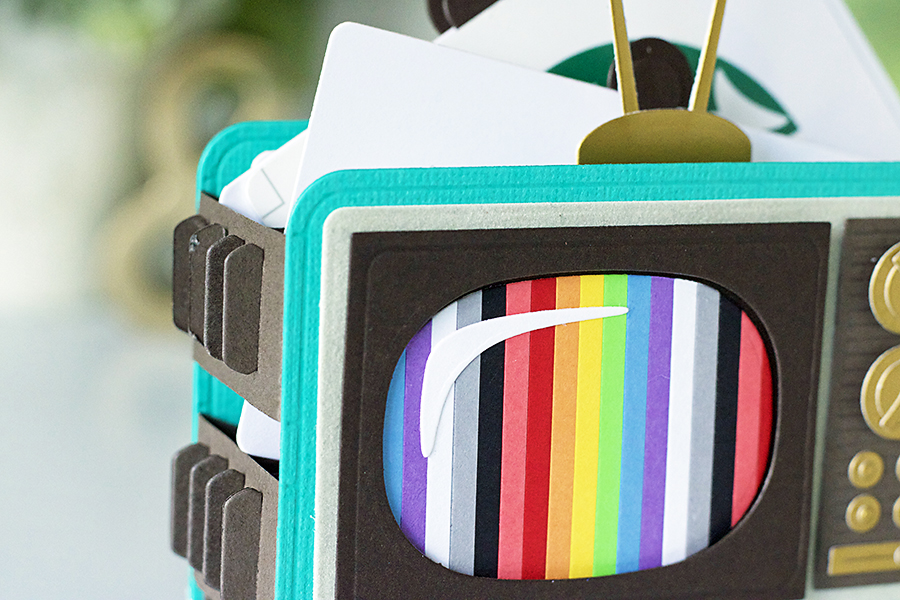
Now to the interesting stuff on the inside! Did you notice the fins on the side of the television? They are spacers on the top row, and on the lower row, there are four V shaped pockets.
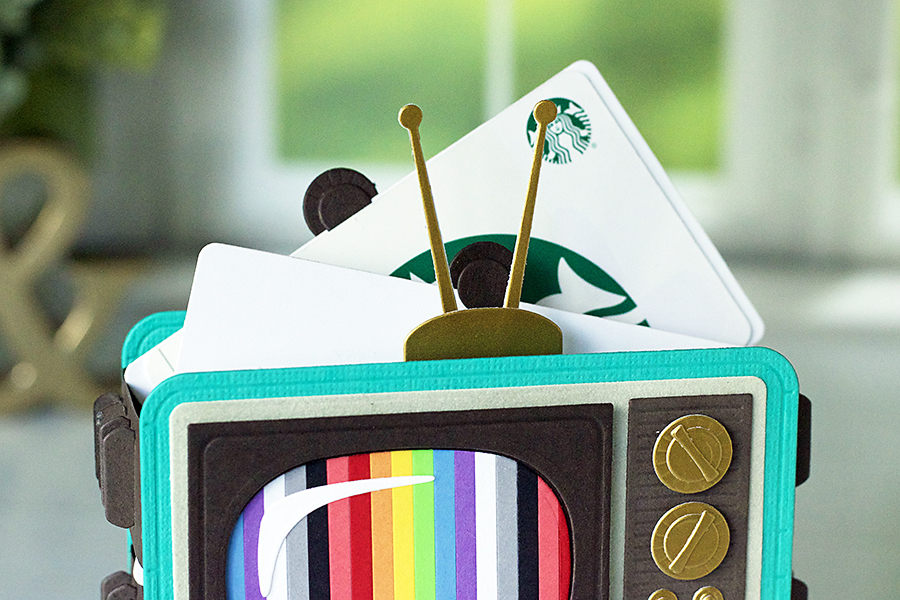
The awesome part of that is you can fit four little inserts in there. For example, you can have the inside sentiment pull up on the rabbit ears insert.

Or, you can add small photos, a message, or even a gift card or two. I FREAKIN’ LOVE THIS.
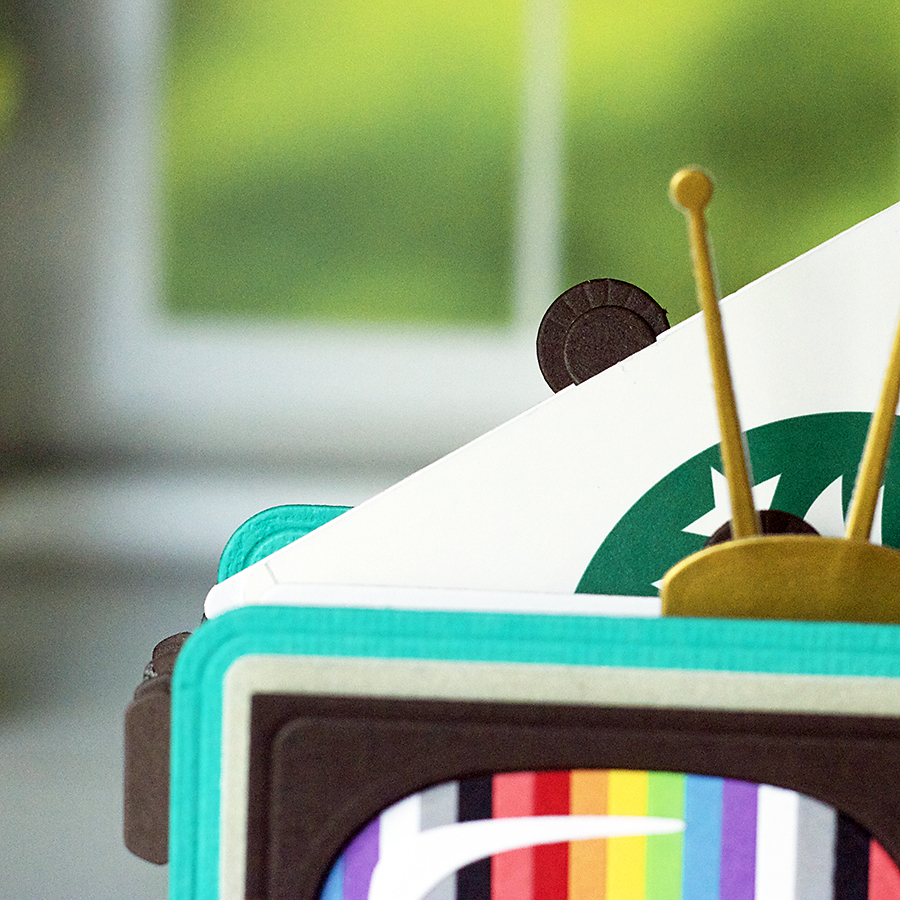
That brings me to the other part of this project where I made a small adjustment. After I had everything assembled, I felt like the insert pieces needed something to grip to pull them out more easily.
So, I die cut three extra TV dials and sandwiched them to the top of each insert.
Boom! A tiny TV. It will fold flat, too, so you can fit it into a 5×7 envelope. Well, you can fit it into an A2, but you’ll have to fold the antennas. A small padded envelope would be perfect for mailing.
I hope you loved this colorful little 3D Retro Television card, and that it inspires you to create your own 3D project.
Pin this project to your Pinterest board for later, and check out the other die sets available at Spellbinders. Spoiler alert, there’s a hot air balloon!
Photos: Canon Rebel T6i with 50mm lens, Replica Surfaces “Lush View” and “Shiplap”; Replica Surfaces Replica Studio, Assorted props and a window with great lighting 🙂
If you loved this post, you might enjoy this holiday DIY box card!