Filling in Open Shapes With Beehive Quilling
I made this card for a friend of mine that recently married. She enjoys quilling too, so I decided that a card that incorporated a beehive quilling decoration was in order.
The card itself is rather simple; it’s a white panel with fun foam underneath for sturdiness through the mail. For the embellishment, I used a technique called beehive quilling to fill in my heart shape.
To start, I die cut the circle in both the fun foam and the cardstock and layered them to create a recessed area for my quilled element.
The sentiment (On Edge, Simon Says Stamp) is on a 4″ x 1.5″ strip of matching cardstock. I stamped it with Versamark and heat embossed it with some detail white embossing powder – you can really make the words pop if you stamp using white pigment ink and then sprinkle white embossing powder on top!
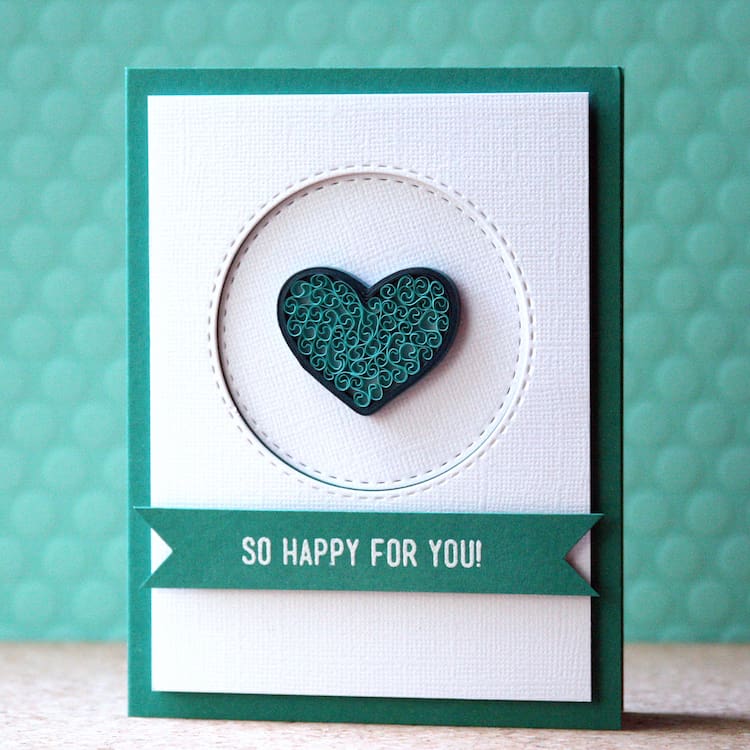
I saved the fun foam circle from the center for another project, and I built my heart on the cardstock circle. Doing it this way made it easier than usual to work with the quilling paper, as I didn’t need to work directly in the recessed area; I finished the heart before I laid the circle in place.
To make the heart, I glued two 23″ quilling strips together end to end, then carefully wrapped them around one of my thin stamp blocks. I tore the end and glued it down while my paper was still on the block. I carefully slid it off and formed my new ring shape into a heart, then centered and glued it down onto my circle.
As a side note, I learned a neat way to apply glue to quillbits: I found some tiny disposable brushes with small microfiber tips, and I use them to apply glue to my papers when I’m building a design.
It keeps me from accidentally making gobs of glue under my project, or pulling out my centers by having to dip.
If you want to give them a try, you can find them here.
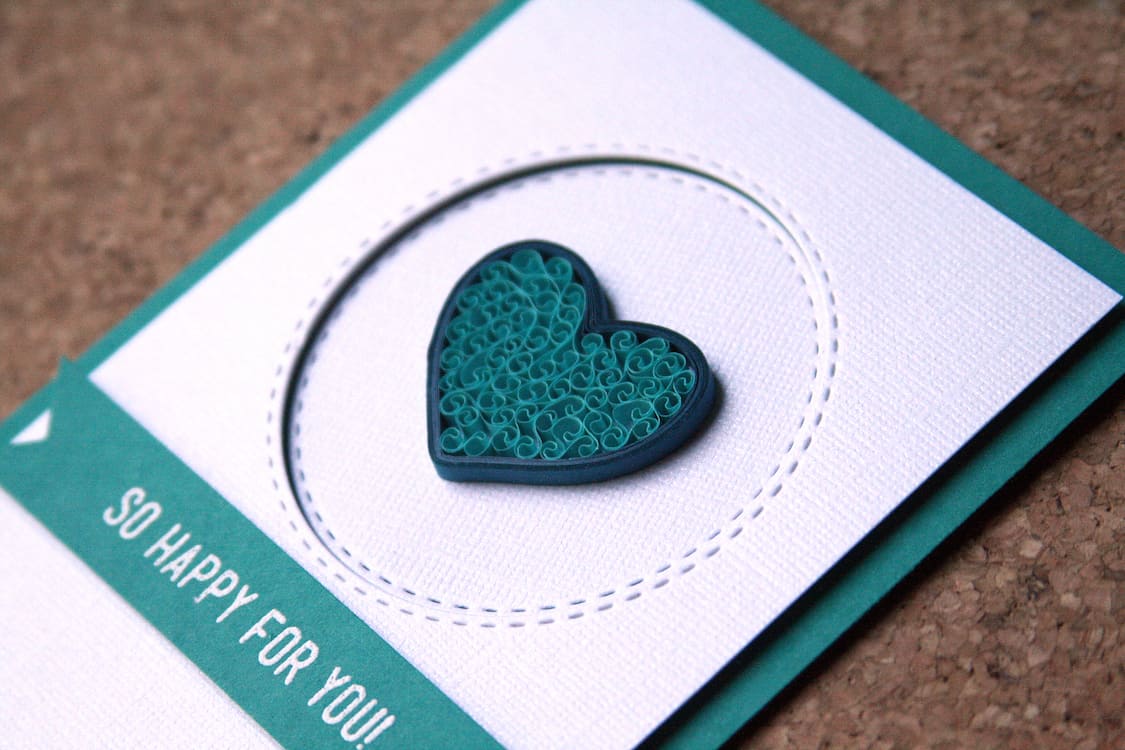
Shaping and placing the heart outline was the hard part. Filling it in with beehive quilling is super fun and fast! You need to use the same amount of strips as you did for the outline shape.
In this case, I needed two. They don’t have to be glued together. No need for measuring and ripping strips, either; just start at one end of your piece and do 3-4 turns of your slotted tool.
Next, slide your tool out of the coil you just made. Move about 0.5″ down your strip, thread your paper through your quilling tool and do 2-3 turns toward your first coil.
That’s it – just continue on down your strip, making a sort of springy sea wave shape until you get you the end. All you have to do then is carefully bunch the springs together and tuck the curly strip inside your outline.
Here is a closer look so you can see what’s going on in there:
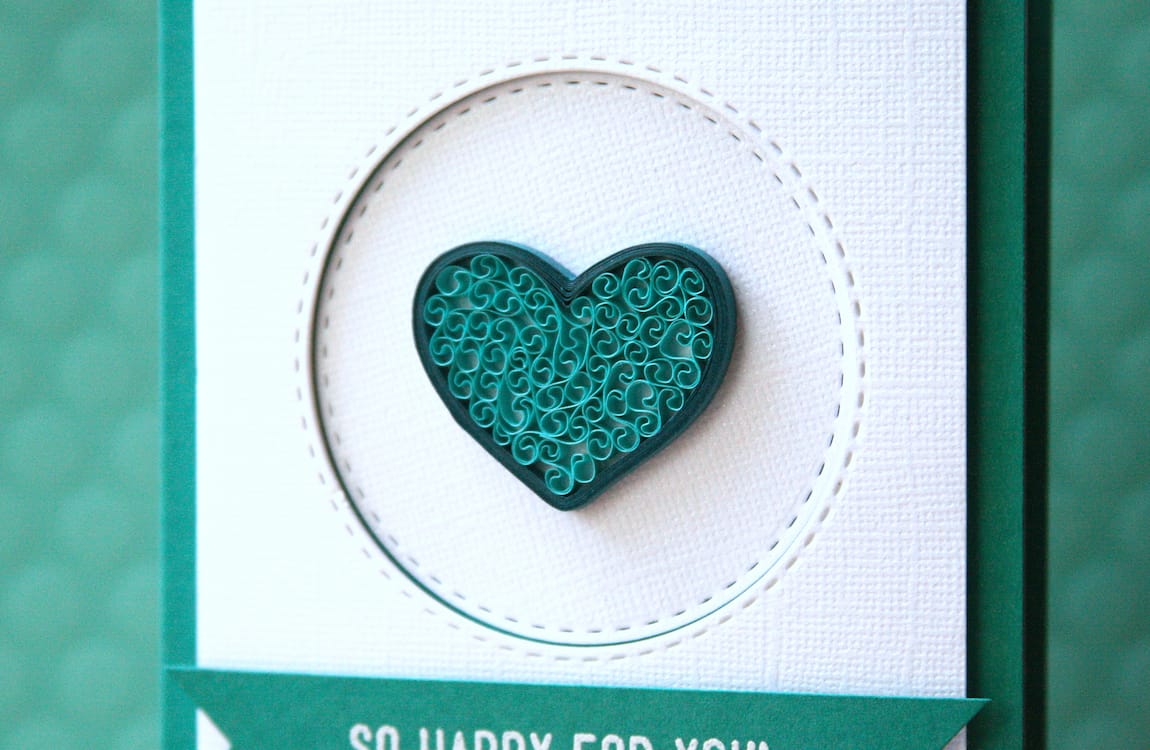
You can use the same type of method to fill in all sorts of spaces in your quilled projects. It can be squished into tight places or left loose for larger areas.
I have a little video on my Instagram that shows how to do beehive quilling. Click here to check it out.
Thanks for reading today! I hope you enjoy beehive quilling!