Make a Pretty Snack Bar for Delivery People During the Holidays
I make a snack bar for delivery people every year for the UPS, FedEx, and USPS people that bring stuff to our house. Right after the fam jam, they are my favorite people. These guys and gals bring me craft supplies all year long!
So, I decidedly jumped on the trend a few years back to make a DIY wood sign (like those lovely welcome signs people make) and leave some goodies at the door for them for a change! 🙂
I used to download the free printables onto a sheet of paper and just post those outside over the snack bar. The problem was that it would get wet or warp in the sun (I tried lamination, that was a no-go).
This year, however, I picked up a DIY sign blank at Michaels and made a decoration that I can use for years to come.
You’ll need:
- An electronic die-cut machine
- A sign blank
- Oracal 651 Glossy Permanent Vinyl
- Transfer tape
- A pretty holiday floral pick, pinecones, or an artificial flower
- A glue gun
*I’d like to send thanks to the first person to come up with the delivery driver snack bar idea (if you’re reading this, thank you!!).*
Create The Wording
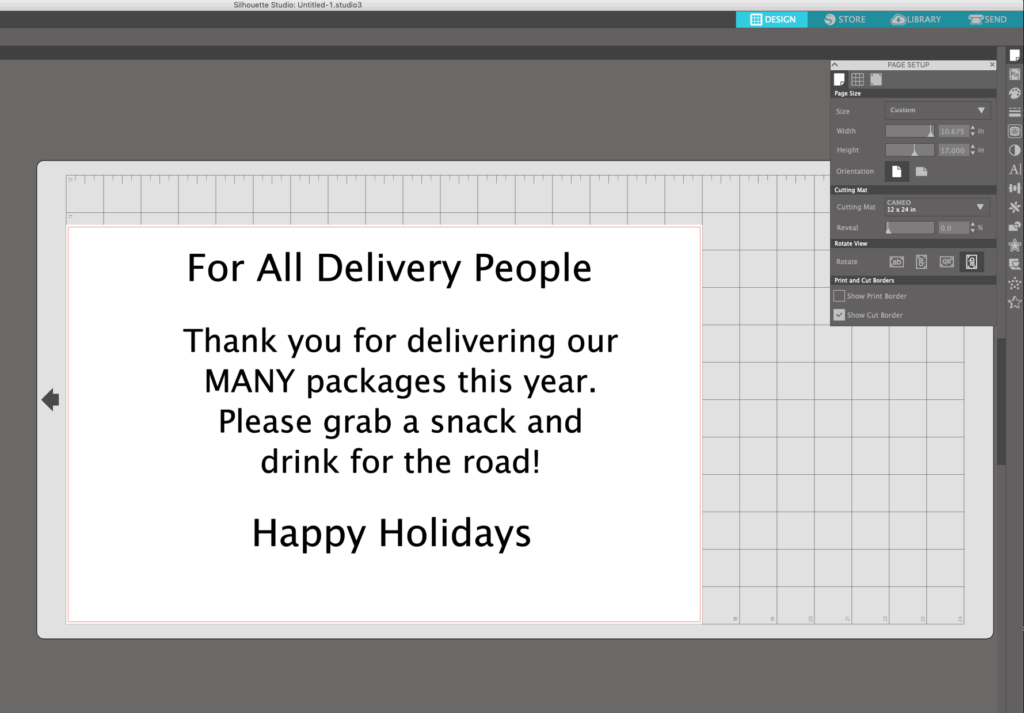
For the lettering, I just searched other snack bar signs on the web and used the most common wording. There are a ton of different sign ideas for this type of project if you ask the Google machine.
I designed the lettering in Silhouette Studio and used my CAMEO to cut. You can also type out the wording and use your Cricut to make this wood pallet sign, just make sure the overall measurements are correct.
The first thing I did was flip my layout to Landscape with a 12” x 24” mat background. I wasn’t planning on using a mat to cut (CAMEOs don’t need them), but I like the look to design on.
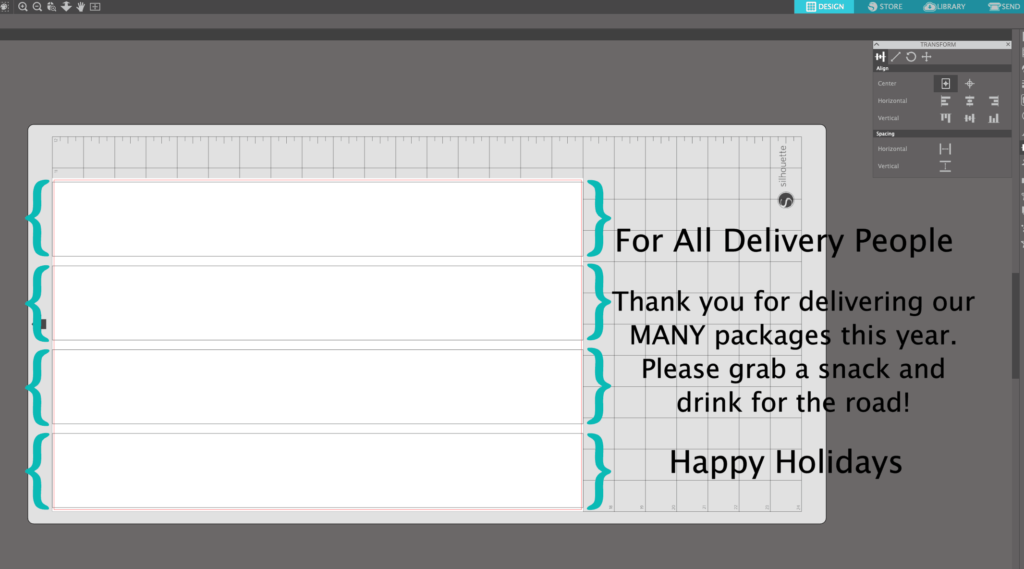
The wood pallet sign blank measured 10-5/8” x 17” and was made of four slats. I used an 18” ruler to measure each of the slats (and the gaps between them!) and drew them in Silhouette Studio.
That way I knew exactly where and how to space the words, so they landed perfectly on the wood when I transferred them.
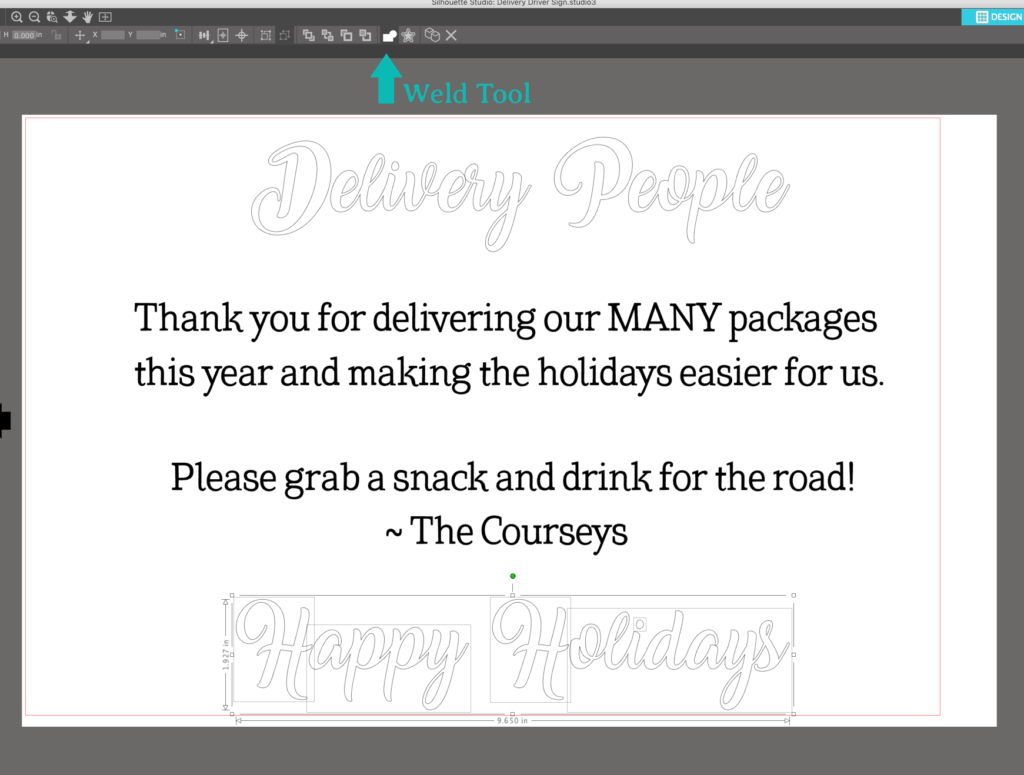
The fonts I used are called Amarillo (free) and Coats (available at The Hungry JPEG). Once I had everything typed that I wanted to transfer to the sign, I used the Alignment Tool to center and space it.
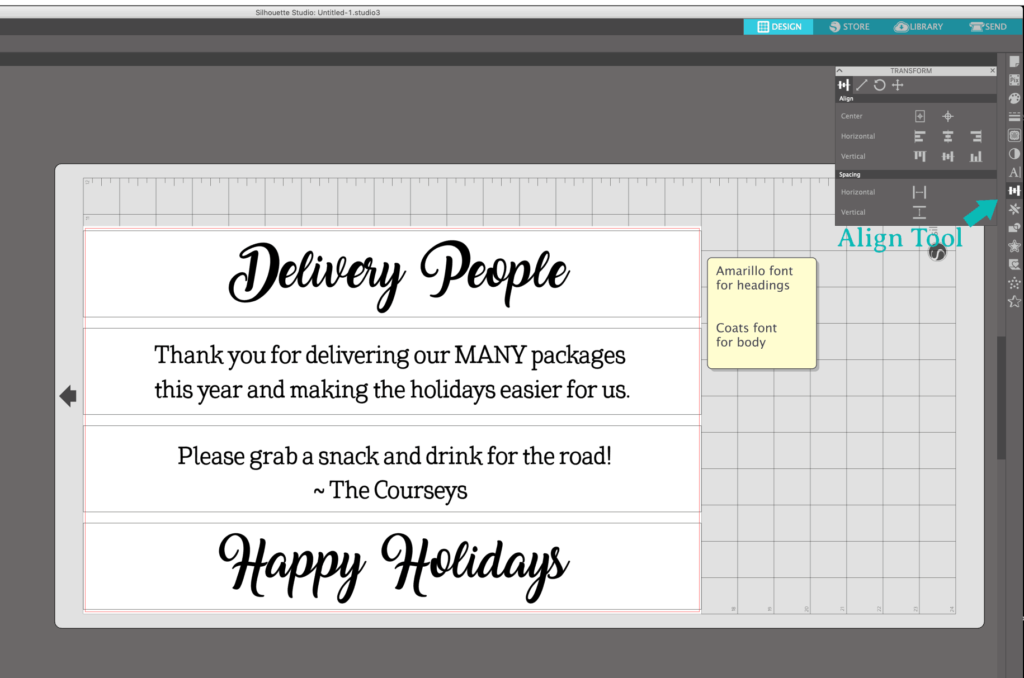
As a last check before I cut the design, I cleared all the fill colors so I could see all the cut lines – and I’m SO glad I did! The letters in the Amarillo font were almost going to be cut separately. Yikes!
To fix that, I highlighted the words and hit the Weld Tool. That “sticks” all the letters together into one smooth cut.
Recommended Cut Settings for Silhouette CAMEO
Get a copy of this file to use with your favorite cutting machine: Delivery Driver Sign SVG. When the new window opens, right click the image and choose “Save As” to save it to your computer. Import the file into your design software, and you’re good to go.
You can also ungroup the text and delete the family name section to put in your own!
The cut settings I used for the
- Blade – 2
- Speed – 5
- Force – 10
- Passes – 1
- No Overcut
Updated
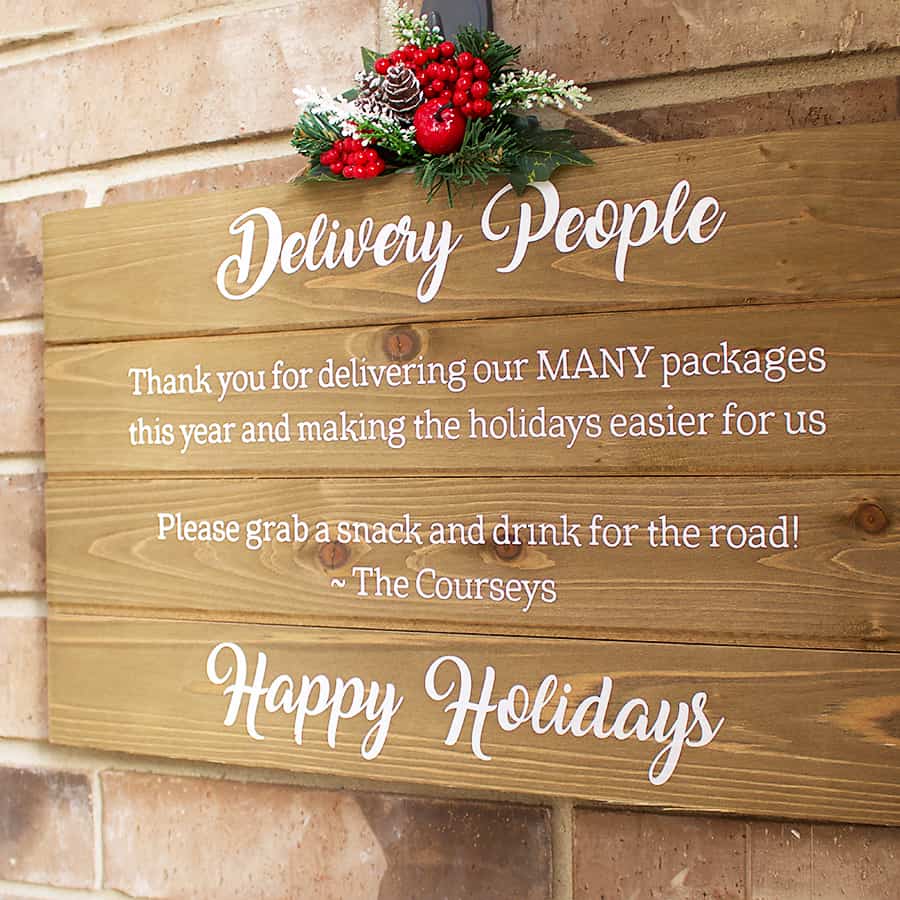
I remade the sign for the delivery driver snack bar this year! I changed the wording, updated the fonts, and removed the family name. Add a few holiday images if you like, and create a snack bar for delivery people!
Now, a word to the wise: ALWAYS do a test cut BEFORE the real design. It’s so frustrating to have to cut twice. Not to mention the risk of the blade hitching a half-cut design or wasting perfectly good vinyl.
The Hinge Method for Transfers
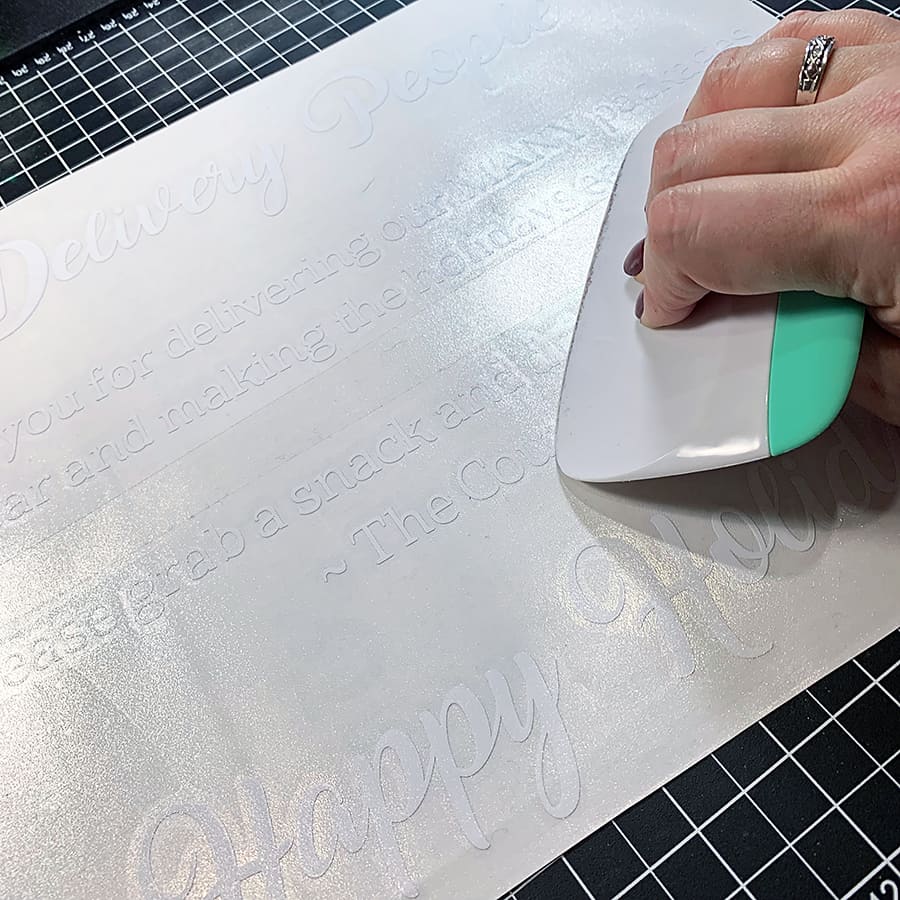
To transfer my design, I used my favorite Transparent Transfer Tape and the “hinge method.” What that means is you use a piece of tape to keep your design aligned as you apply it to your project.
This is how to do it: when you’re finished weeding your design, apply the transfer tape over it and burnish a bit so all your letters stick. Here, I used a Cricut scraper tool. I like the size 🙂
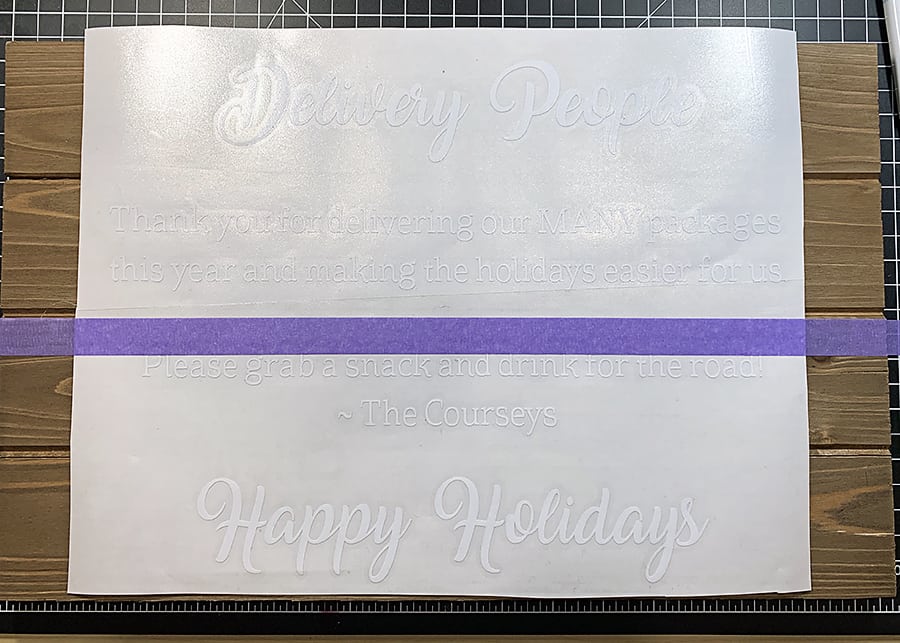
BUT – don’t peel them off the release paper yet. Lay your design in place on the sign and use a long piece of painter’s tape right across the center (or down the middle) to keep the design in place. Any type of tape will do, this neat low-tack purple stuff is what I had on hand.
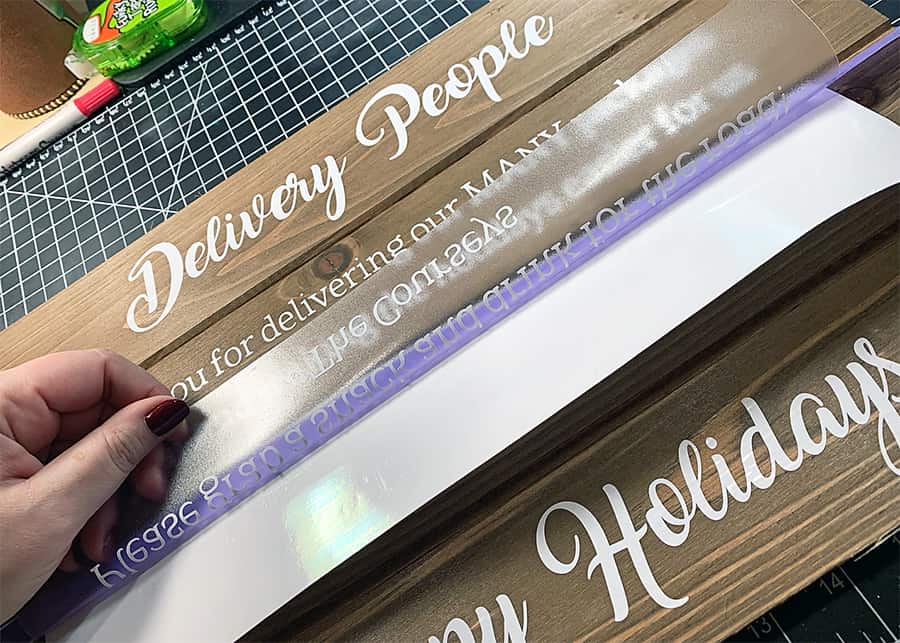
Now, fold over the top part to the tape line and peel the release paper from the transfer tape. Tear away any excess release paper and carefully lay back your vinyl letters into place. Burnish to remove any bubbles (I used the Cricut scraper again for this), then lift the bottom half of your design and repeat the same method to remove the release paper and finish transferring your vinyl.
Taa-daa! Perfectly straight!
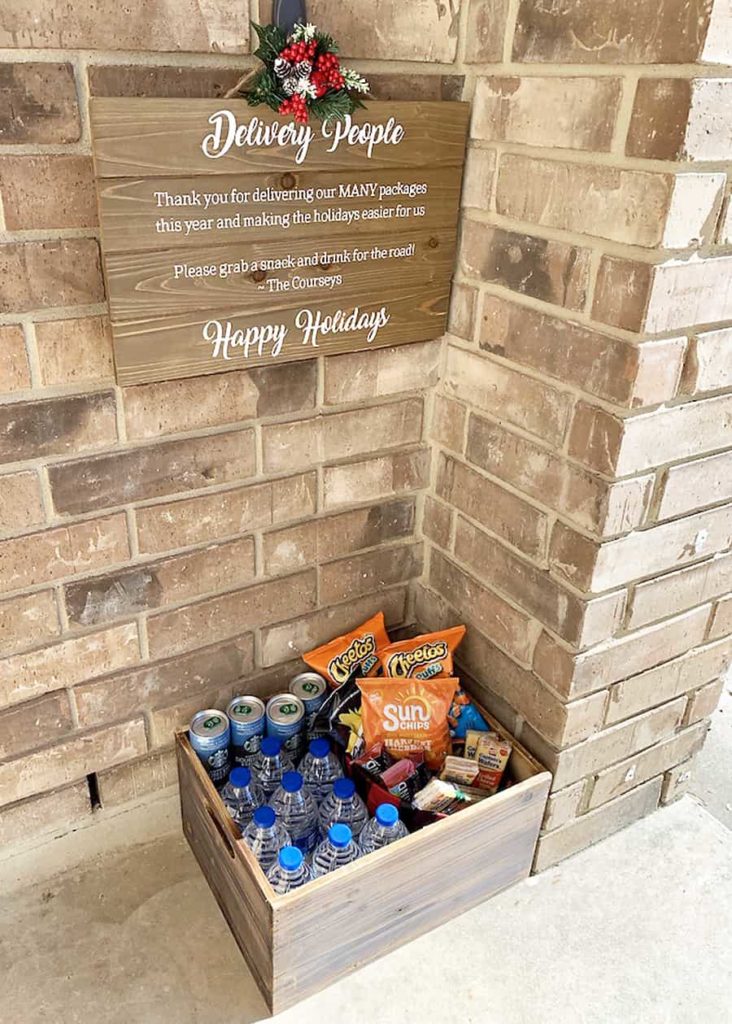
Finishing Up & Delivery Driver Snacks
To finish up this project, all I did was add a little holiday floral pick to the top with a glue gun.
Then I stuffed a wooden crate with a variety of chips, protein bars & shakes, snack bars, crackers, water, and some double shot espresso cans.
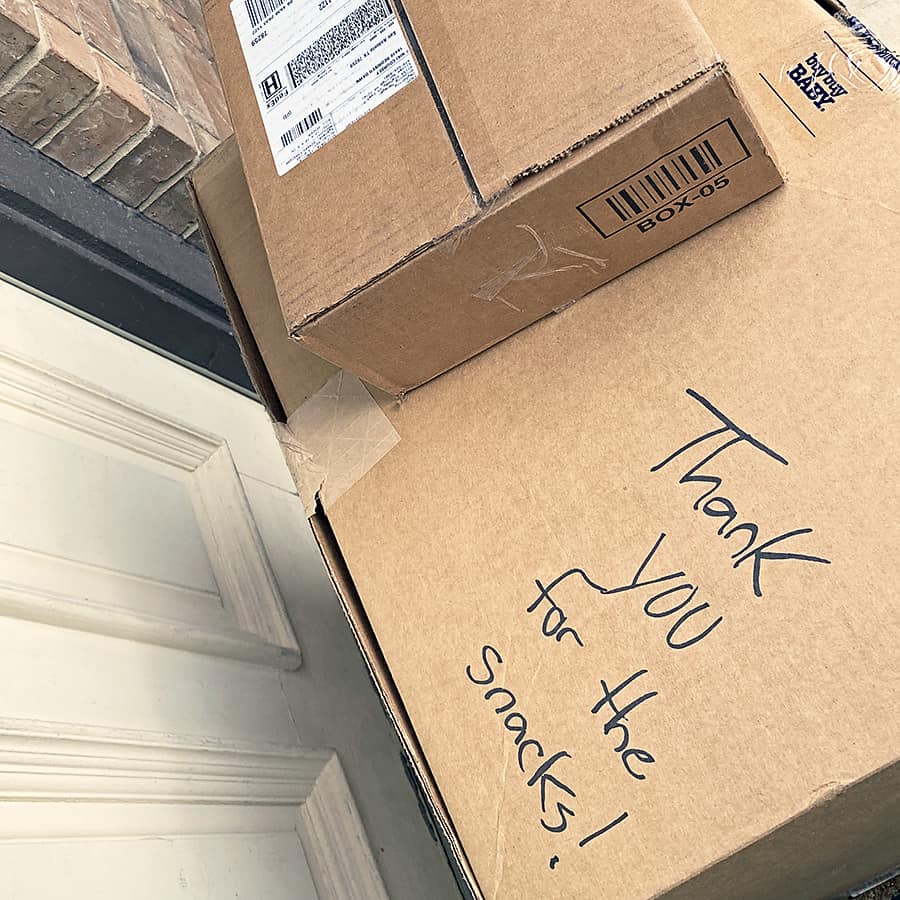
From the UPS guy 🙂
Thanks for coming to see my take on a pretty DIY sign to go with the snack bar for delivery people! Don’t forget to pin this to your inspiration board on Pinterest so you have quick access to make your own DIY porch sign!

My boys both work for UPS – this is awesome!
Thanks, Susie!